A free pattern, double gauze, and upcycled denim
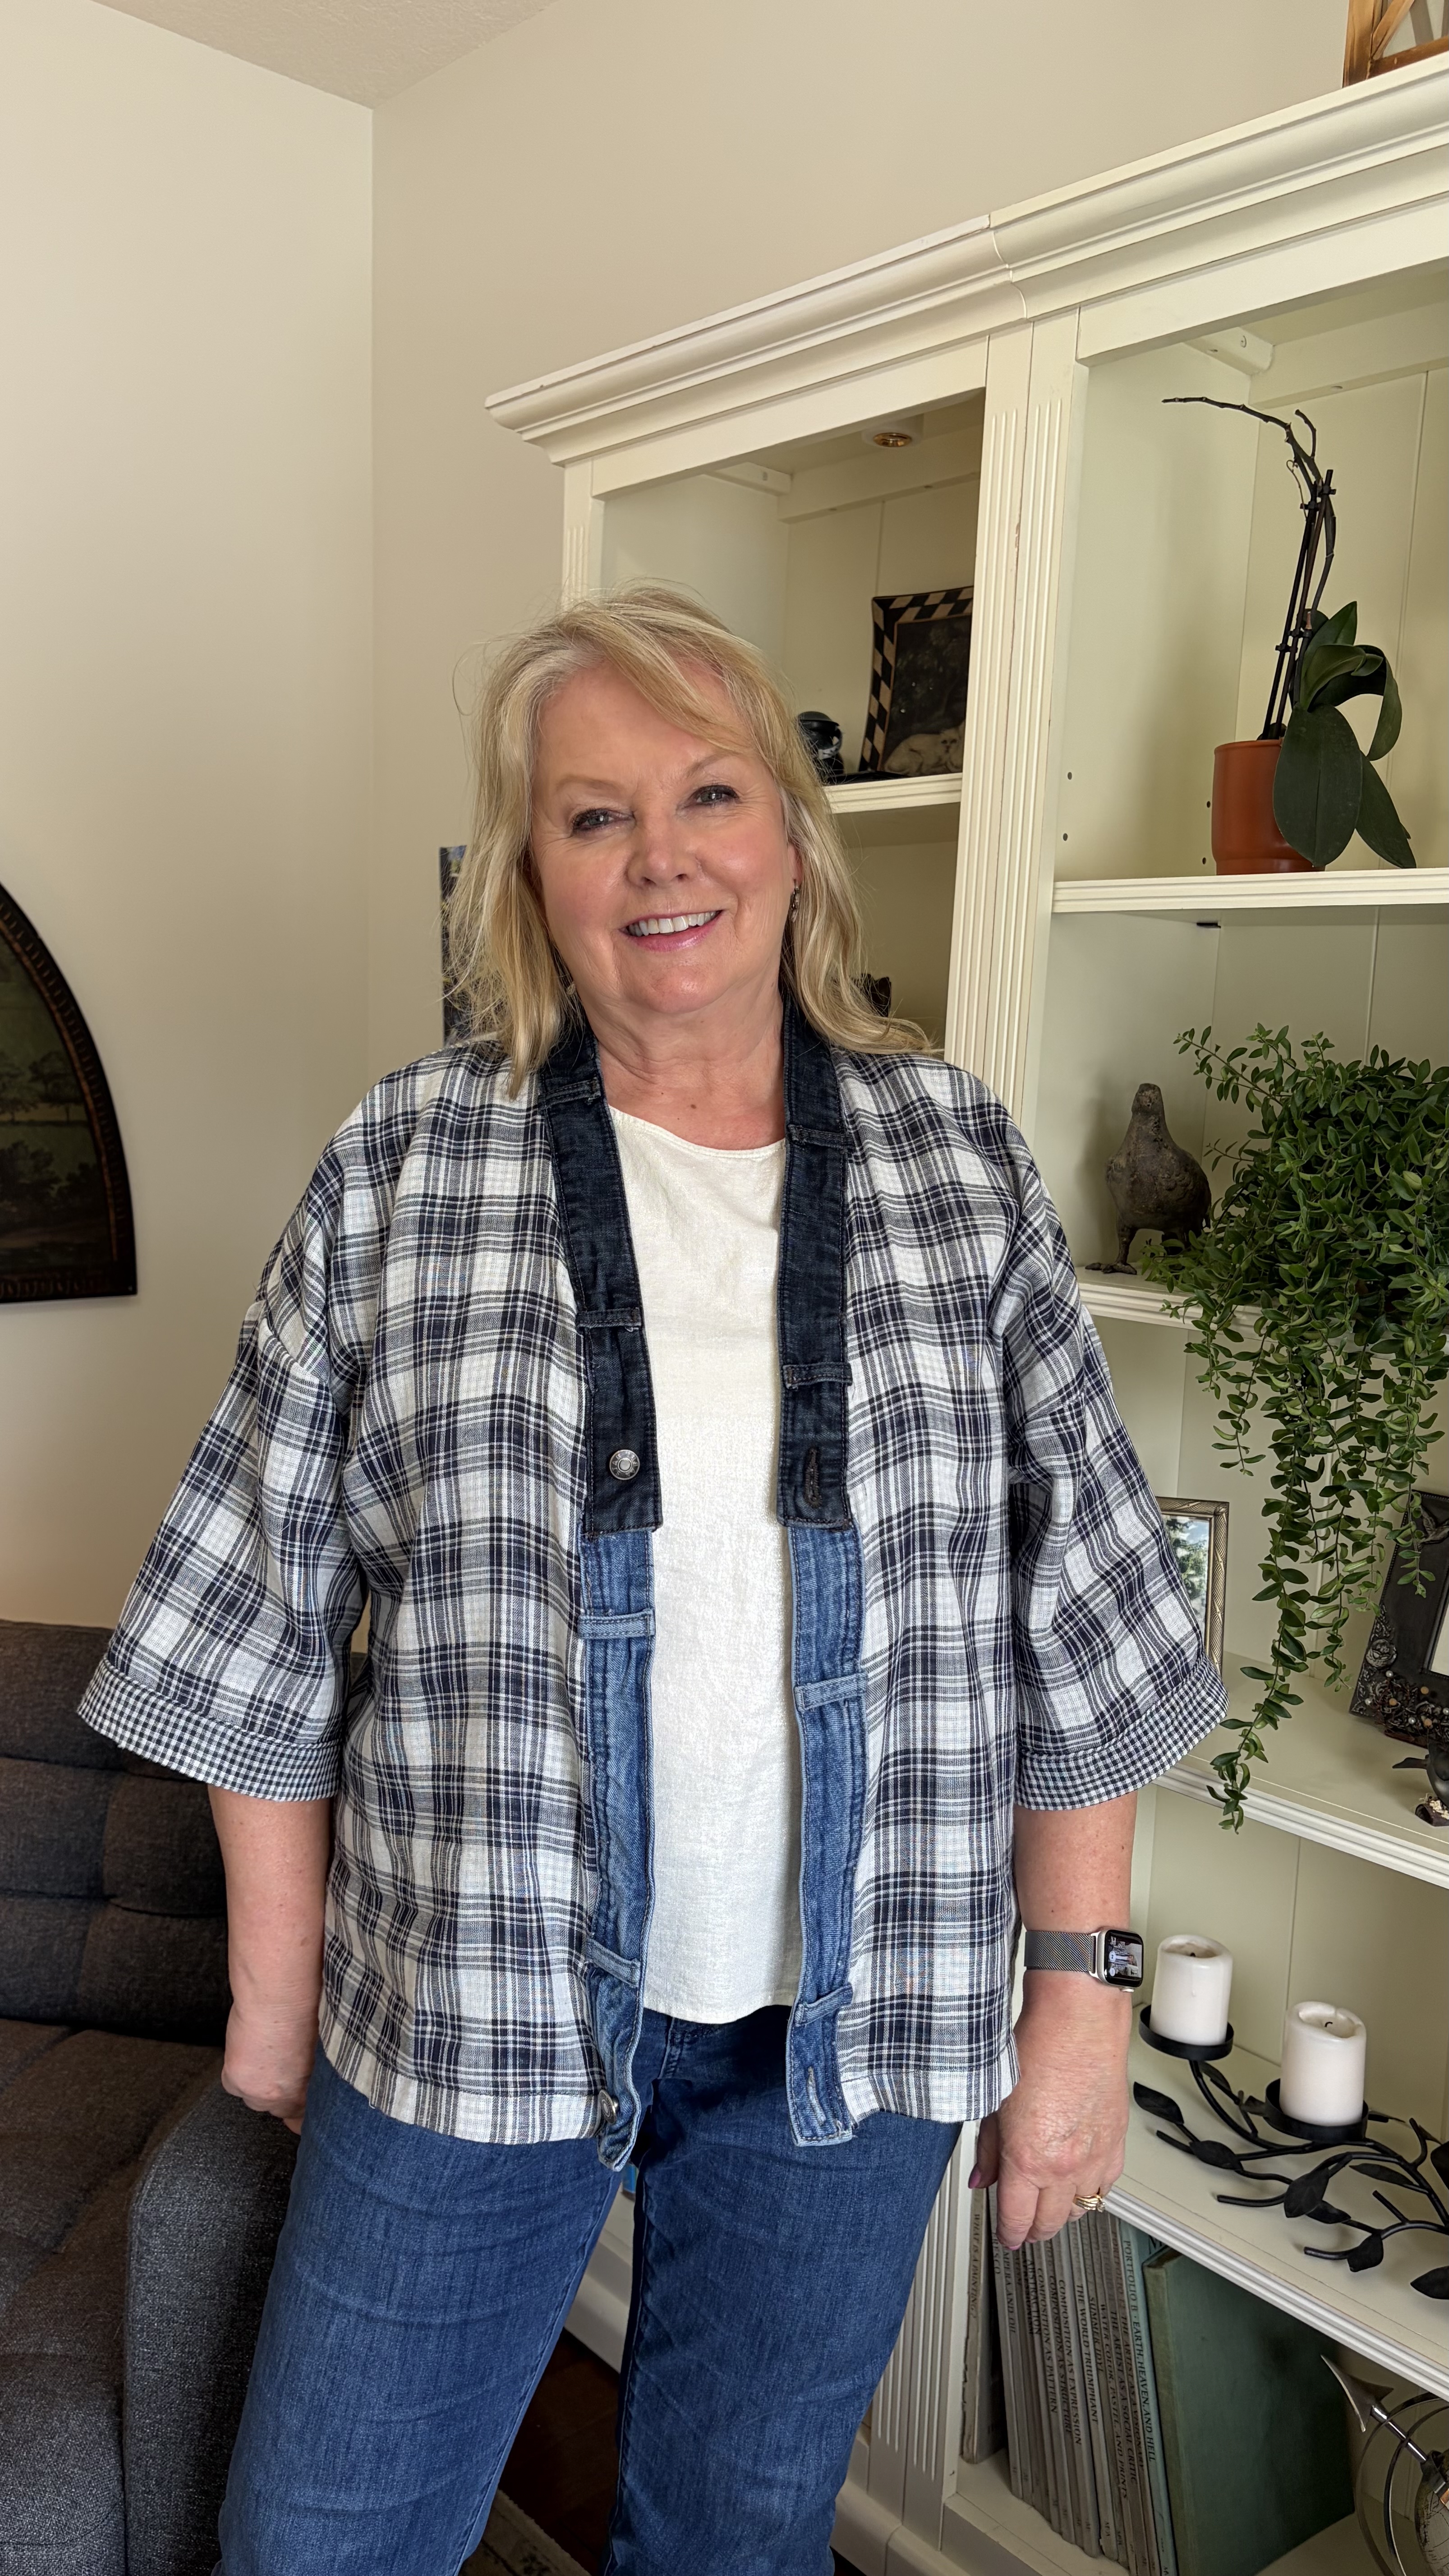
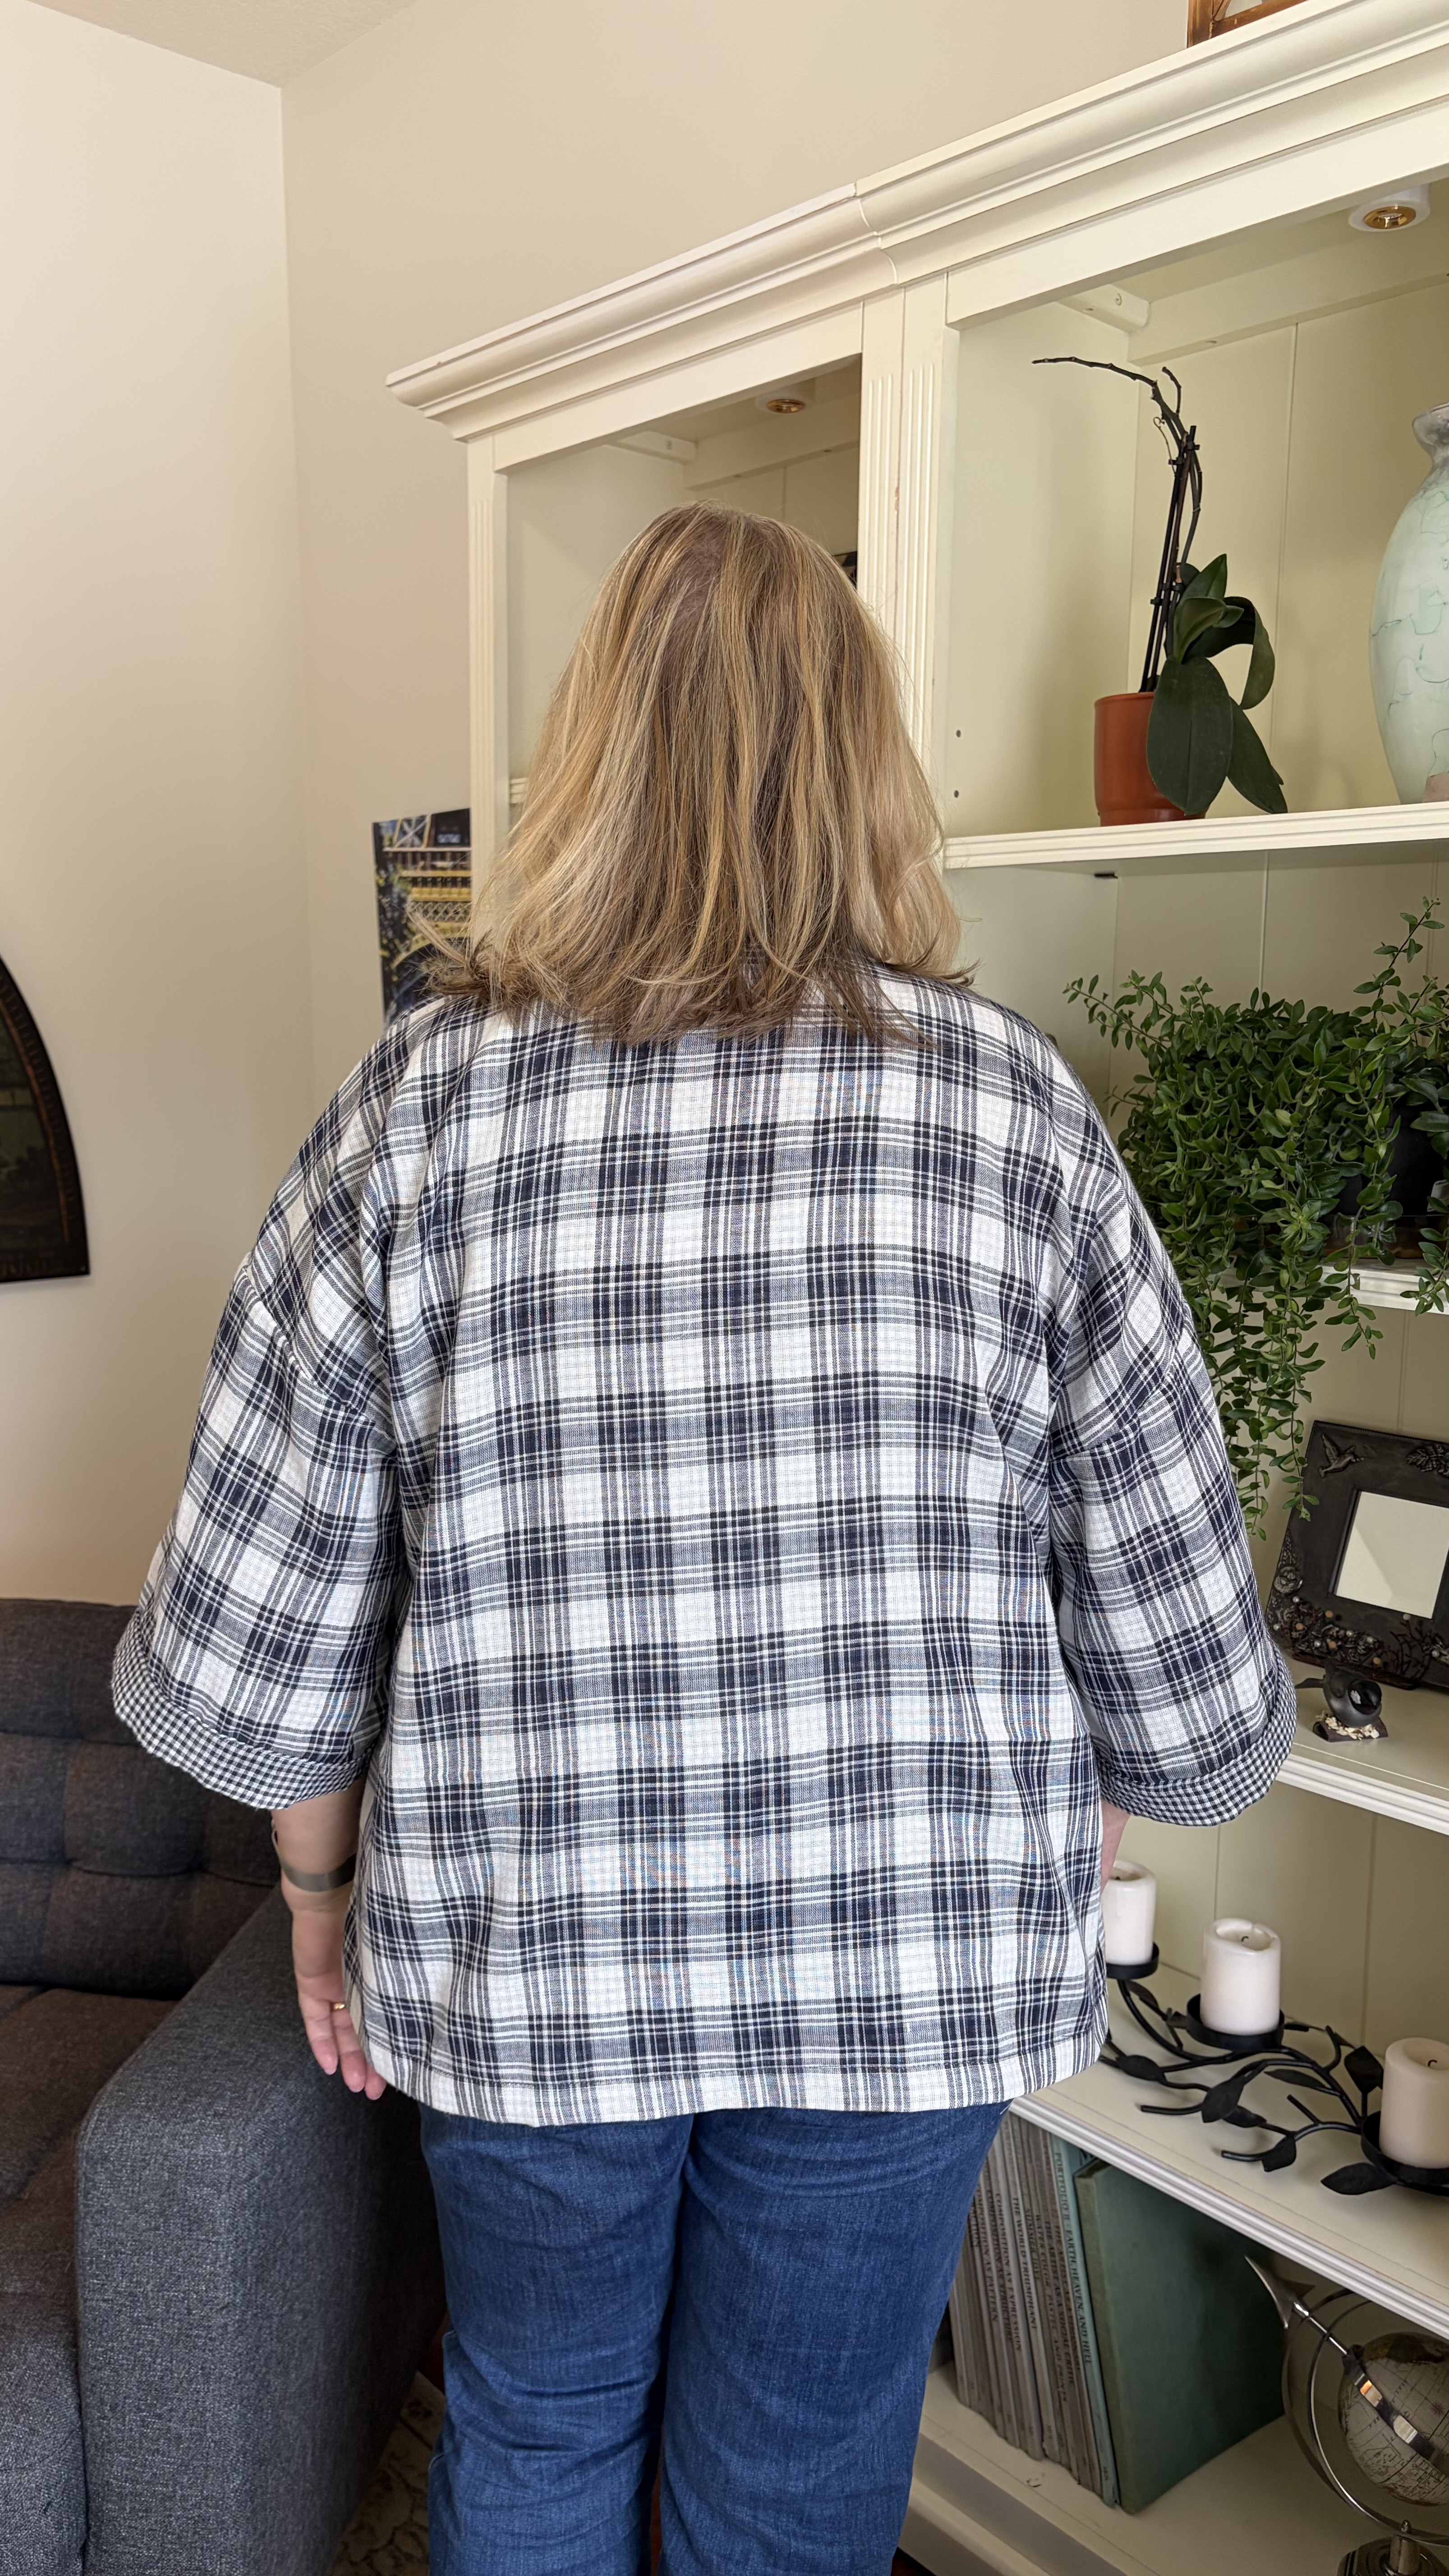
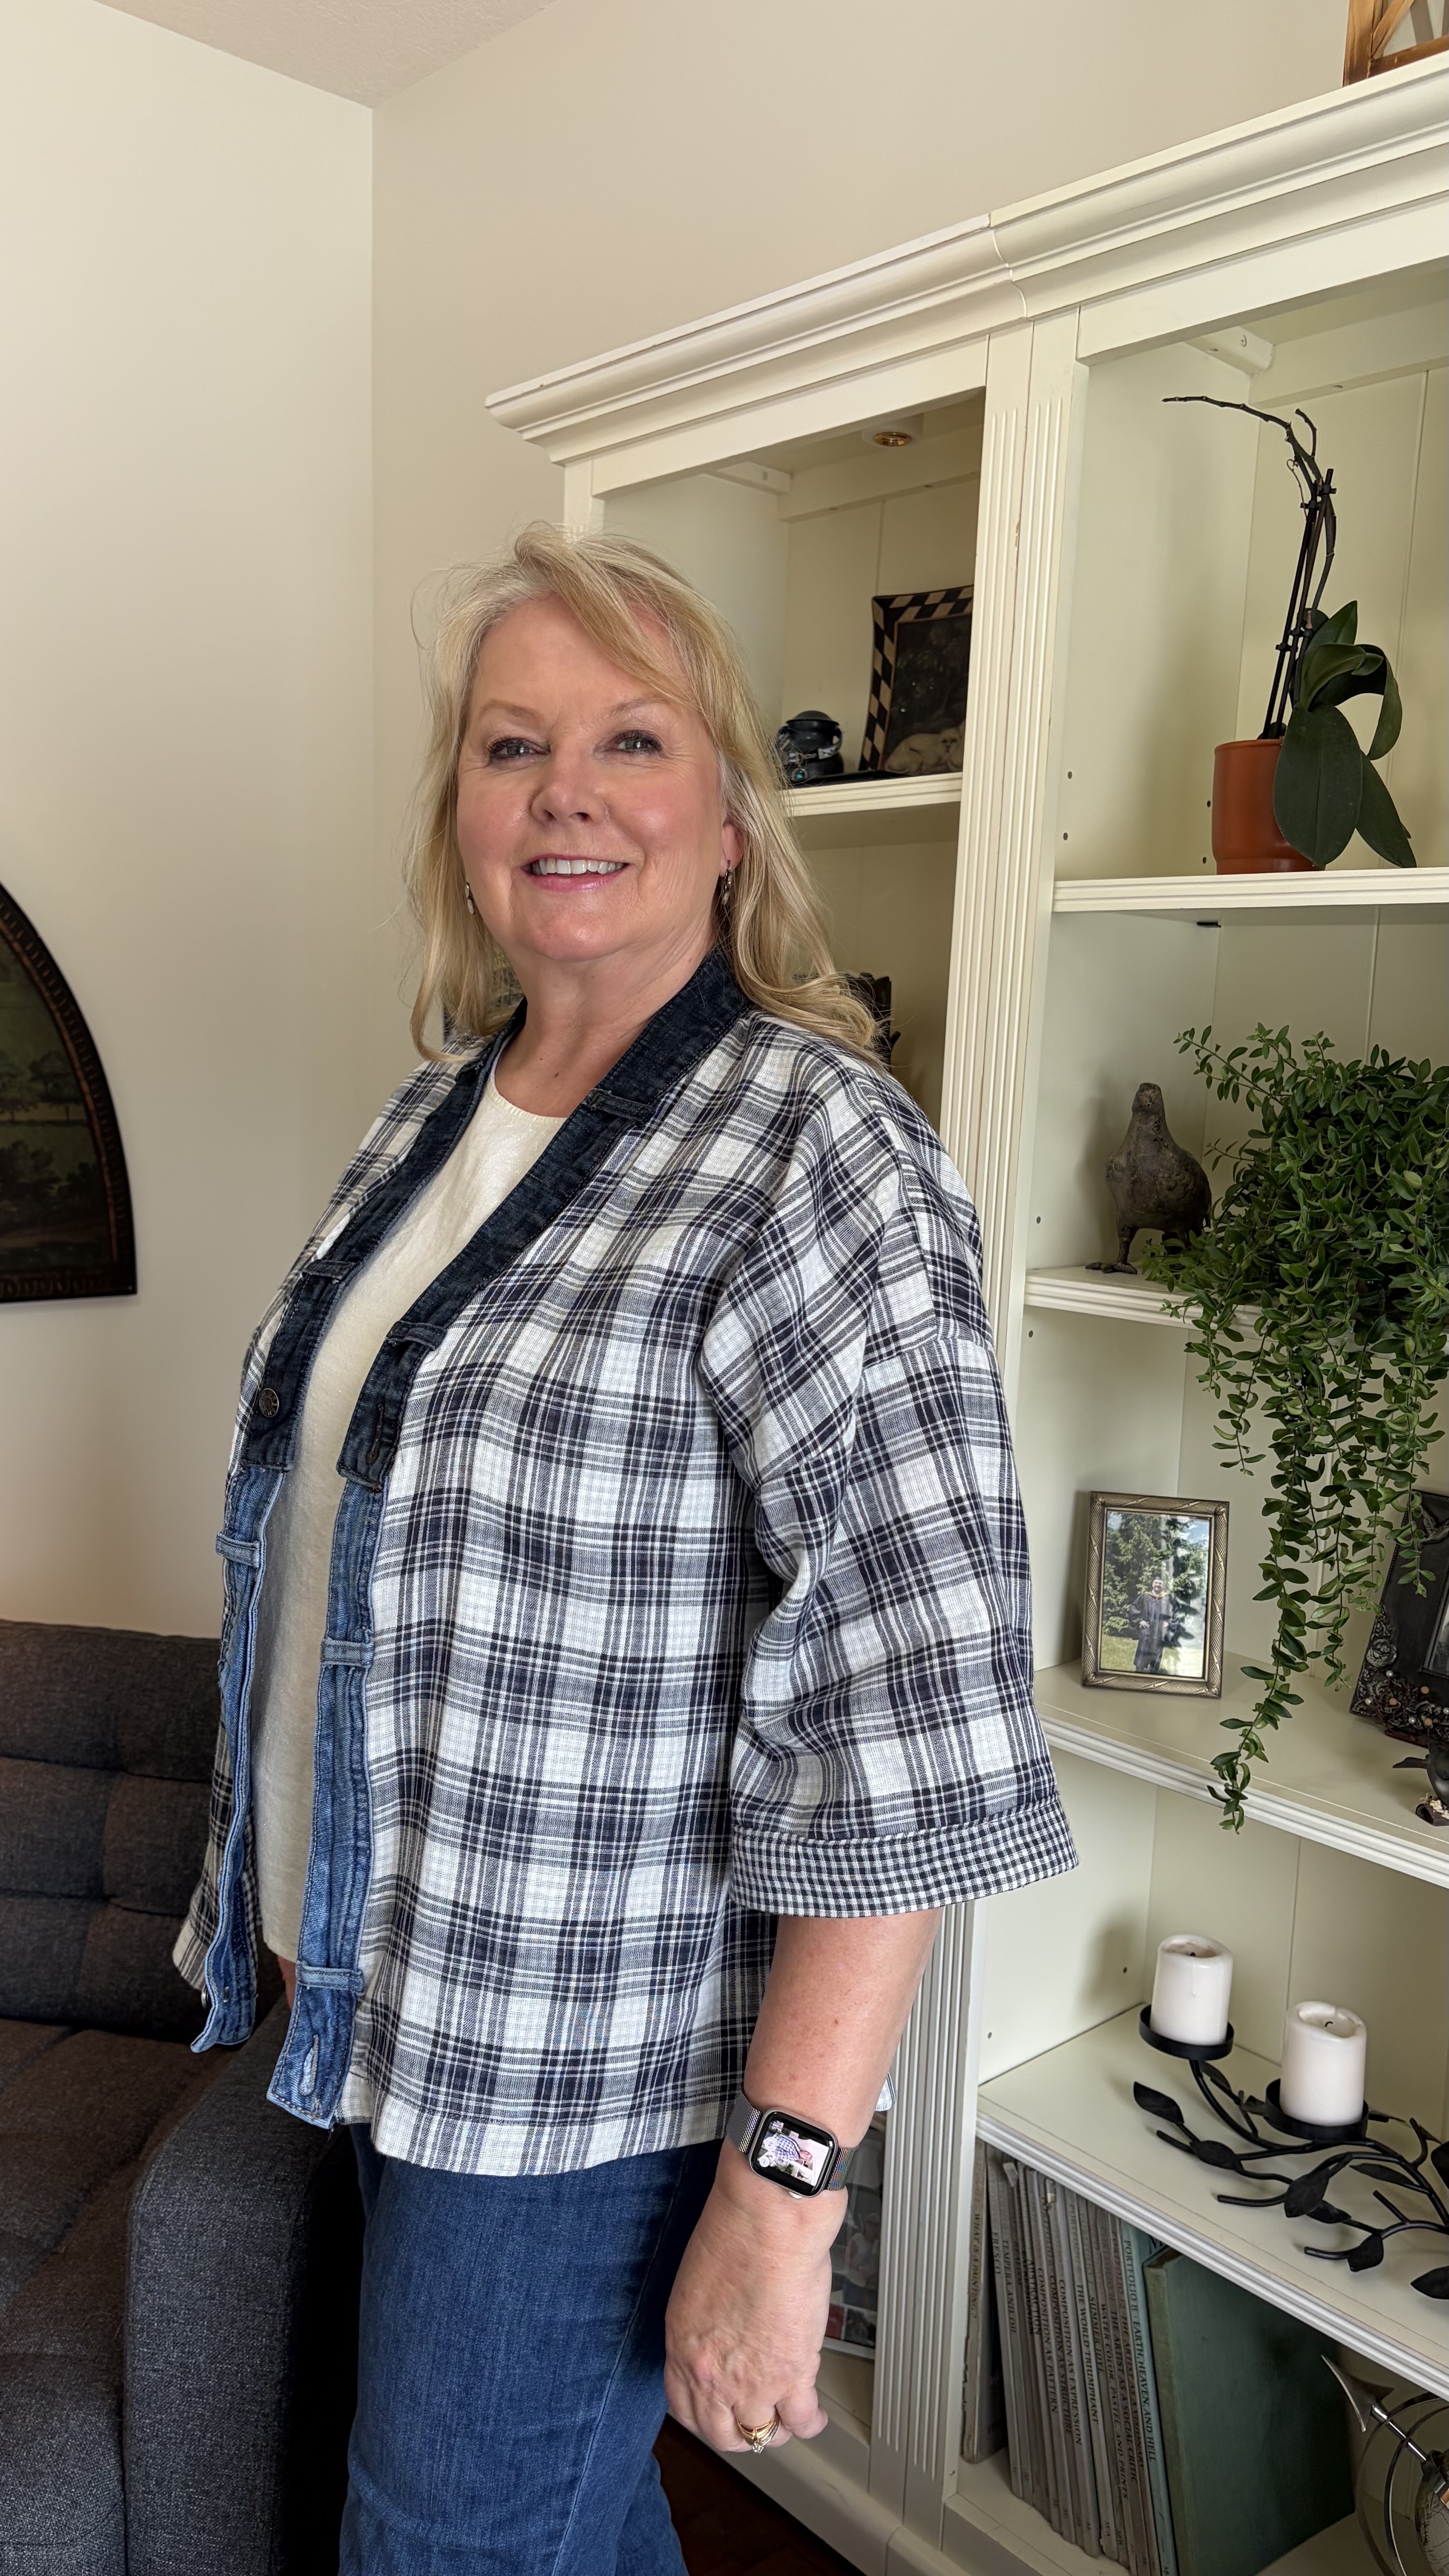
In this blog post I’m sharing with you a jacket I made for Sew Frugal 2026. It was a very rewarding make, and I’m pretty happy with how it turned out!
This month – May 2026 – is Sew Frugal month on Instagram and YouTube. This sewing challenge encourages us to sew something using fabric in our stash (or upcycled/reused fabric) and free patterns. Those who post their makes on Instagram on May 31 are entered into a drawing for prizes! I like this challenge because it pushes me to pull out fabric that has been languishing in my stash.
For the past couple of years I’ve joined Sew Frugal by making different garments and posting them on my YouTube channel. And yes, I did that this year (video linked here) but I wanted to really remember how I made this jacket, so decided to chronicle the make here on my blog, too. Maybe this will inspire you?
This year I made two garments for Sew Frugal, this. jacket and a tank top that I plan to review in a blog post soon. I’ve added both patterns to my Free Garment Sewing Patterns page (linked here). In this blog post, I’ll tell you about this open jacket which will be perfect for summer parties, concerts, and every day!
Inspired by Ready to Wear
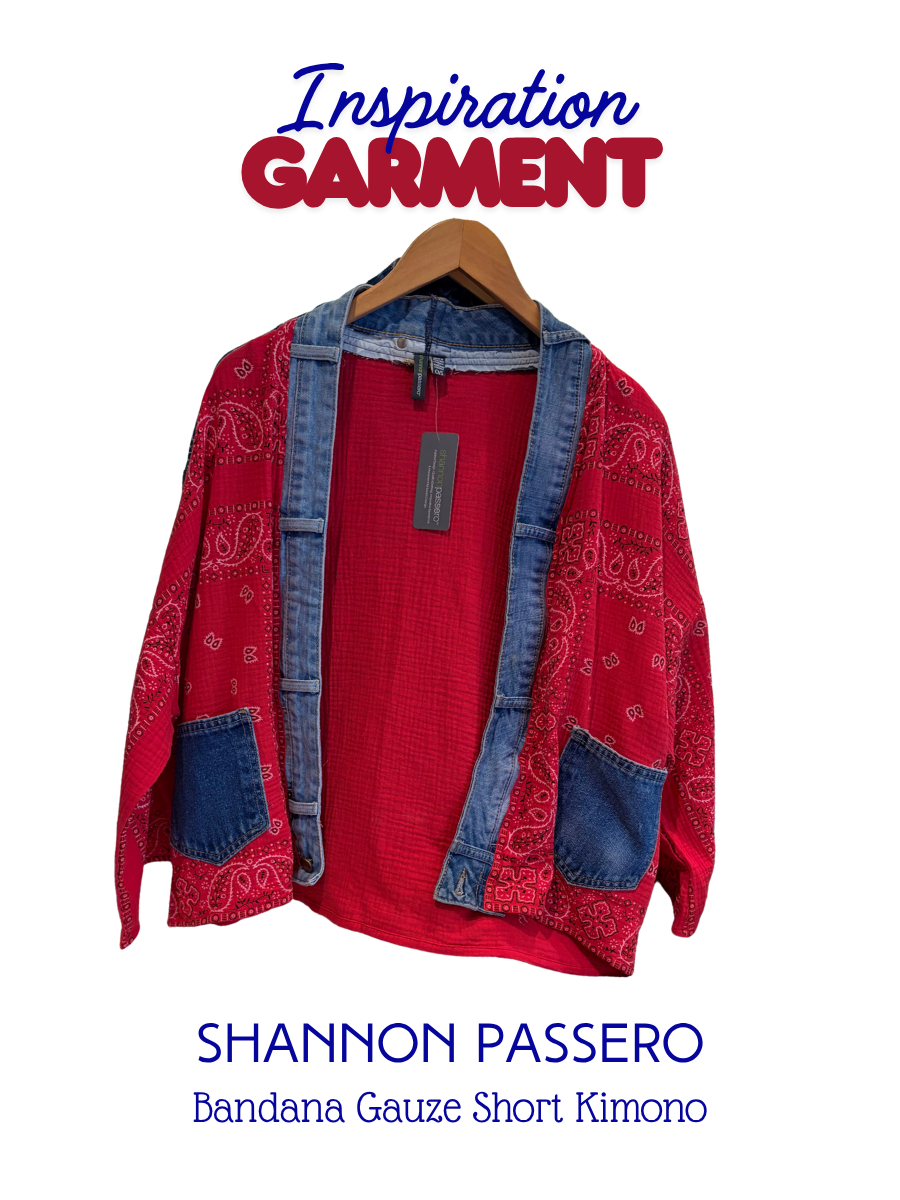
A few months ago I saw a hip-length open jacket made from double gauze that had been printed with a bandana design. Instead of a self or contrast coloured band around the front and neck, the designer used an upcycled jeans waistband. I took a picture and since then, I’ve seen the designers makes in several boutique clothing stores in Calgary. The urge to sew something that is actually on trend was so strong that I had to give it a go!
STASH FABRIC: My make used 100% cotton double gauze with a plaid print on one side and ginham on the other. (Originally purchased from Rick Rack Textiles for a summer dress. In stock at time of posting)
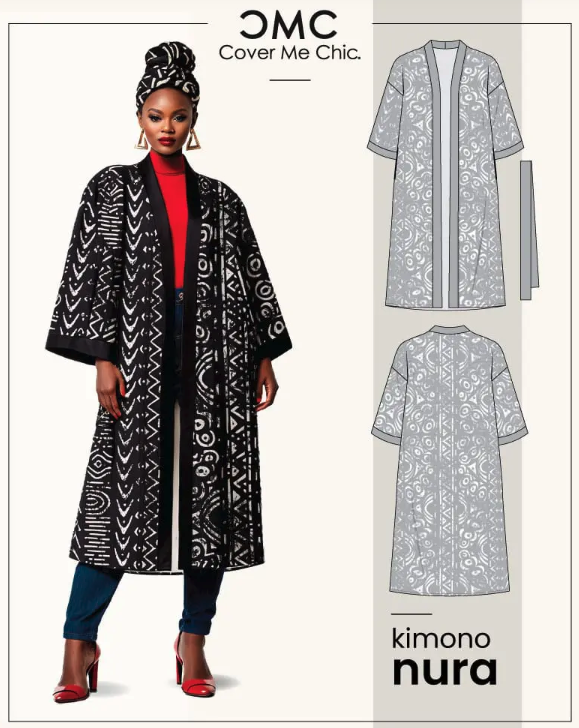
FREE PATTERN: The pattern I chose was from a new-to-me pattern designer, Cover Me Chic and it was the Nuru Kimono Pattern – linked here.
UPCYCLING: For the front band I used two adult size 34 denim waistbands, and had about 20 cm/8″ of the light coloured denim band left at the end.
NOTIONS: Thread, regular needle (80/12 in this case) plus a denim needle for stitching the waistband. Optional: denim topstitching thread if you wish to topstitch the band in a contrasting colour.
Prep Process:
I printed the pattern at home. As I didn’t want the full-length robe, I only printed the pages for the sleeves and upper half of the robe. I then measured the robe front and back pieces and decided on the length I wanted for my jacket, which was 7cm/3″ longer than the lengthen/shorten line. Because I was using denim waistbands for the front band, I did not print that piece.
Then I cut the fabric and did a not-so-great job of matching the plaid.
My denim came from two sources – a bag of denim scraps from a Calgary Sews project last year, and a pair of my husband’s jeans.
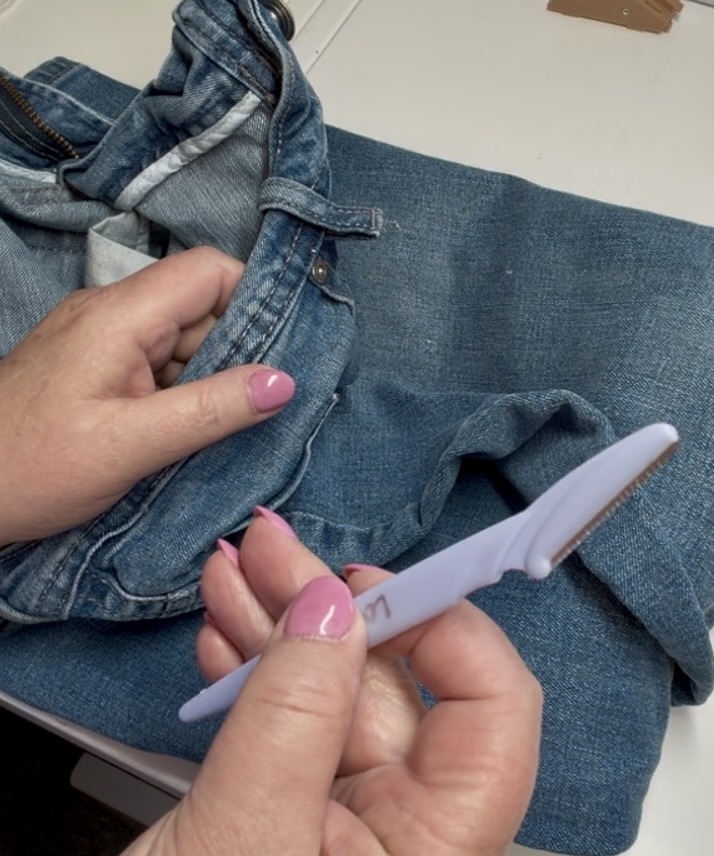
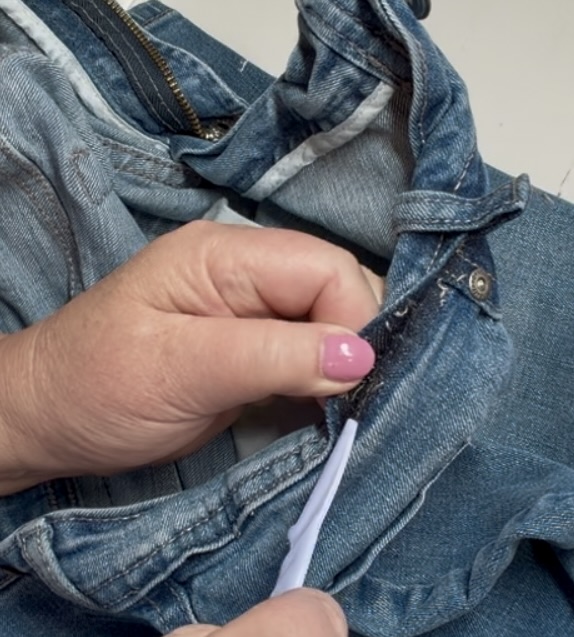
The denim waistbands needed to be unpicked and it was clear that only the lower set of topstitching needed to be unpicked. That’s the stitching that holds the waistband to the jeans. One pair had two lower rows of stitching, the other had one. It was really tedious to use a seam ripper as very single stitch had to be picked.
Then I remembered seeing a tip to use an eyebrow trimmer blade as a seam ripper, and I had bought a package of blades at the dollar store at some point. This was my opportunity to give it a try.
I simply started by unpicking a few stitches with a seam ripper then held th seam open with one hand and sort of sawed the blade across the stitches. It cut the stiches quickly and easily without damaging the denim.
While this was a much faster way to unpick the seams, the downside was that the thread was completely cut so all of those little teeny stitches needed to be cleaned up. With a bit of masking tape and sewing YouTube videos on the TV, it wasn’t a bad task.
This blade worked extremely well on denim. I don’t know if I would use this tool on fine or lightweight fabric but for denim it was a big time saver.
Sewing the Jacket:
Following the sewing instructions that came with the pattern, I started out by sewing the shoulder seams, the sides, and the sleeves. I used my serger to sew all seams.
Then it was time to add the denim waistbands to the neck opening. My waistbands were two very different shades of indigo – one dark, one much lighter. I placed the darker denim band around the back neck and down the front on both sides as this was the most pleasing to my eye.
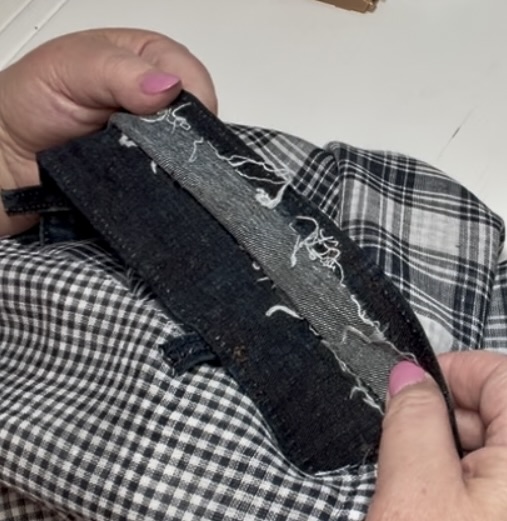
When the waistbands were unpicked from the jeans, the lower seam was opened up. It was quick to simply slide the waistband over the front/neck edge of the jacket.
I first started with the darker indigo waistband and centred it over the top/back neck edge of the jacket. The label on the waistband was actually smack dab in the middle so that lined up nicely with the centre back of the jacket.
The gingham print on the inside of the jacket made it a bit easier to align the waistband along the edges.
On the inspiration jacket, the belt loops had been left on the waistband then tucked in and stitched for a tight fitting loop. I liked that look so did the same – folded the belt loops under the waistband so they were tight and flat.
I inserted a denim needle and sewed the waistband to the long edge of the neck of the neck. While I considered using that classic gold denim topstitching thread, I decided that it wasn’t necessary and it would definitely draw too much attention to any wobbles in my stitching.
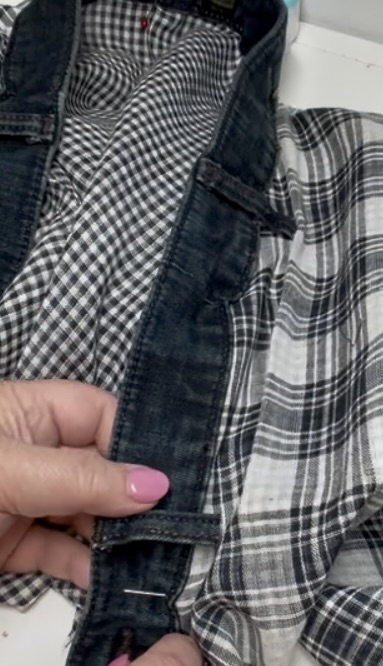
The next step was adding the second waistband and finish off the front edges.
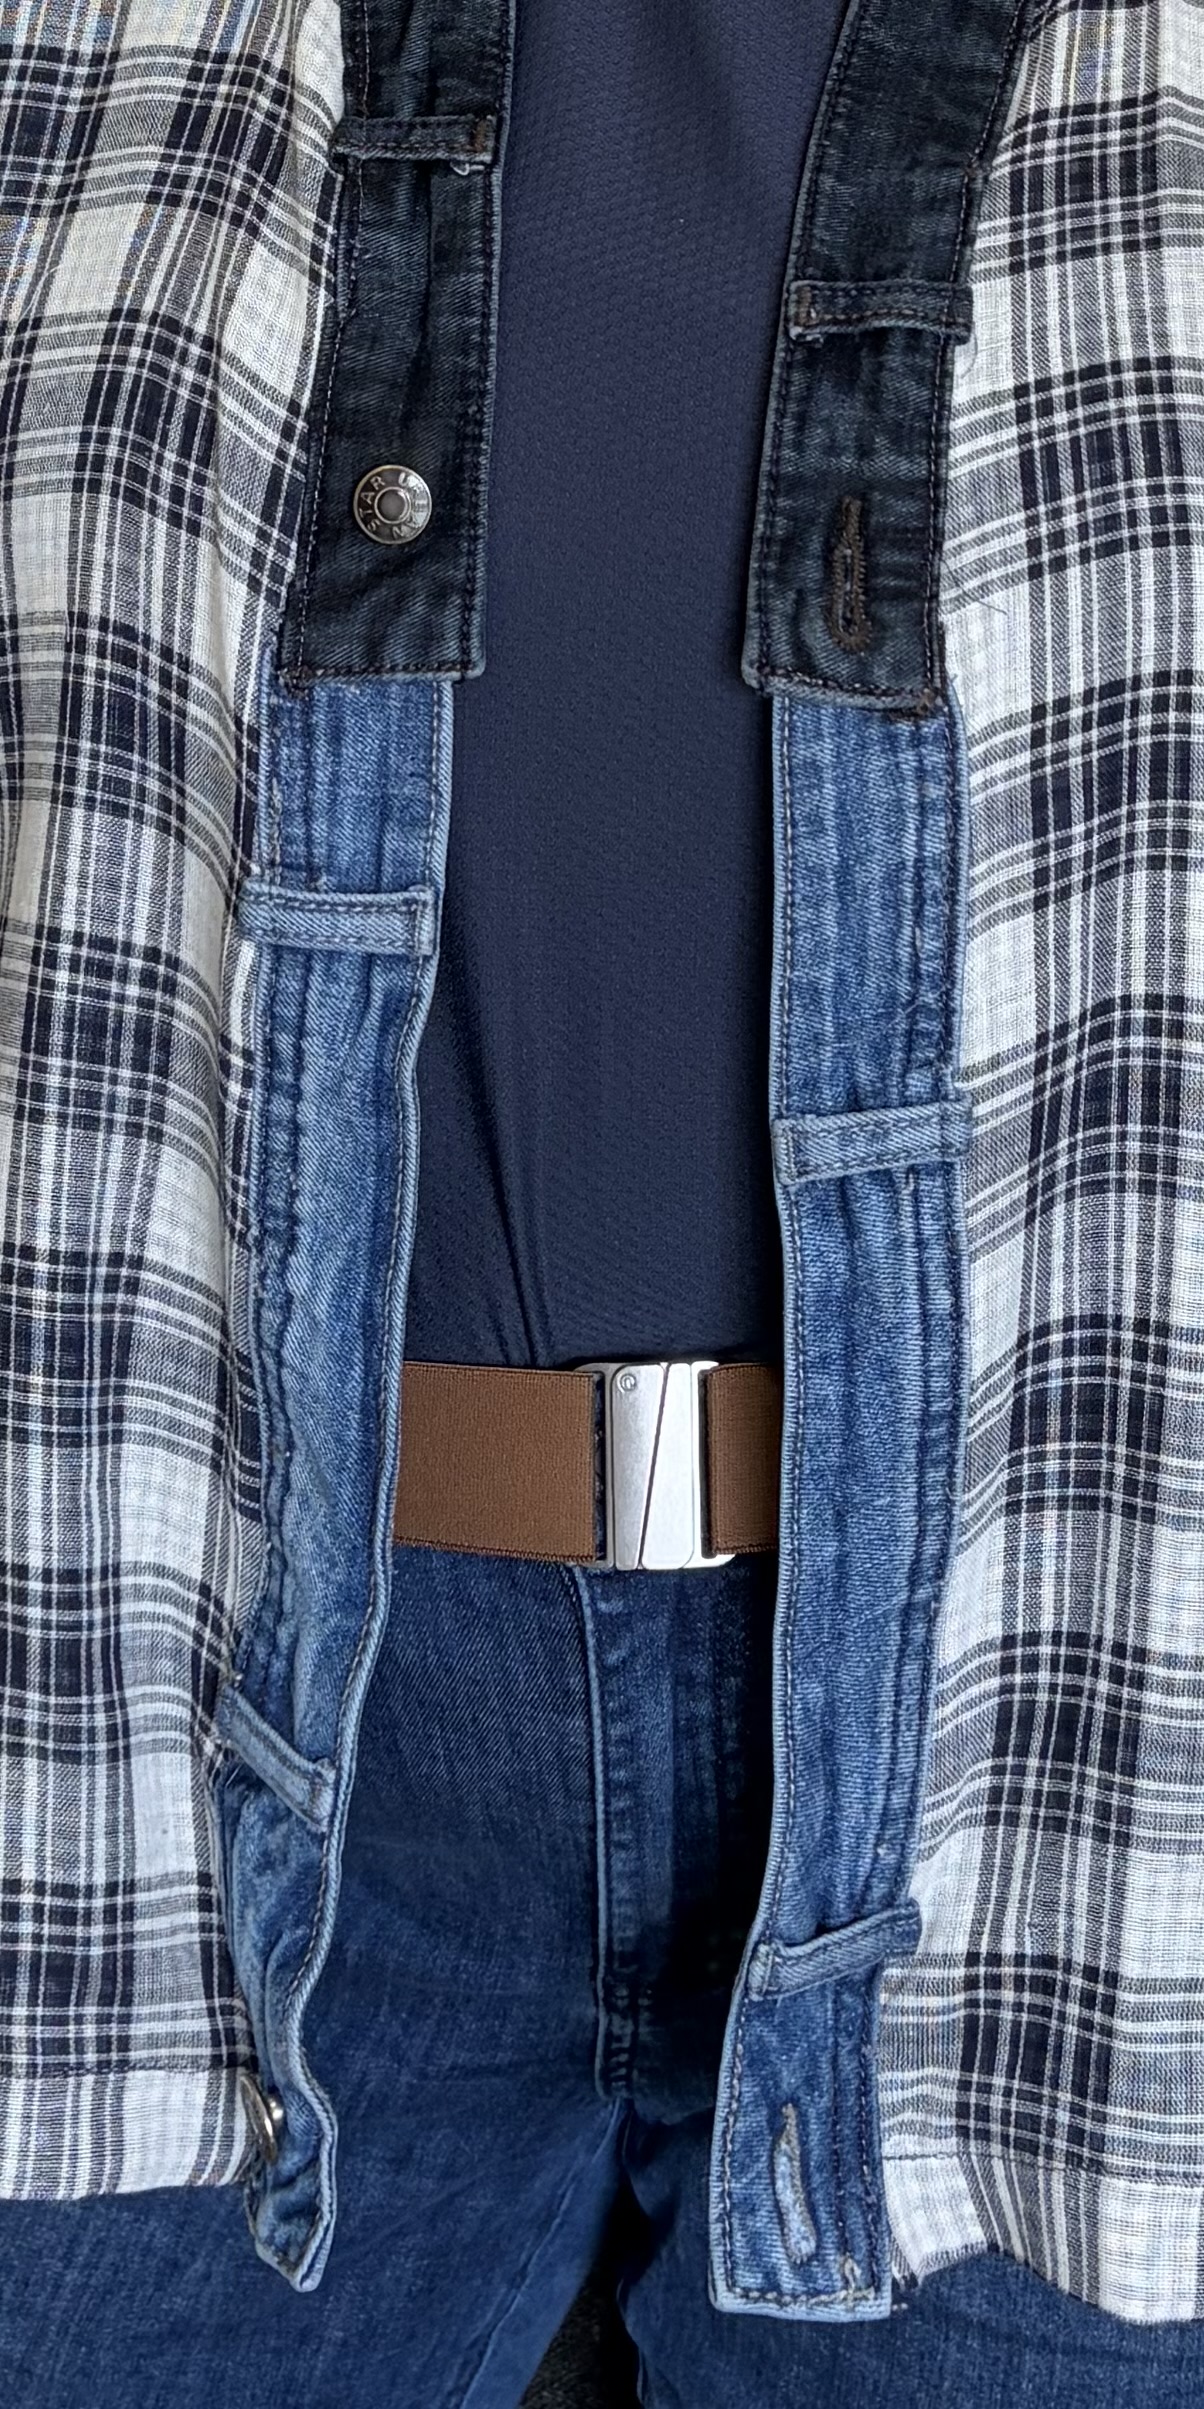
I wanted the button and buttonhole ends of the waistband to be at the bottom of the jacket.
- Before adding the band, I finished the bottom hem, folding it up by 3cm or 1 1/4 inches and topstitching.
- Next, I took the button end of the waistband and sandwiched the jacket fabric between the waistband layers before pinning it in place. This left a nicely finished end at the bottom of the jacket.
- Then I had to decide how to handle where the two waistbands met.
- The neck waistband — the darker indigo one — already had the button and buttonhole finishes in place. I didn’t want to unpick those ends, so I left them intact and tucked the lighter waistband underneath. I then topstitched everything together so there were no raw edges visible on either side.
It’s not particularly elegant, but it worked.
As you may have noticed in the picture above, the ends of the front band curl up a little. That’s the nature of a well-used denim waistband.
Only one more quick step to finish this project — the hems of the sleeves. To take advantage of the two sides of the fabric, I chose to fold the sleeve hems to the right side so the ginham looks a bit like a cuff. At this point I sort of kicked myself for not using French seams as the serged edge of the sleeve does show on the right side of the cuff. Oh well …
And with that, my jacket was finished! Total time spent was under six hours – fast for me. I’m so pleased with how it turned out. The double gauze fabric is a beautiful weight — light enough for summer, but with enough structure to feel like a jacket and not a shirt. I can already tell this will become a wardrobe staple for patio evenings, outdoor concerts, and absolutely the Calgary Stampede.
As for the Cover Me Chic pattern — I’m impressed. The instructions were clear, the drafting was excellent, and everything came together smoothly. I absolutely want to support indie designers who offer free sewing patterns and am planning to buy at least one other pattern. I have my eyes on the Iman and Amira tops.
Do you have a frugal sewing project on your list for this year?


Nice work! So cute.
LikeLike
Thanks! It was a really fun make.
LikeLike