Indie Patterns · Sewing

Jacket Express with Recycled Denim

A couple of years ago I bought the Craftsy class on industry sewing secrets (“Sew Better Sew Faster“) taught by Janet Pray. The class came with the Jacket Express pattern from Islander Sewing Systems. I didn’t watch the class and just filed the pattern away.

My Bespoke PJs got me into Round 2 of the Pattern Review Sewing Bee. This week the challenge was to make an adult garment using ONLY recycled denim. I needed a pattern for a garment that I would actually wear on a regular basis AND said pattern needed to be comprised of many small piece. Jacket Express met the bill on the latter, and I could make a few changes to the design.

I convinced my husband to give up a couple of pairs of jeans but everything else came from the local Goodwill where I managed to find a calf-length denim dress, a pair of ladies jeans in stretch black denim and a pair of men’s jeans in size 48. The denim below is what I started with. I didn’t use the garments that are marked with red X’s.
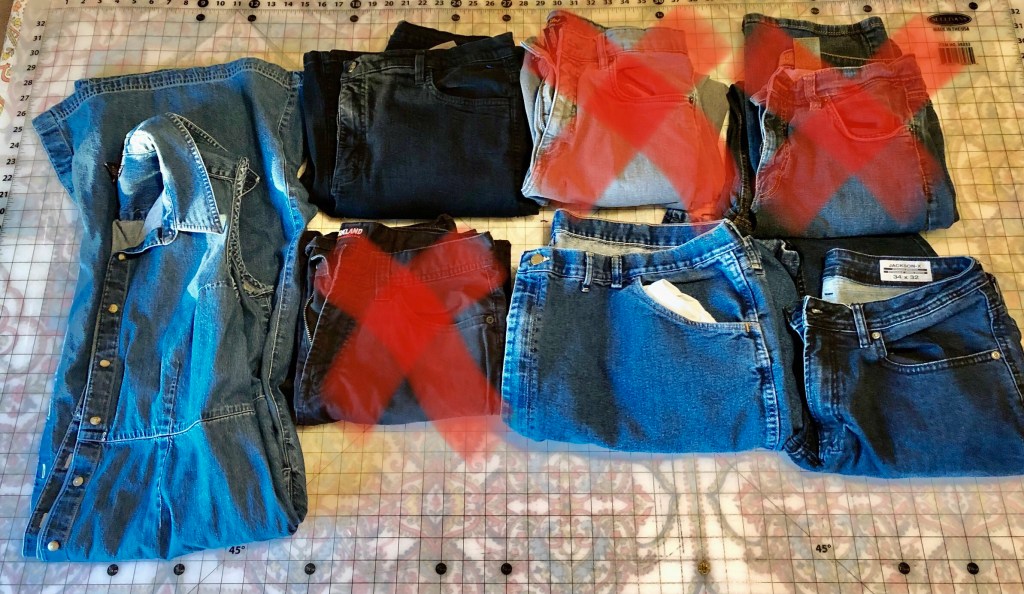
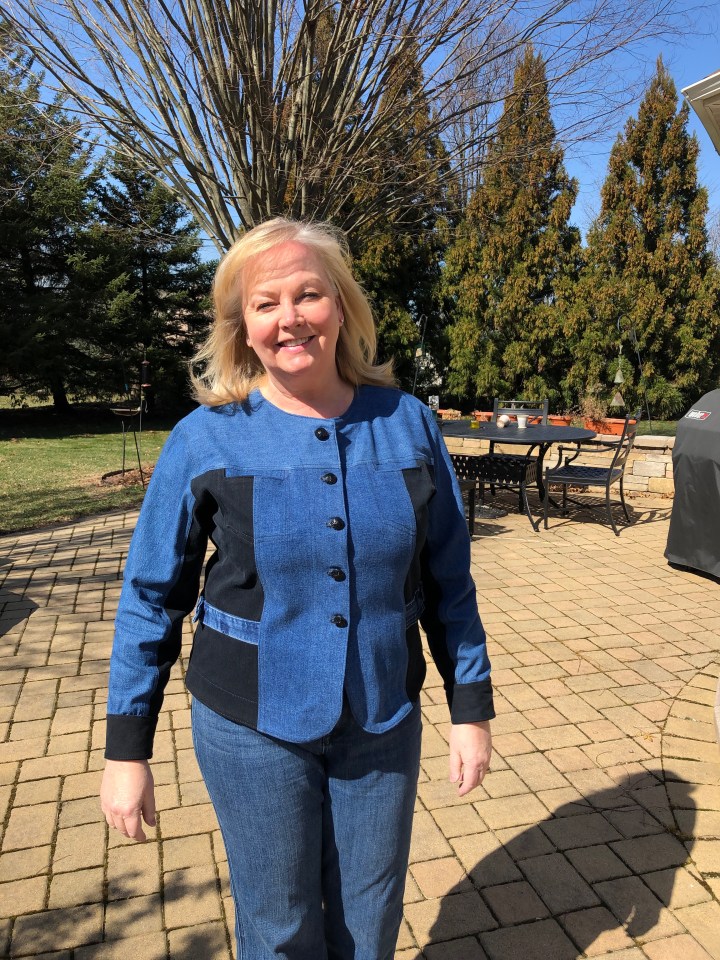
For about an eighth of a second I considered spending time picking out the leg seams but I had enough denim so why bother. Then I set about laying out the pattern pieces so the colours would look okay. The black jeans provided just enough for the front and back side panels, the inside panel of the sleeves and the cuffs. Black is slimming, right? 🤣
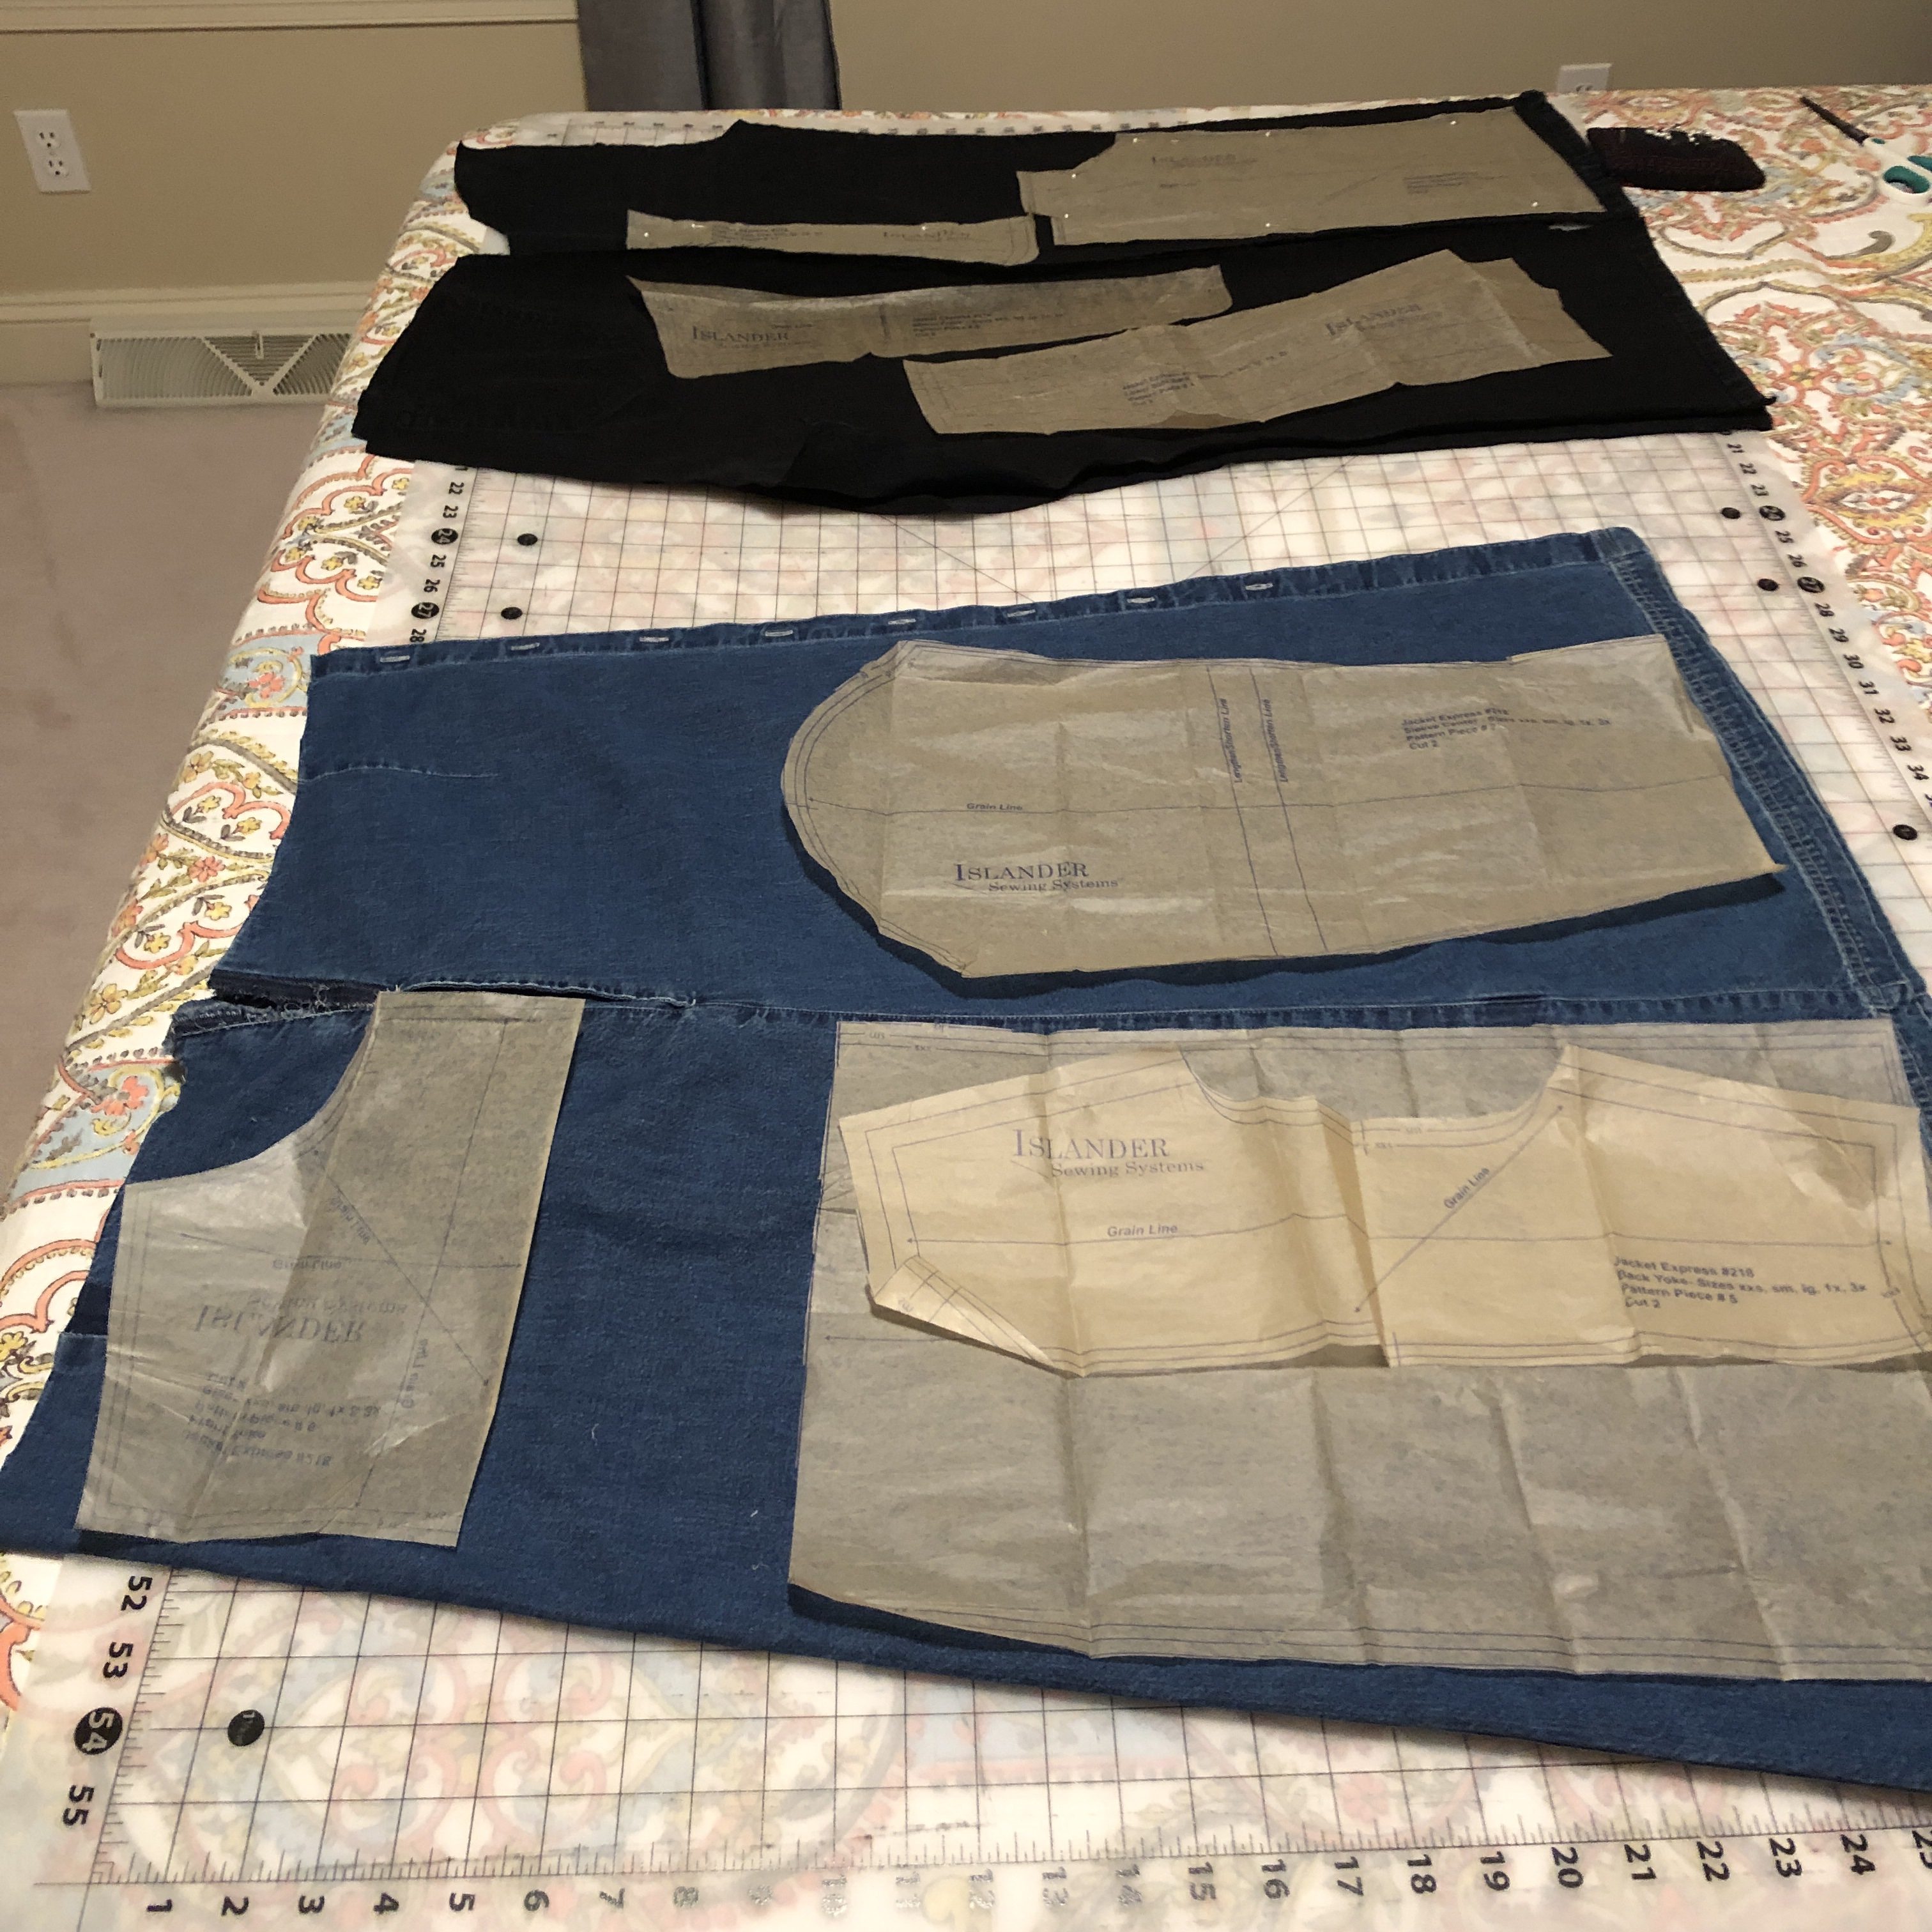
Laying out the pattern

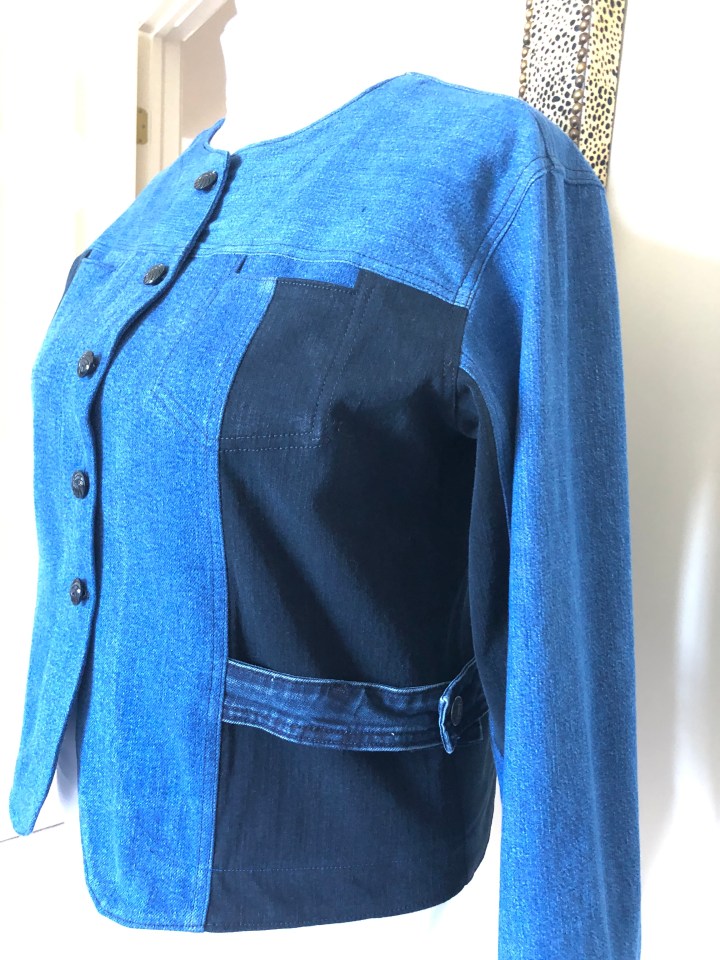
To make this wearable for me I first decided that I didn’t want the rounded collar. There’s a facing all the way around the garment so I simply drafted a piece of facing for the back neck. Then I skipped the breast pocket flaps because they would scream ‘1980s jean jacket.’ My denim was pretty heavy weight so I also left off the welt pockets as they would add bulk. This was going to be a jacket made of denim, not a jean jacket. Once all the pieces were cut I interfaced everything and it was …

Time to Sew

Although I had access to the Craftsy class (4 hours!) the instruction booklet is excellent so I didn’t bother with watching the video. I’ve attended a couple of Janet Pray’s classes at sewing events so am familiar with how to place the hands and hold the fabric so you take advantage of the feed dogs.

I put a denim needle in my machine, threaded the serger so the thread colours would work with my denim and set to work, following along with each step. The instructions are in the order needed to give a professional finish while still constructing with some speed. There is a LOT of jumping back and forth between stitching a seam on the machine, then over to the serger, then the iron, then back to the machine which now needs topstitch thread, stitching two rows and changing back to poly thread … But the results were really good right from the start so I just kept following along. All of the steps made sense, especially since there’s so much top stitching.

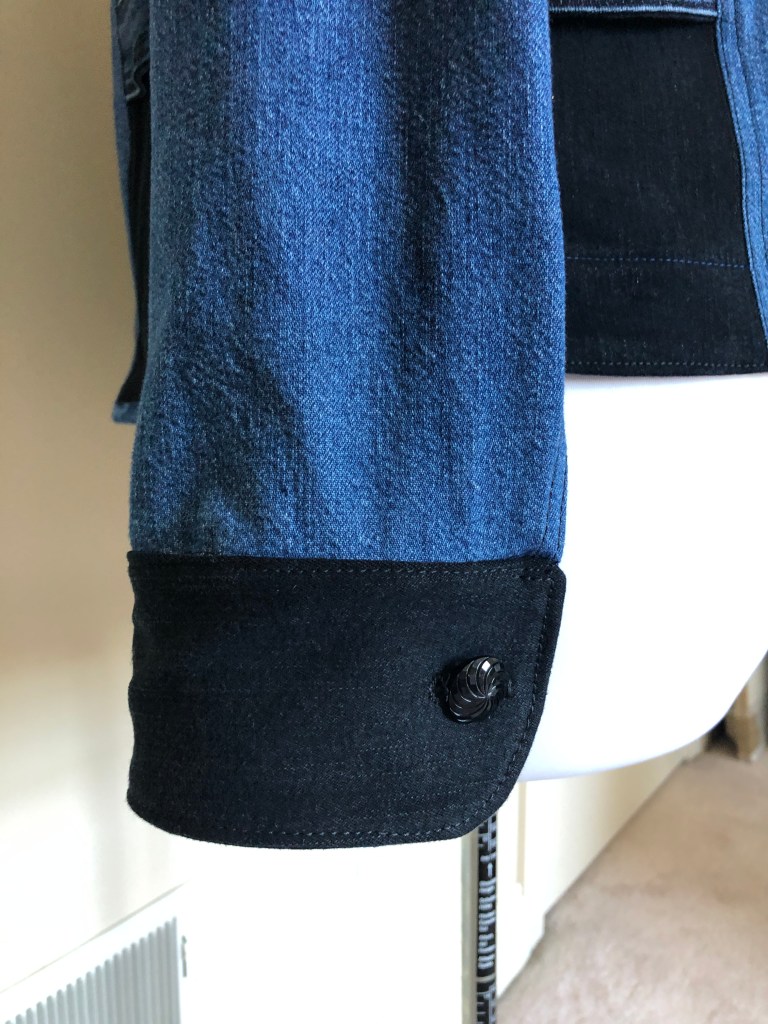
Pretty buttons from Fabric Mart

There was only one point when I watched the video and that was for the cuffs. The instructions in the pattern booklet were a bit of a head scratcher and since my project was completed, I’ve read several reviews that said the same thing. I managed to get them done right without any hand stitching. Actually, the only hand stitching in the whole project was slipstitching the back facing over the yoke and sewing on the shank buttons. Gotta love that!

One thing I wish I had done was use my cover stitch machine. Since I hadn’t used the pattern before I wasn’t sure if that would fit in and it definitely would. In a few cases you’re instructed to stitch just a single line of topstitching but in most cases it is two lines.

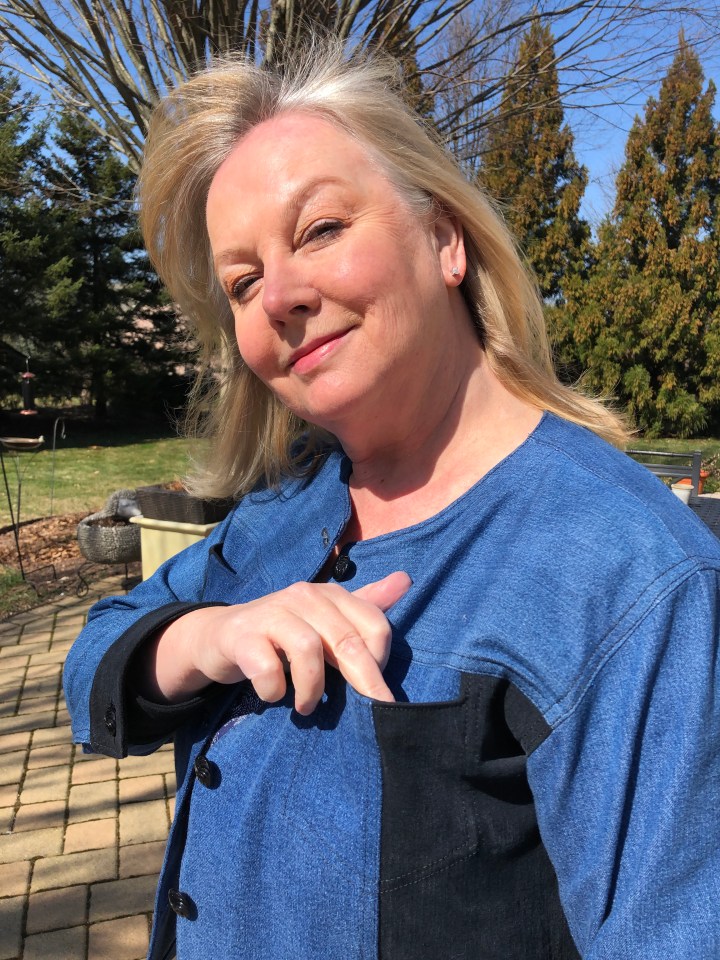
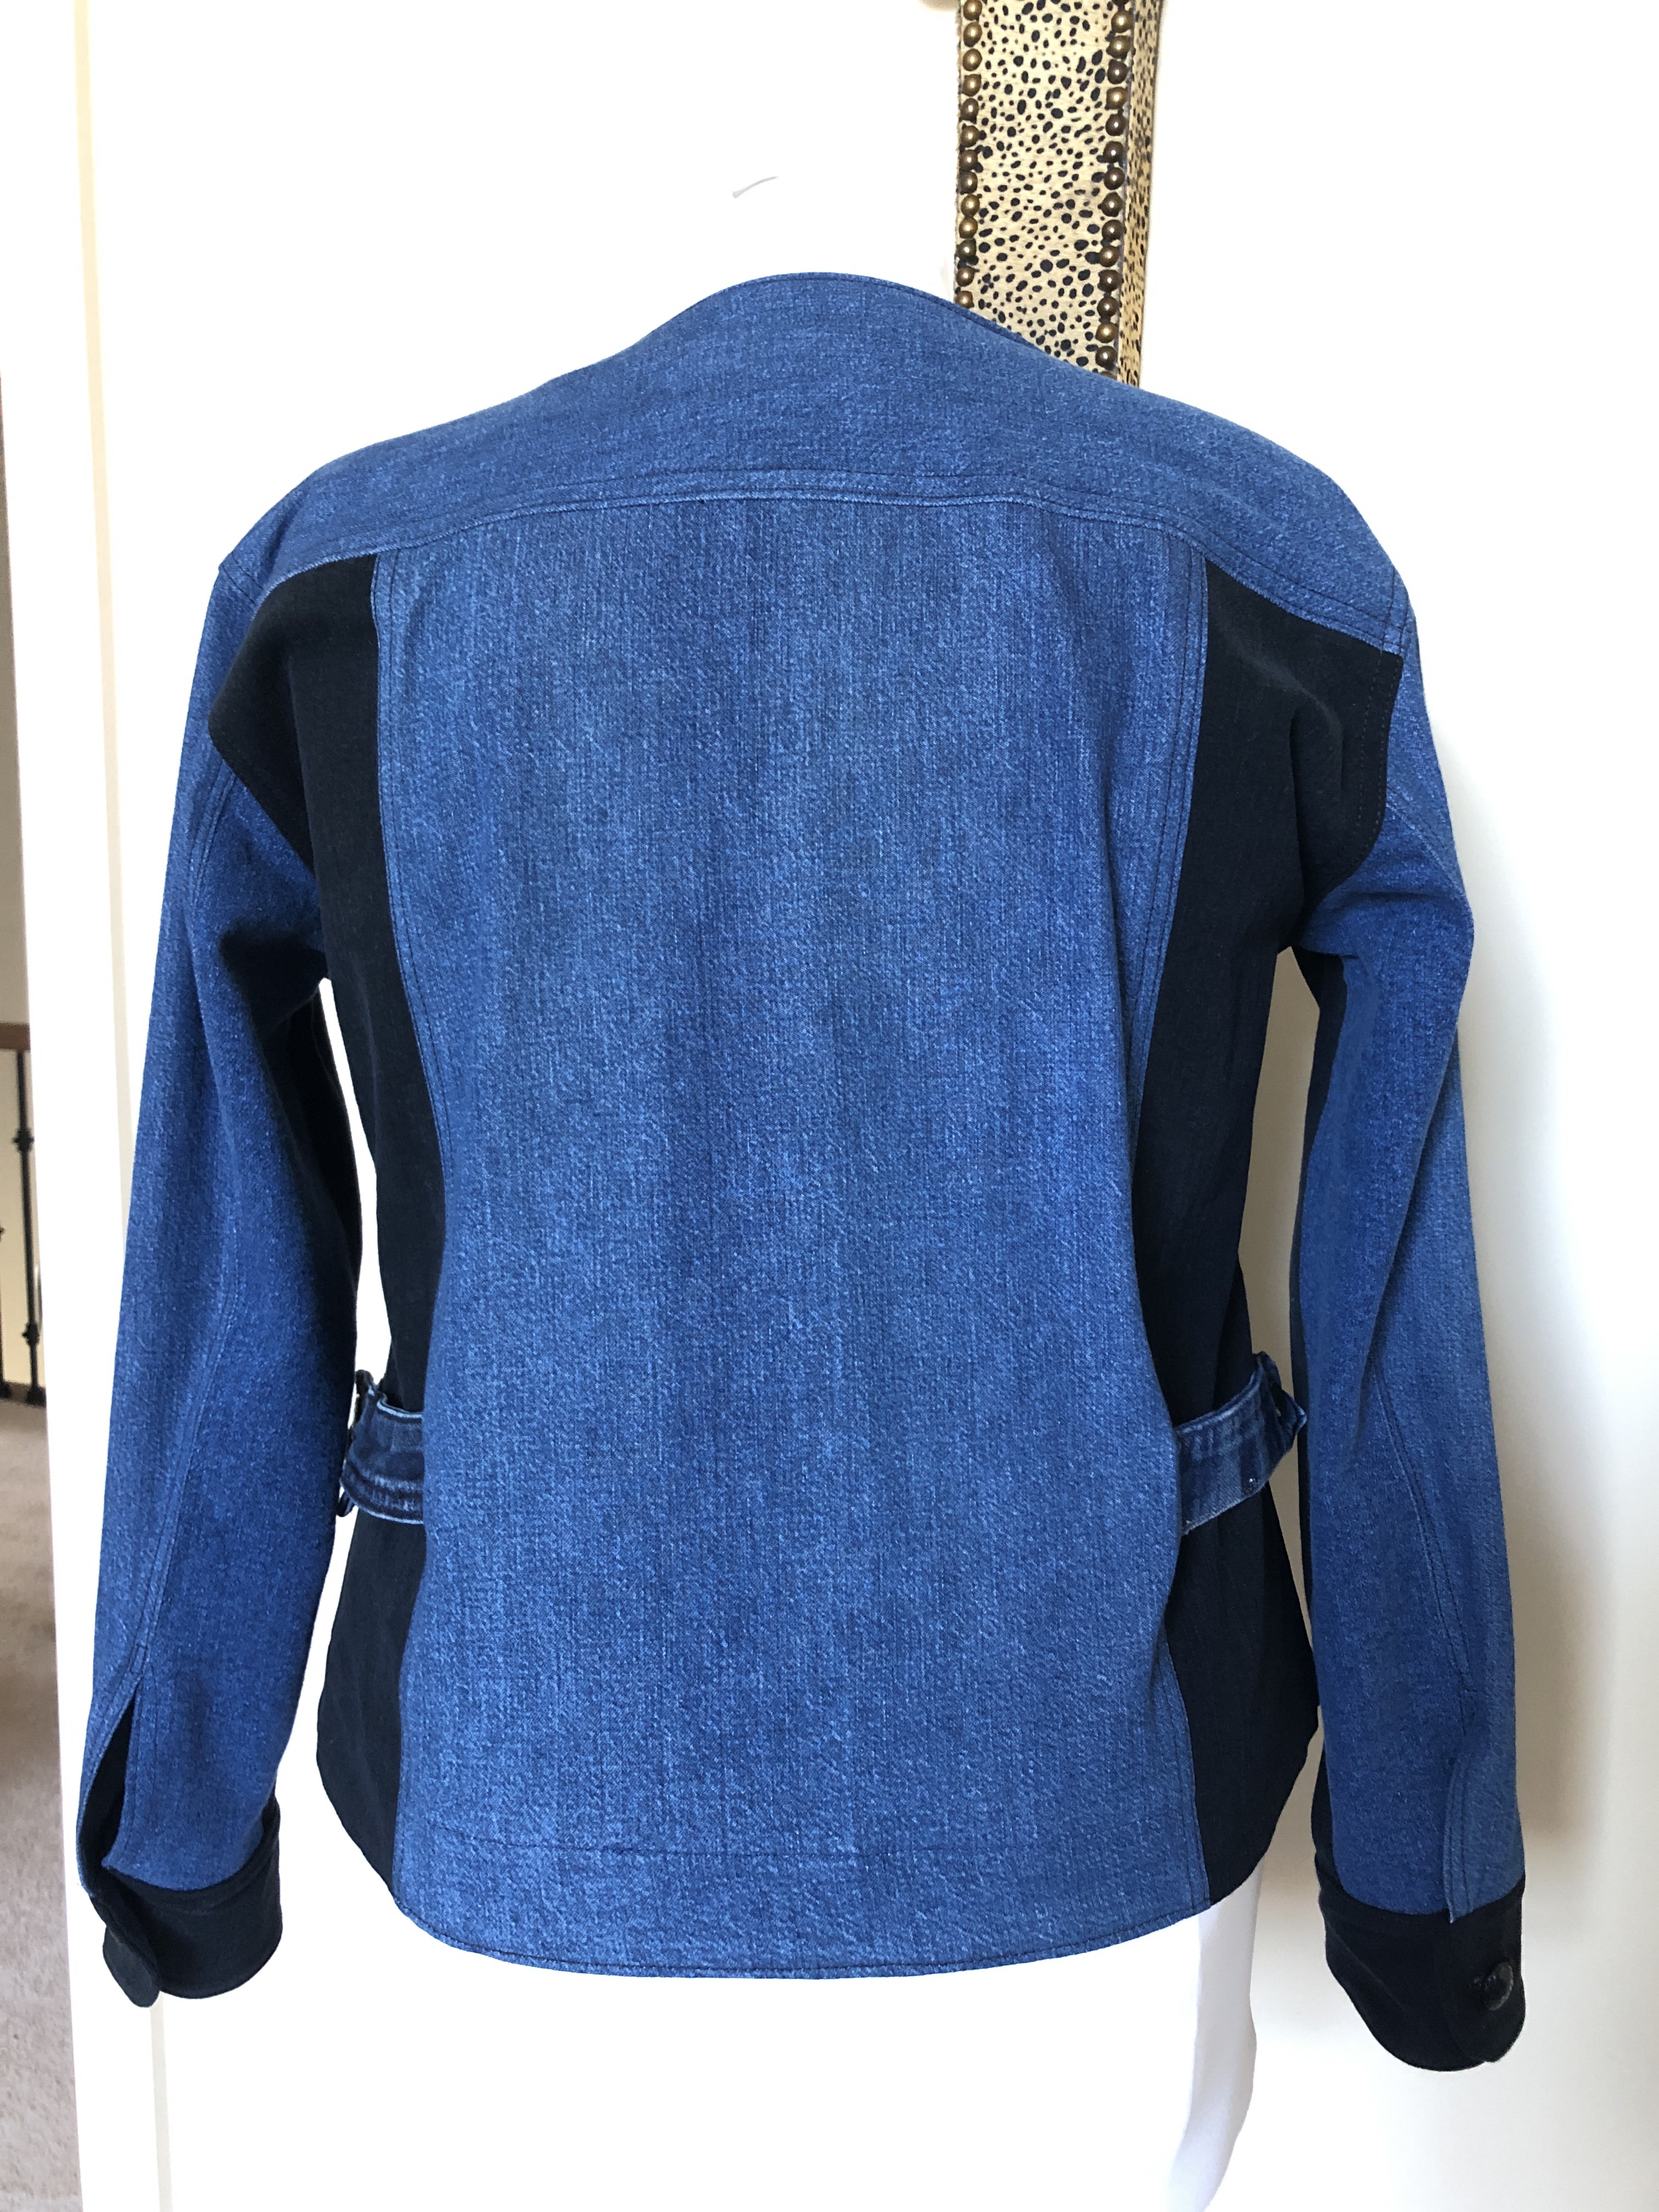
A surprise that I hadn’t considered was an interesting geometric design that appeared when I left off the breast pocket flap. The pocket is sewn to the interior of the garment (I used pockets from a pair of jeans) and then a facing is added. This meant that there was an opening that was highlighted nicely by the colour blocking.

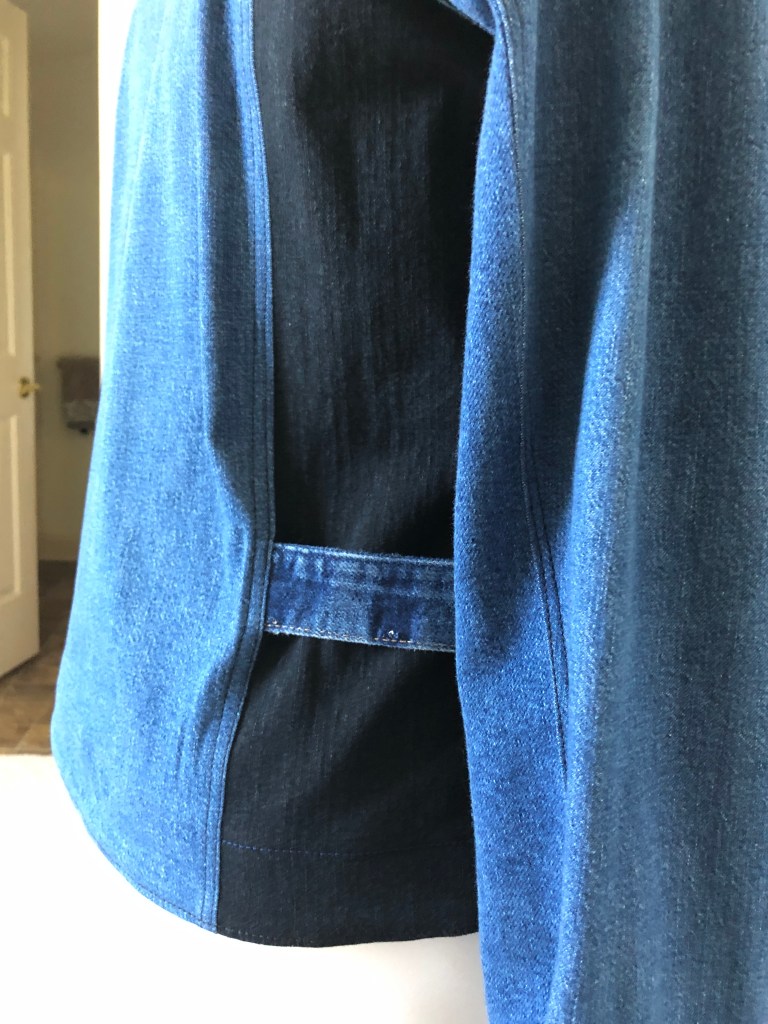
This wasn’t supposed to look like a standard jean jacket so I added straps at the waist – you know, the kind that you can tighten up when you’re smaller and loosen up when your waist expands? I just unpicked two jeans waistbands and stitched them at the side panels. I like the look and at some point I can add another button hole to cinch the waist in a bit. 😉

Part of this contest is always going above and beyond so I considered different embellishments. My initial thought was bleach painting but the black denim just turned copper. Then I thought about machine stitching a row of leaves and adding rhinestones for flowers. In the end, I skipped all of the bling stuff because I don’t think I’d wear the jacket if it was flowery or too feminine.

One thing I’ve learned over the past few years is that I prefer simple garments without a lot of embellishment, especially for things like jackets that I’ll wear frequently. A wild print is fun for a dress or a top but all that colour and print has to be balanced with clean shapes. For this, I decided that less is more.

Several sewists I follow on Instagram have embroidered phrases and thoughts inside their garments so instead of putting a design on the outside, I used the lettering feature on my Brother PS500 and stitched a quote on the inside of the hem facing. For everyone this has been a really hard year and I wanted something quiet that would reinforce my optimism every time I put on the jacket.

Even if I knew the world would fall to pieces tomorrow, I would still plant my apple tree.

Martin Luther
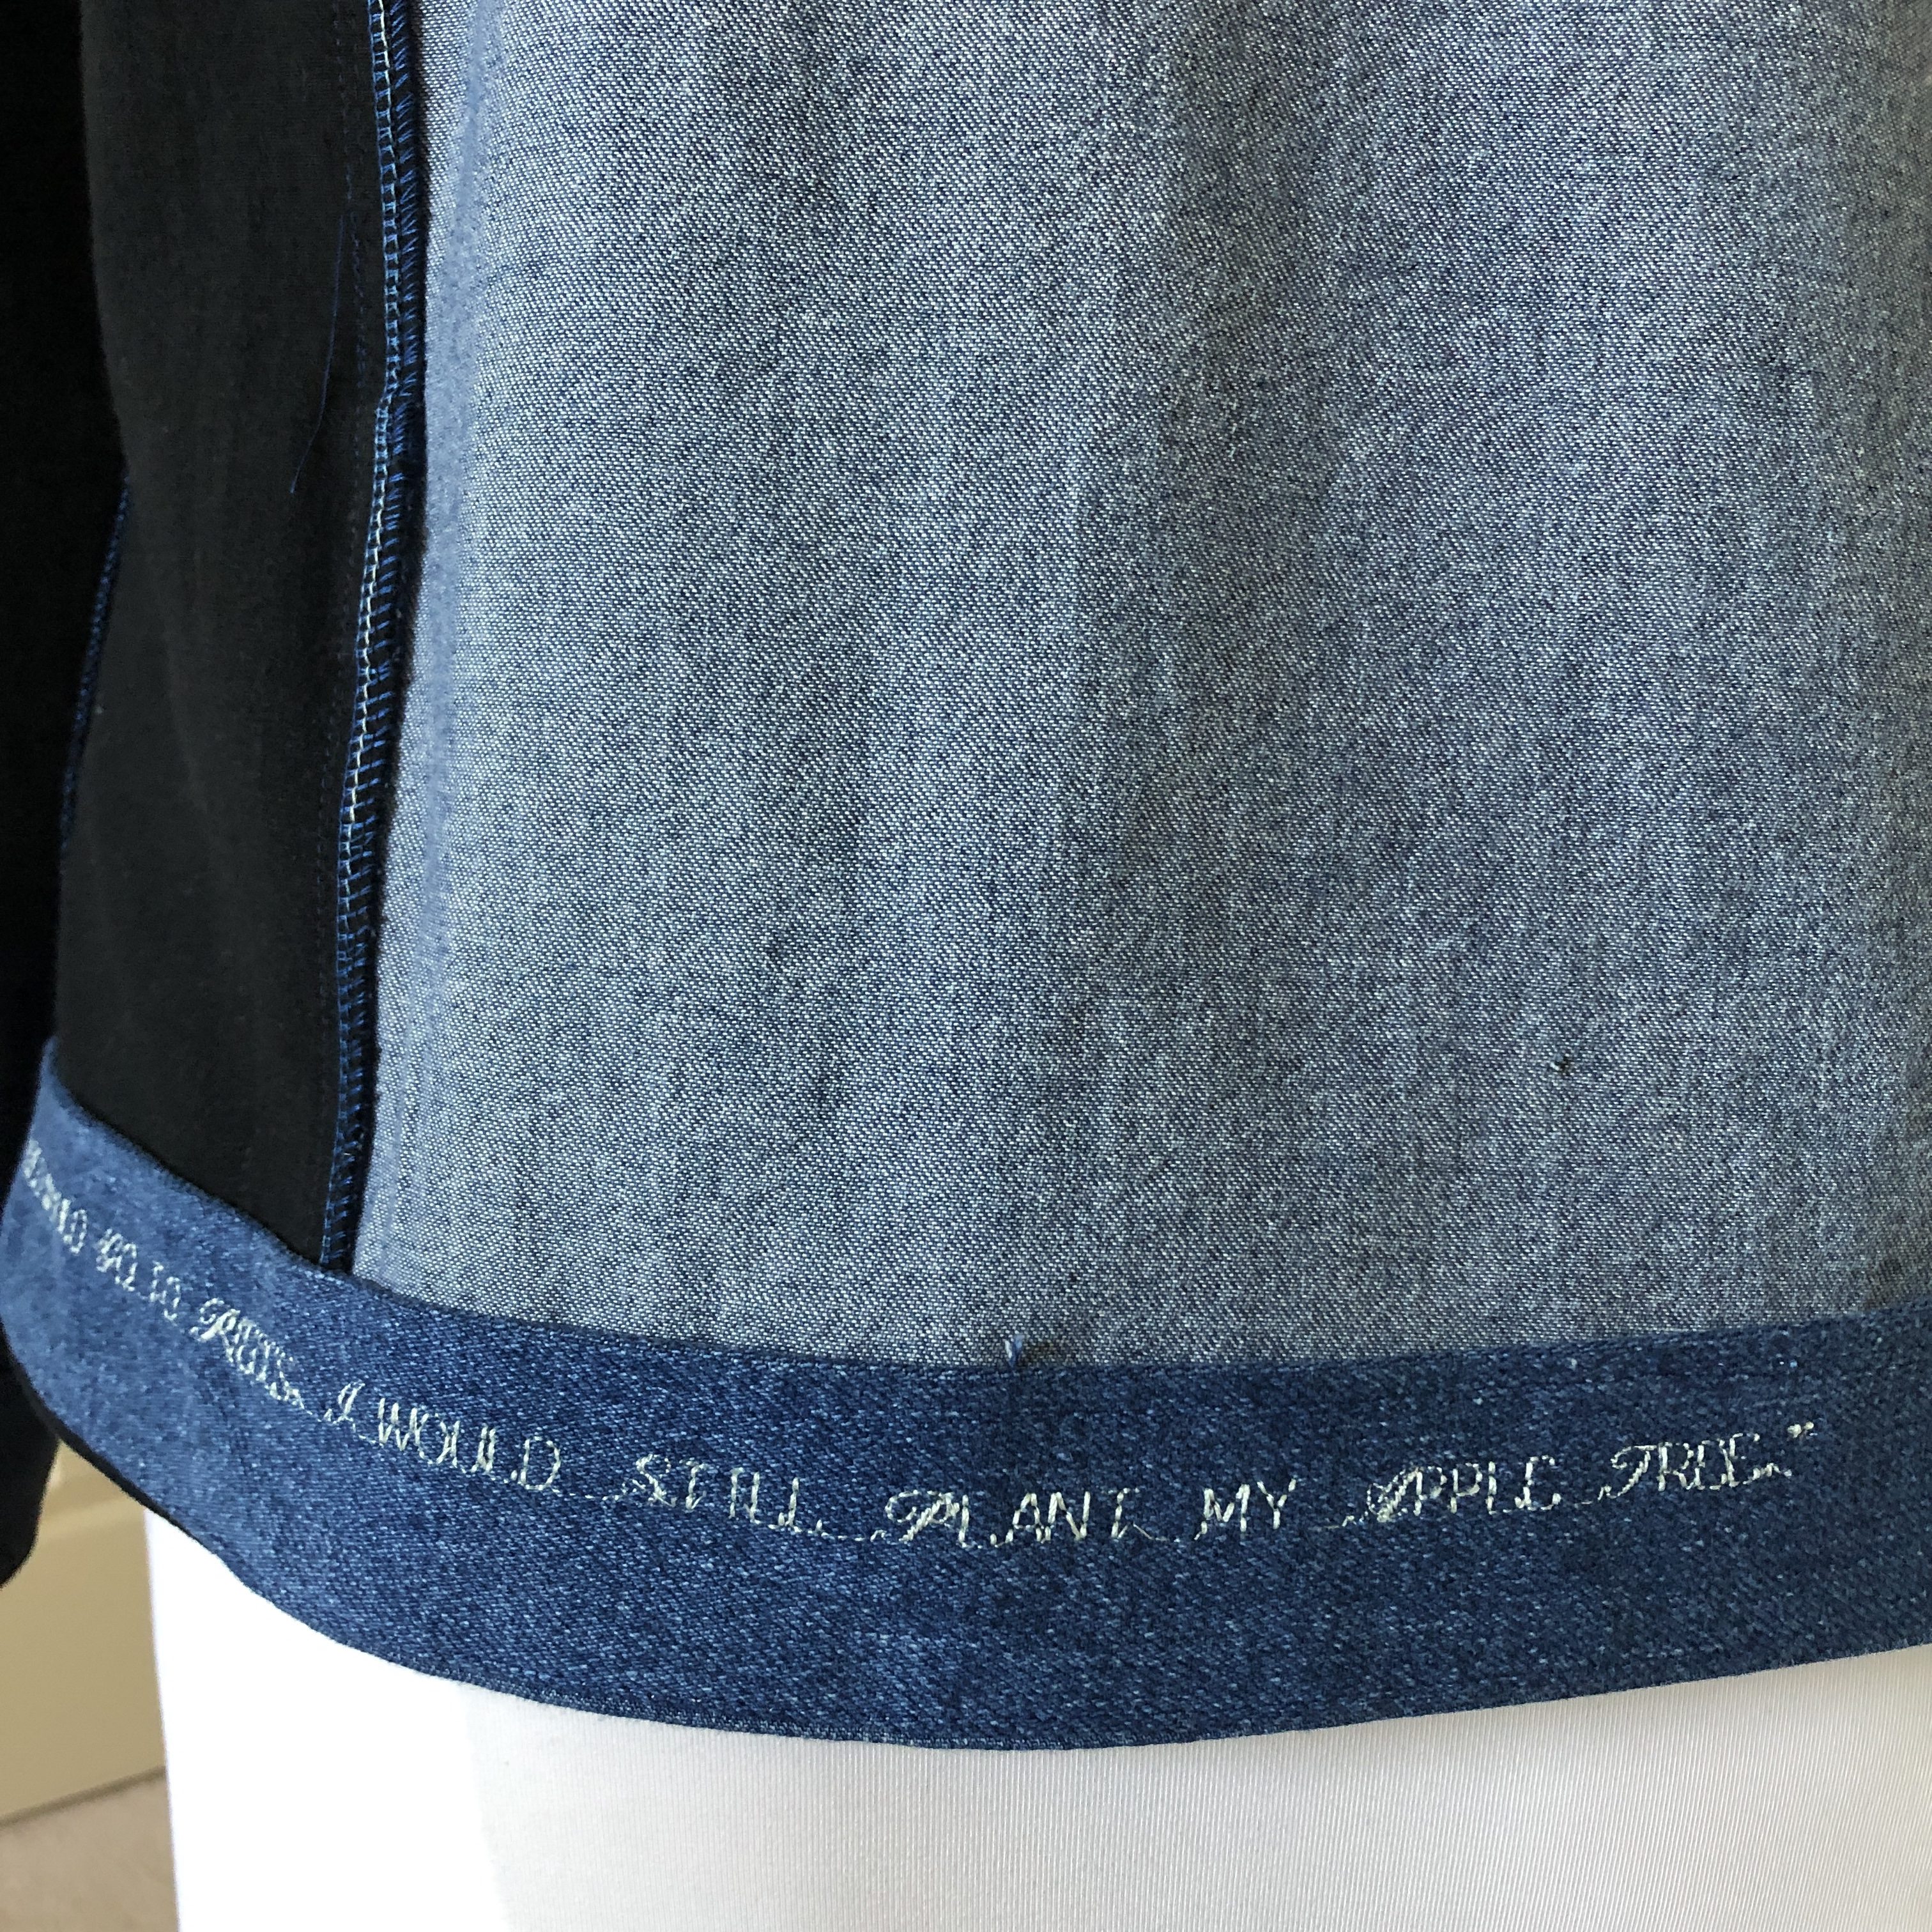
Once that was done and all of the necessary topstitching completed, I added the buttonholes and buttons and was done!

For the purposes of the contest, this was completed in almost exactly six days (Sunday noon through Saturday noon). Other than thrifted denim, I used interfacing, thread and buttons. (The buttons were from a big bag that I got at FabricMart in November.)

Summary

This is one of my better projects. It doesn’t feel like a jean jacket. And the interior looks good enough that I would throw it over a chair in a public place and not be worried about raw seams.

The basic construction of the jacket was far easier than I expected. The instructions are so good that I think a beginner could tackle this project. You need to be pretty present when doing the topstitching and the seam allowances aren’t large (1/4″ or 3/8″) so there isn’t much room for error.

Would I use this pattern again? Yes! Next time I would add a few inches to the length but this might be awfully nice in brocade or velvet. Hmmmm …

Indie Patterns · Sewing

Anticipation – Cashmerette Webster Dress

This project was shared on Fabric Mart Fabric’s Fabricista blog on March 10, 2021. Fabric Mart provided me with the dress fabric, thread and pattern in exchange for this blog post. If you’re a regular reader of my blog or watch my YouTube channel you will know that I have bought a lot of fabric from Fabric Mart over the past 3 years, so I definitely am a customer!

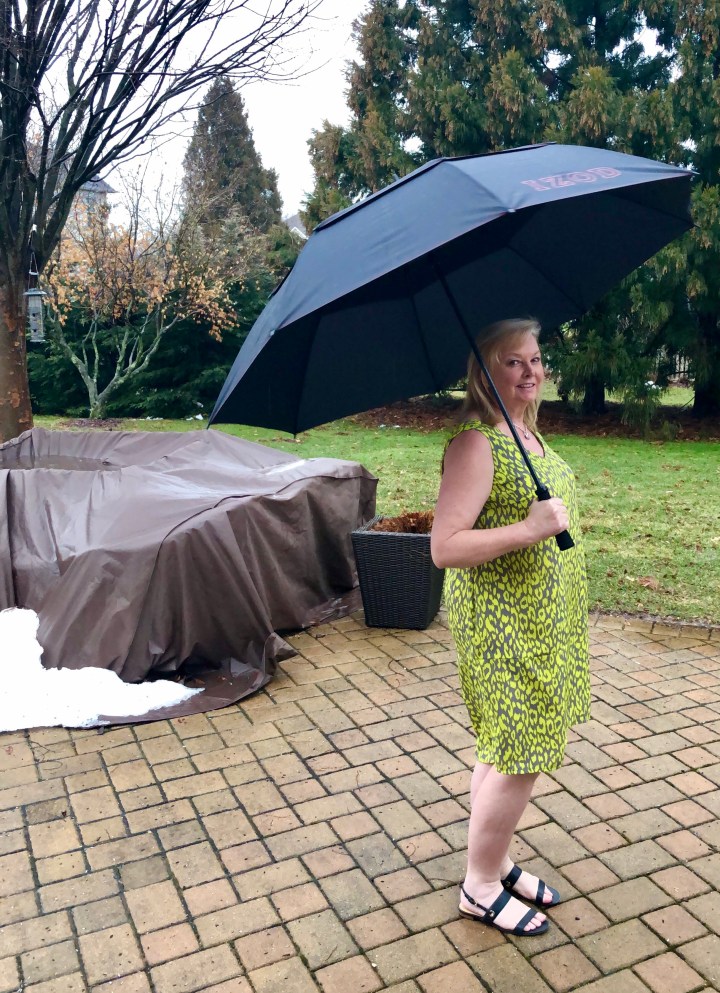
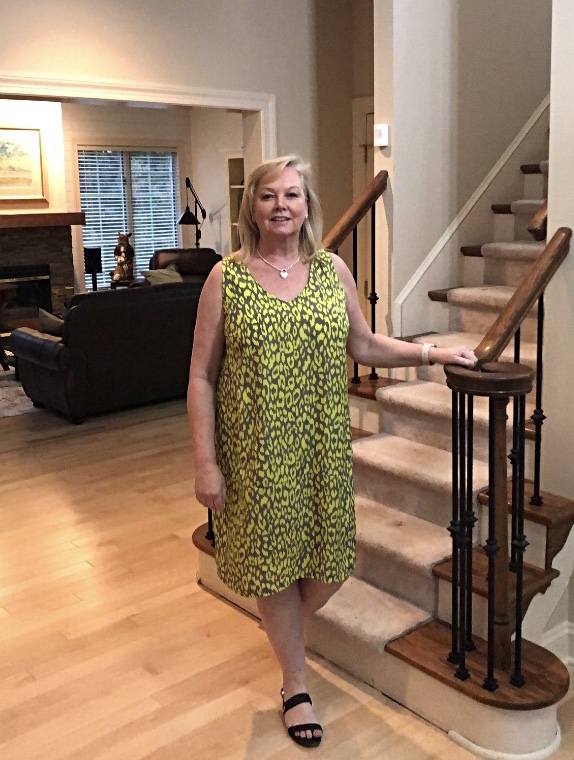
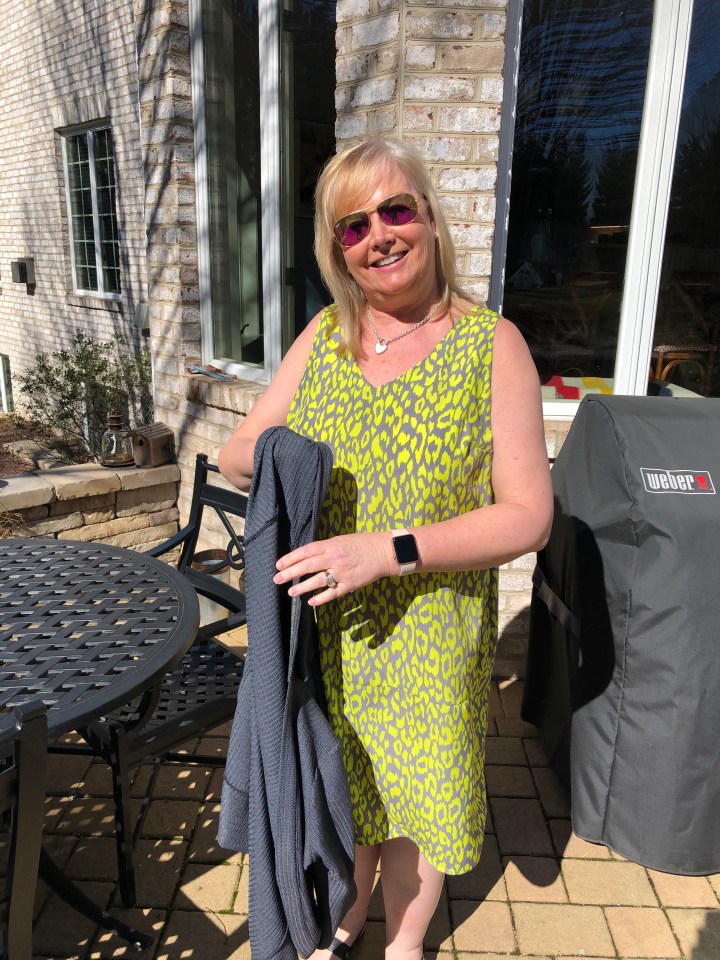
One of my favourite colour combos is yellow and grey. When we went on our first real vacation about 10 years ago, I planned my wardrobe around those two colours. I had a yellow trench coat, grey jeans, grey dresses, yellow print tops … Making this dress filled me with the anticipation of warmer days and trips to restaurants, patios and maybe even soaking up the sun on the balcony of some vacation villa.
The fabric was obtained online from Fabric Mart Fabrics and was described as “Caution Yellow/Graphite Grey Blouseweight Woven.” This is a completely opaque polyester fabric that would make a nice blouse but I think it’s better suited for a dress.

Pattern – Cashmerette Webster

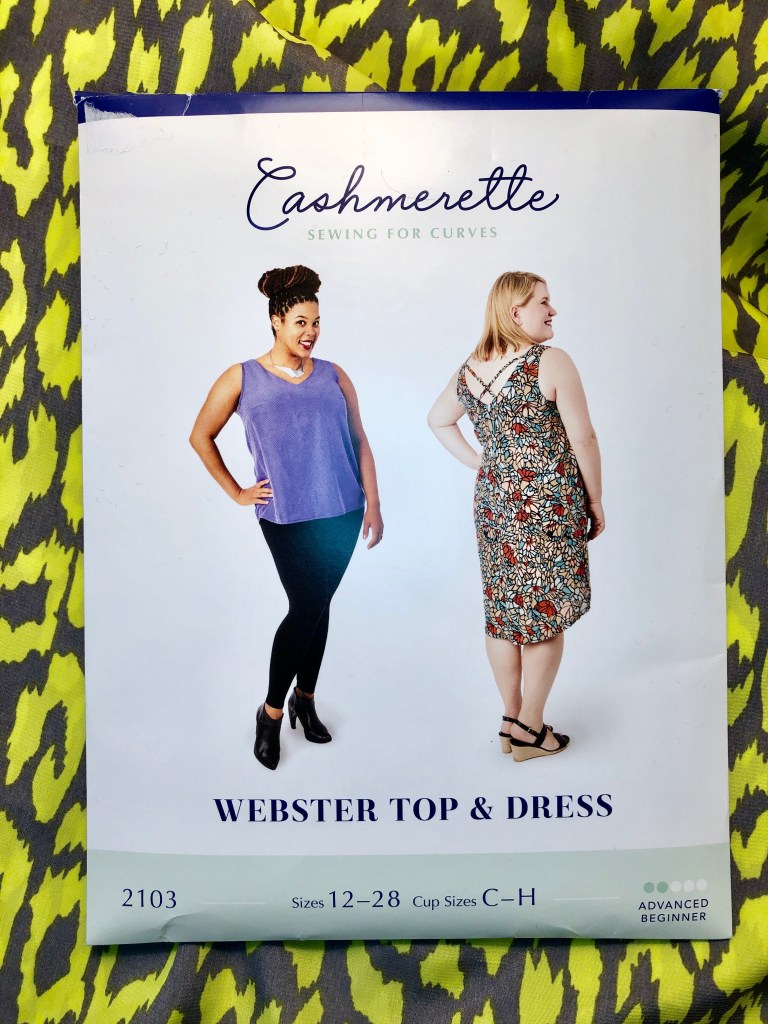
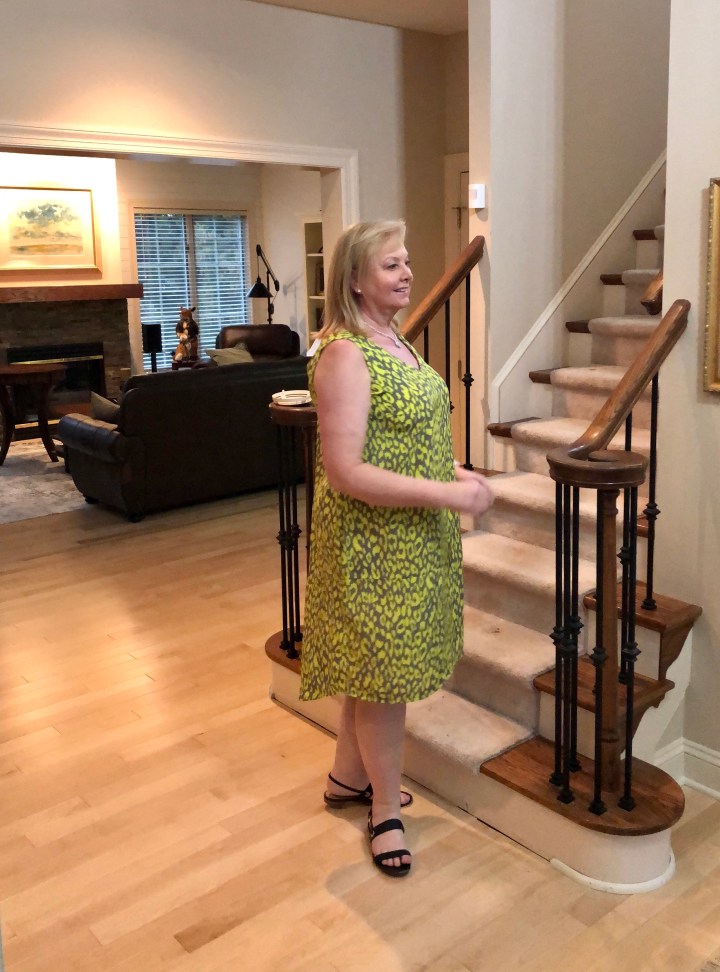
As this will be a sit-around with a drink or hang out on vacation dress, I wanted something comfortable so selected the Cashmerette Webster. I liked this pattern for the fitted bust, loose body and interesting straps on the back. It’s also perfect for a fabric that drapes well and floats in the wind.  I’ve made the Cashmerette Springfield top a couple of times and loved the simplicity of working with a pattern that doesn’t need a full bust adjustment, or a shortened waist so I decided to give this pattern a try.

If you haven’t heard of Cashmerette, its patterns are designed for people with curves – in particular, boobs. (Cashmerette has recently started the process of expanding their size range to cover those from sizes 0-32.) The size charts are slightly different from Big 4 patterns, however, they offer a handy size calculator which was very helpful because I definitely would have cut the wrong bust cup size. After using the guidance from the website, the only adjustment I made when cutting the dress was adding 2” to the length. (There was one other adjustment while sewing … keep reading …)

Details

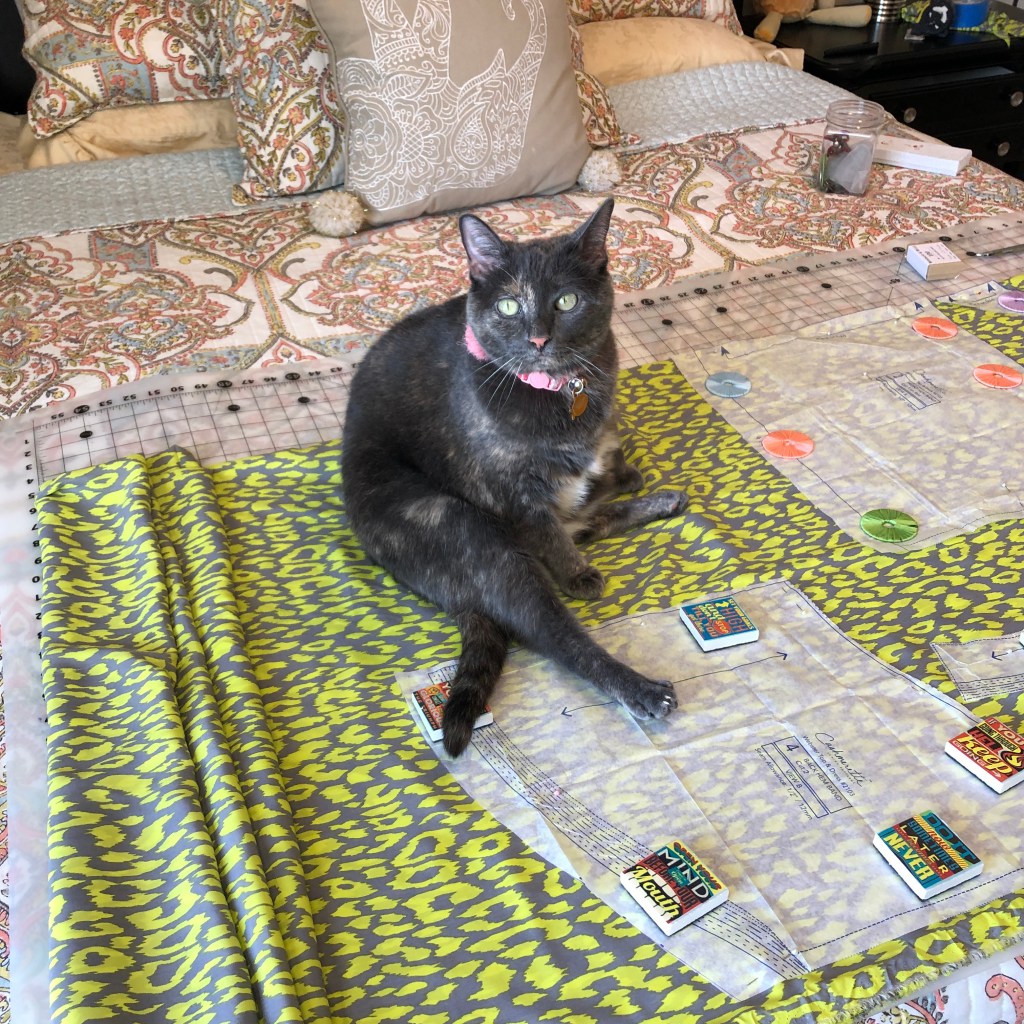
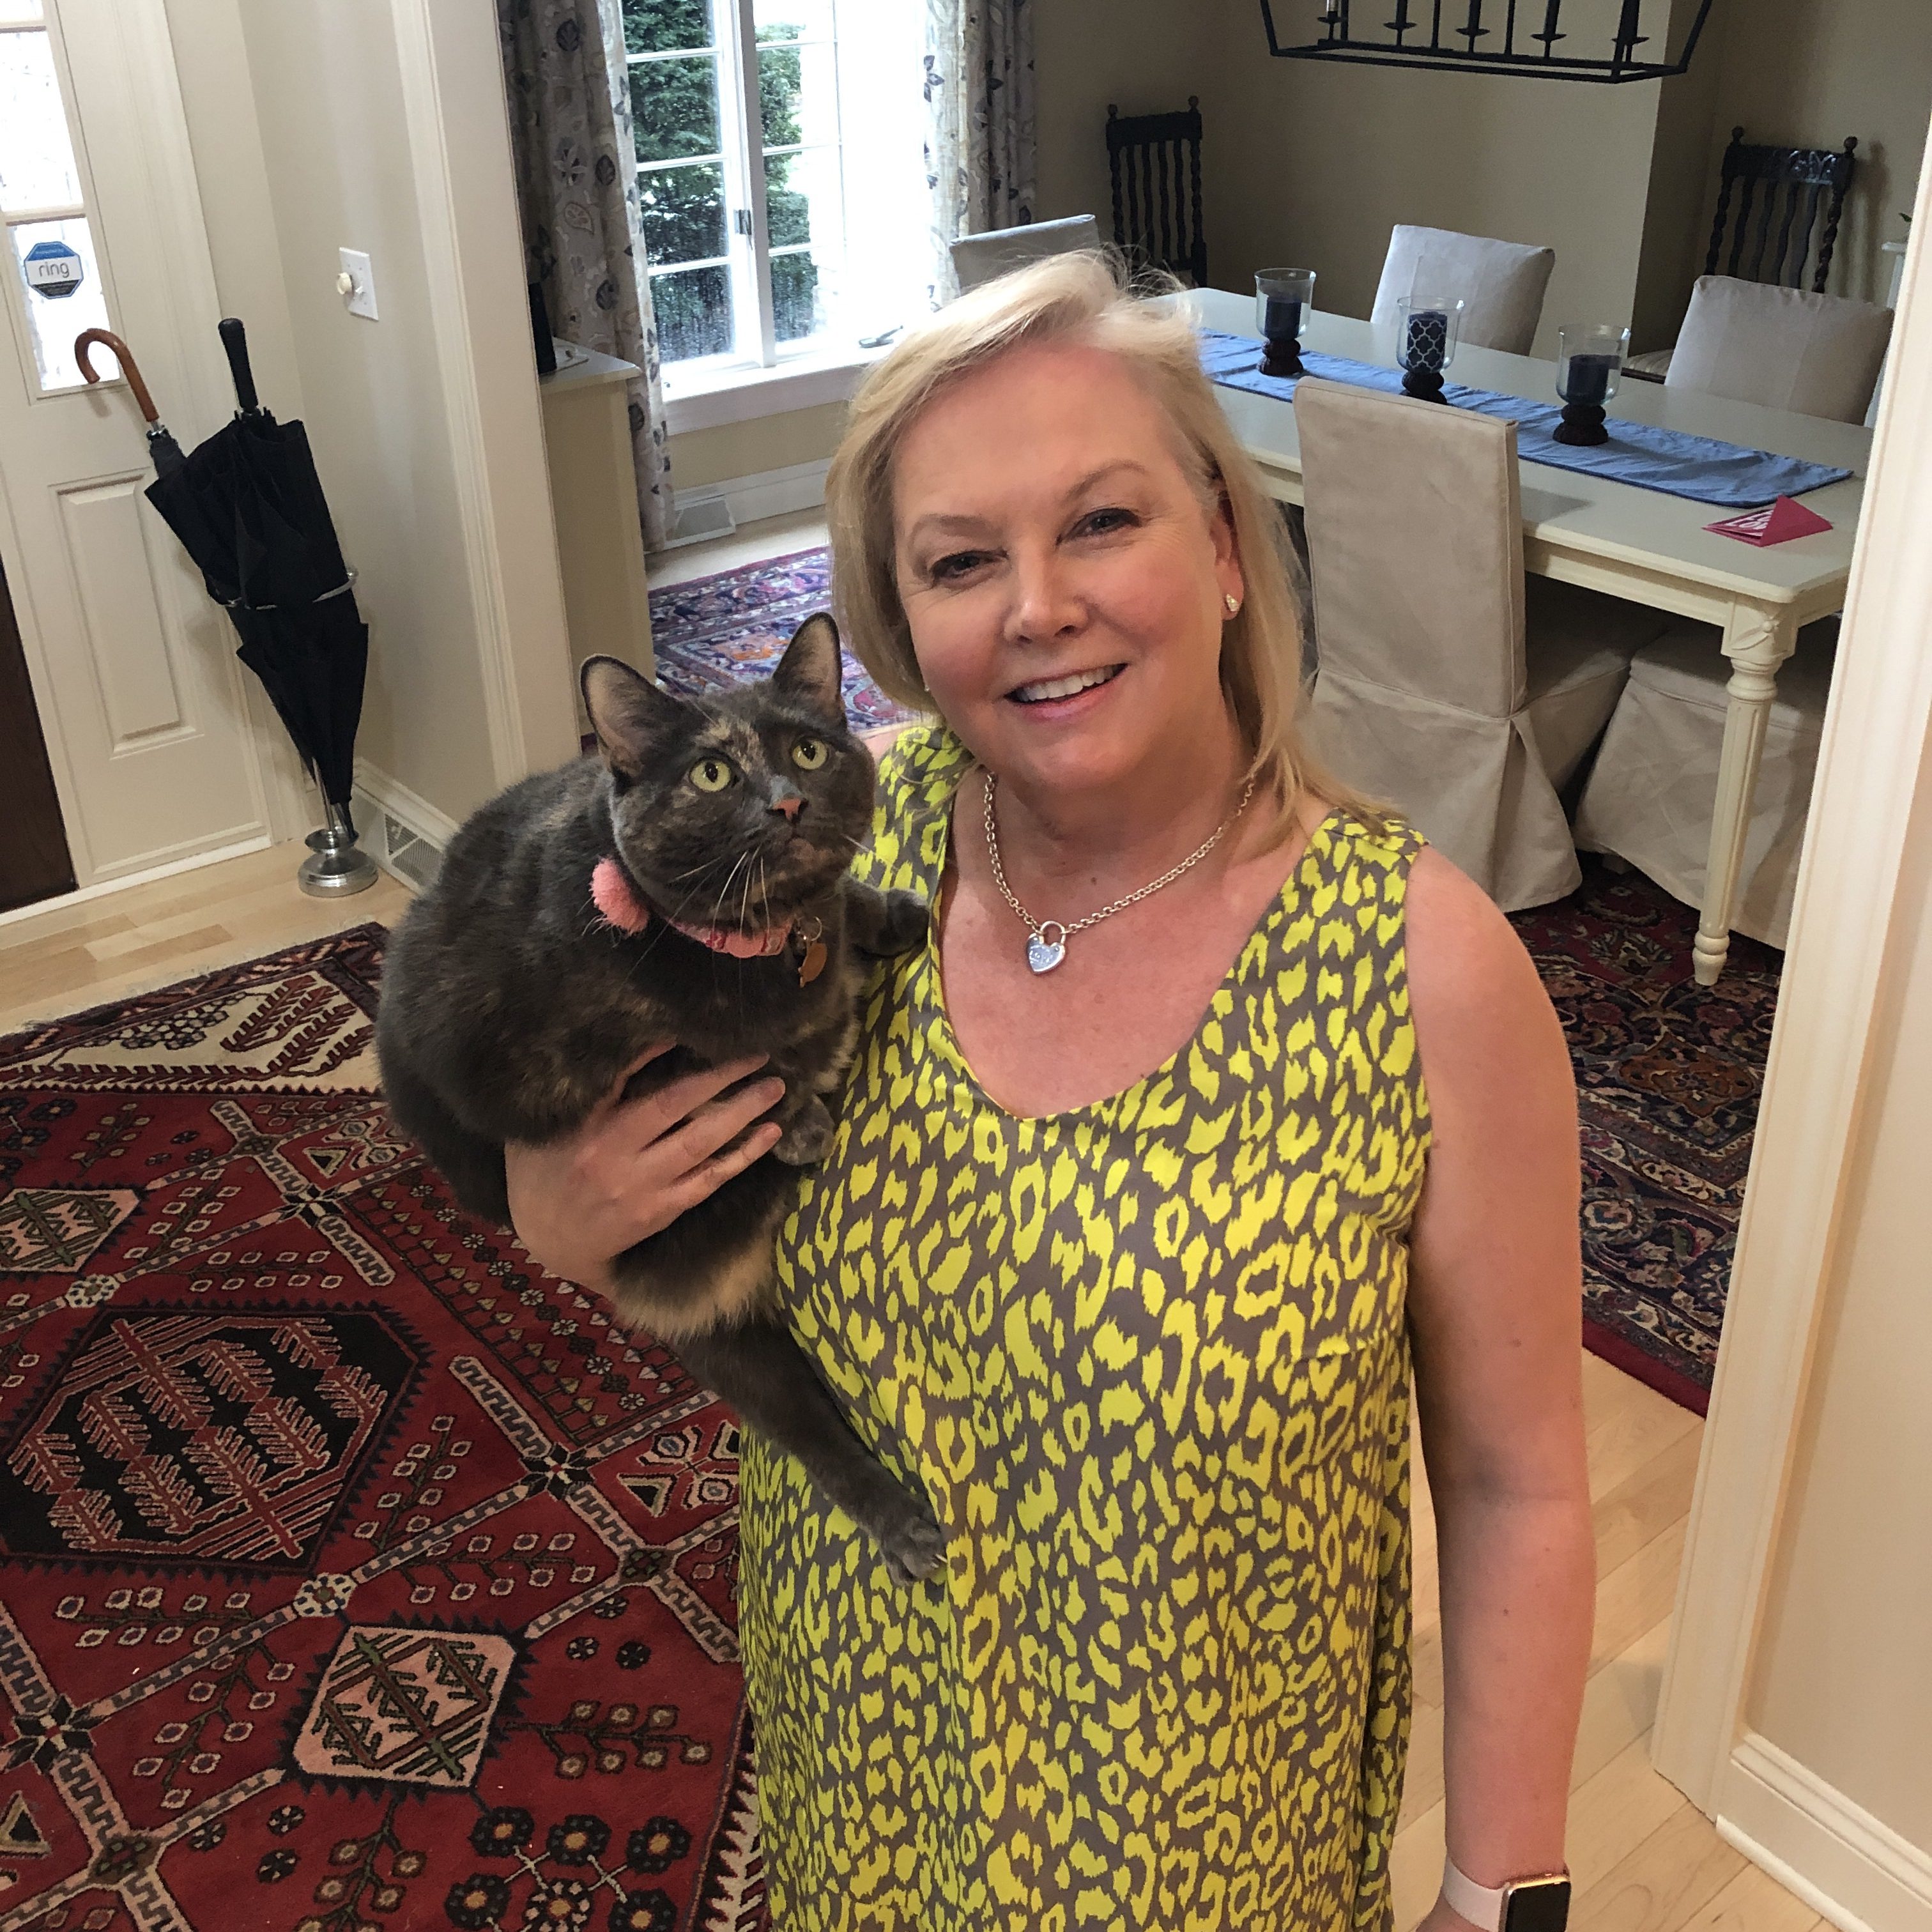
The weave on this fabric is dense and so I used a few fine pins then added weights (and a cat) to secure everything while I cut with scissors. I didn’t use a rotary cutter this time because the fabric slipped a bit.

Note – It is important to carefully mark the placement lines for the upper straps so they are angled correctly on your back.

Helpful Caternweight. She had to demonstrate that this fabric is perfect for her colouring.

To work with this fabric I used a Schmetz Microtex needle (size 70/10) and slightly loosened the needle tension and I used Wonder Clips instead of pins when sewing.  To finish the seams I ran a second row of stitches in the seam allowance and then used pinking shears..

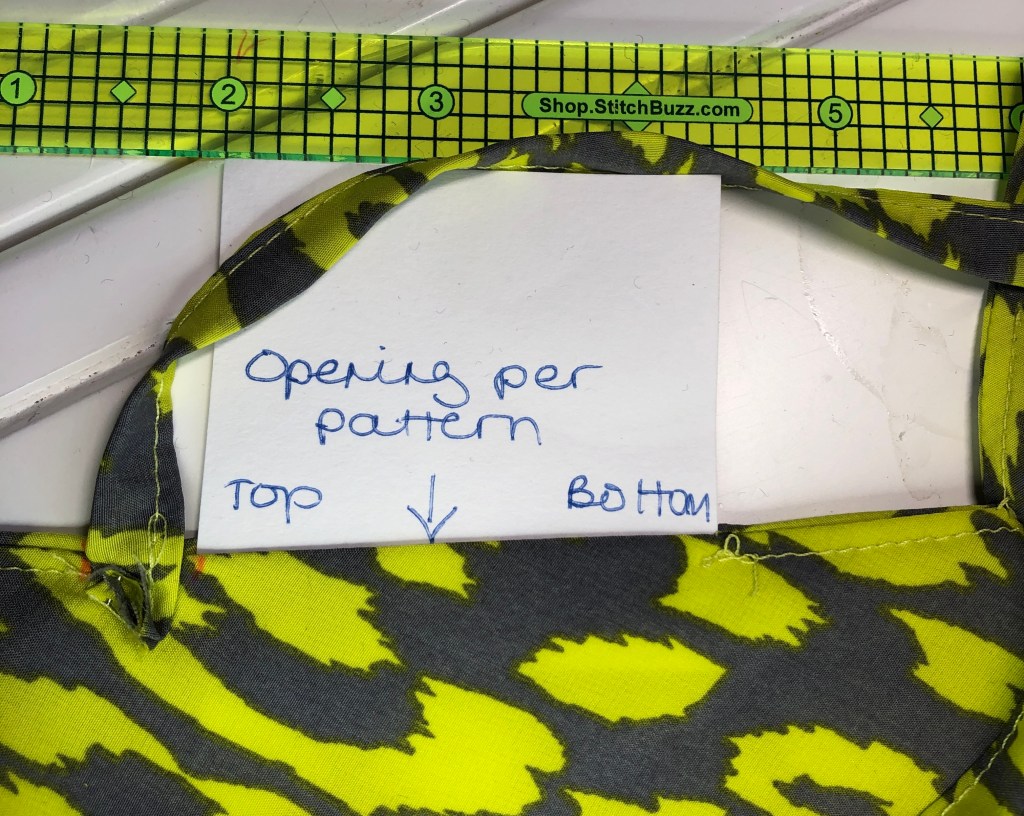
This is quite a simple pattern and the instructions are good. Amazingly, I only had to unpick ONCE! World record, folks. For the back straps you stitch the upper edge when attaching the facings and leave an open space in the facing to insert and stitch the lower edge of the straps. First mistake, I did not take the advice to have someone help me place the straps. I just stuck them in where indicated on the pattern and sewed. I tried on the dress and the back gaped between the straps. So I unpicked the seam and under stitching (ugh) and thought about what was going on. I realized that my back was too broad for the strap placement. I wound up moving the lower edge of the straps almost 2” higher. If you have a rounded or broad back like mine, consider leaving an extended opening so you don’t need to unpick. (Photo below)

The card shows the opening per the pattern. On the left is where the straps were correctly placed after unpicking.

The instructions for the hem are to fold under 1/4” and then again 1/2”. I’m absolute rubbish at finicky folds – I have a really bad habit of just eyeballing hems but I’m trying to be more careful so I followed some advice posted in various places and ran a row of long stitches (5mm) at the point of the first fold (I used 1/3″) and pressed using that line as a guide. Then I stitched ran another row of stitches up 1/2″ and pressed again. Finally, I topstitched. This process worked well and I didn’t dread hemming the long edge!

The last bit was hand stitching the side and back neck facings in place and the dress was done!

I like the tidy neck and arm facing finishes. Also, the straps are wide enough that you can wear a bra and there is zero gaping at the front armscye which is a huge bonus. No pins or fashion tape anywhere!

This fabric is just the right weight for this dress. And it doesn’t crease so that makes it a perfect dress to throw in the suitcase for a weekend away, whenever that may be!

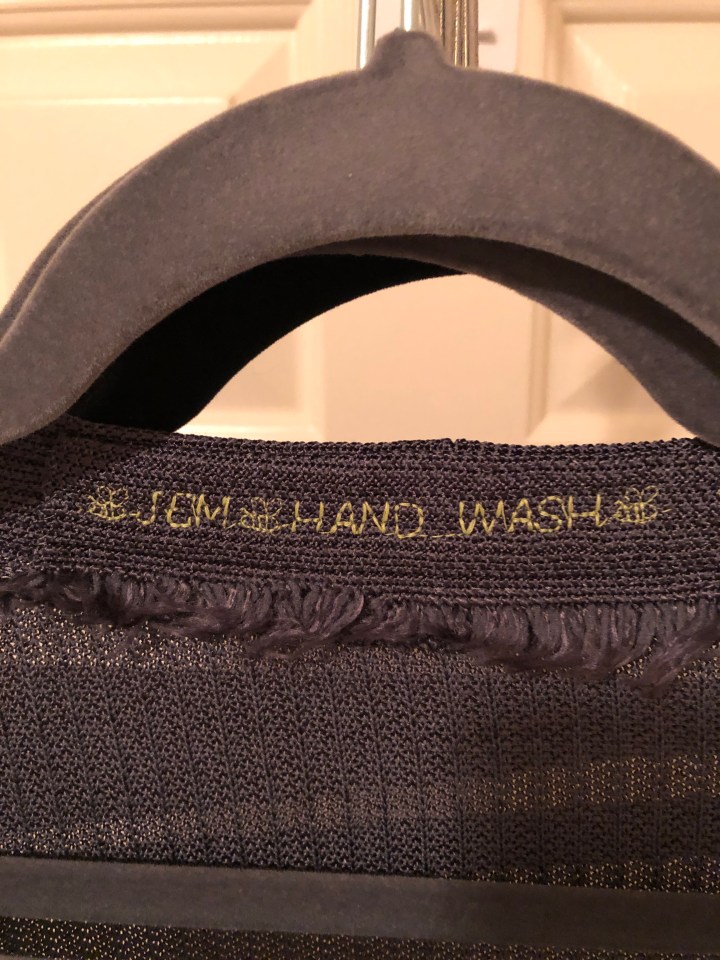
It’s still a bit chilly to wear this dress today so I’ve paired it with another recent make, Helen’s Closet Blackwood Cardigan (I’ve made a few of these over the years, link to blog post here). The cardigan fabric is something special that I’ve been hanging on to for a couple of years. This is a lovely, luscious St John knit that I purchased from Fabric Mart about 3 years ago. I had a bit of fun with my sewing machine and made a “Hand Wash” tag from the selvedge of the fabric. The cardigan is just right for this dress, and the colour is perfect! Some things are just meant to be.

Now waiting impatiently til this duo can go out somewhere and be seen!

Indie Patterns · Sewing

Bespoke PJs

As usual, Pattern Review announced the Sewing Bee contest challenge and I was compelled to enter. This year, Round 1 was pyjamas for an adult. My husband made a couple of sad comments (😕 I need new pyjamas. Can your entry be for someone other than you? 😿) So I made PJs for him. The challenge was to make not just pyjamas but to make them unique for the wearer.

Pattern

I used a pattern I have used twice before to make him PJ bottoms – Favorite Things Pattern Designs Sleep Well (V034). When I started sewing again in 2015, I took a ‘return to sewing’ class at Discover Sewing in Atlanta and our project was these PJ bottoms so I felt very confident sewing the pants and the top looked simple.

“Bespoke” PJs

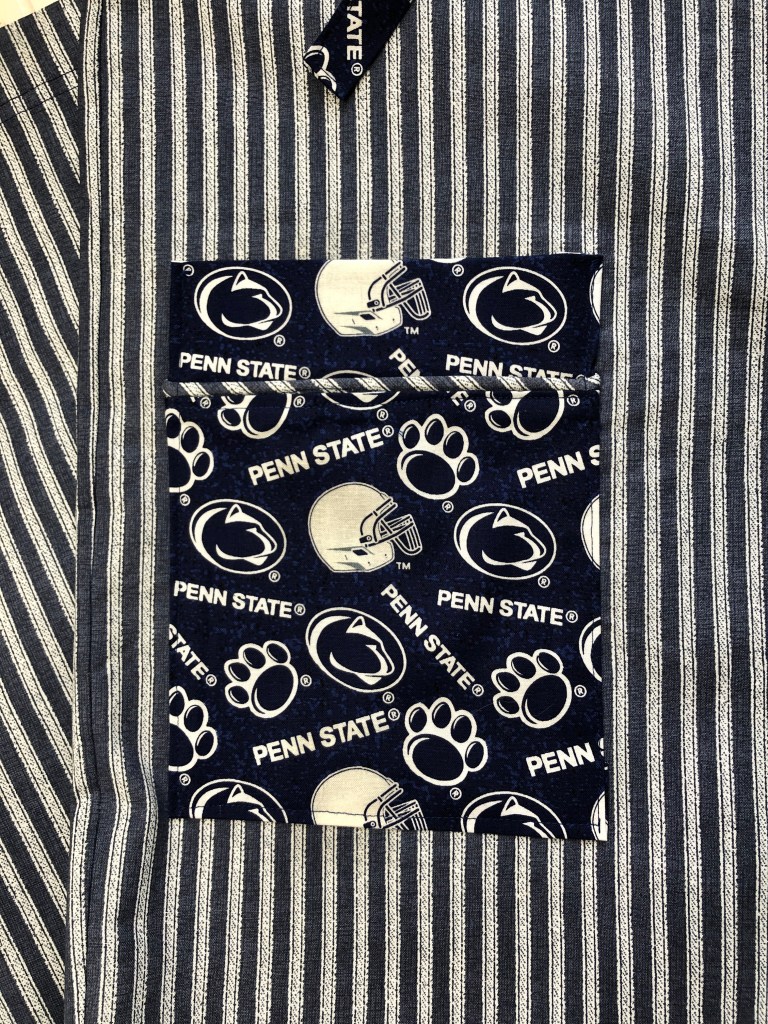
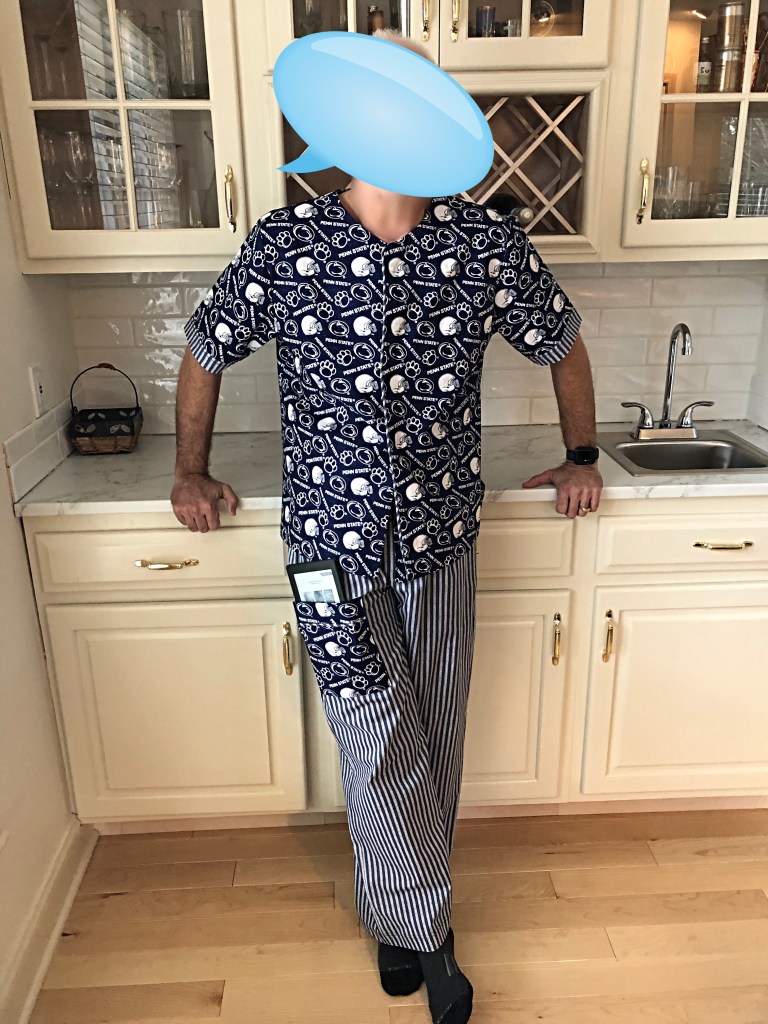
I wanted to make these something that DH will wear (no cat fabric), so that meant finding a print that would be fun and be wearable. He’s a proud alumnus of the Pennsylvania State University and I had a bunch of PSU logo’d fabric around so the decision was made. The top requires 2 1/4 yards of 45″ fabric but I had just 2 yards of the Nittany Lion fabric and nothing suitable for bottoms (2 2/3 yards of 45″). Off to Hobby Lobby for a lunchtime shop. (The Sewing Bee has a short window – just 7-days – so if you live away from a major city there likely isn’t enough time to order fabric without paying for express shipping.) I had hoped to find a nice checkerboard or plaid to match but only find stripes.

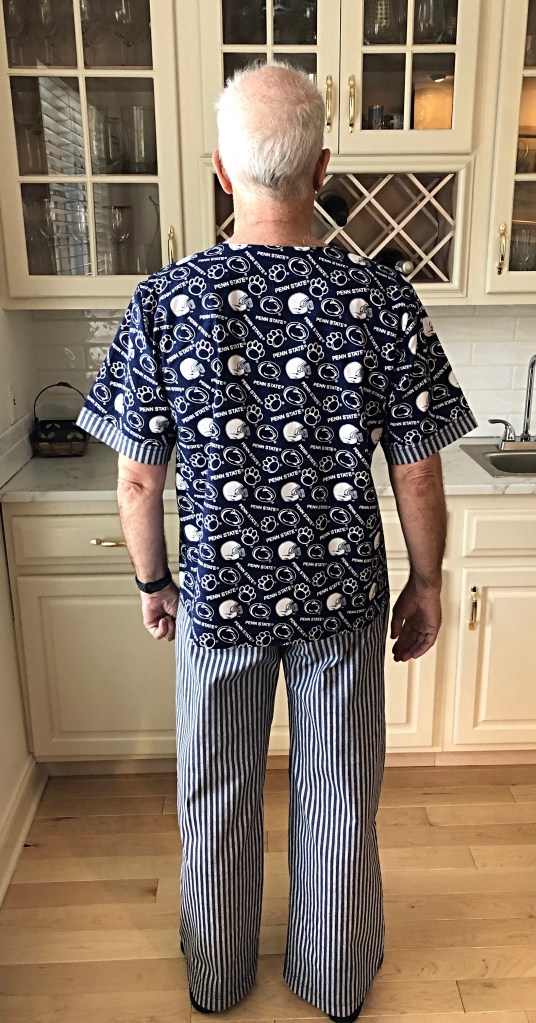
To advance to the next round of this competition you really have to make your garment stand out. You might be able to get away with a perfectly sewn garment and excellent pictures for the first round but each year there are more entrants so that means you have to do something to catch the eye of the judges, and in this case, add elements that made the PJs unique for the wearer. I had the print and striped fabric so decided to mix things up and use bits of both fabric on both the top and pants, and add piping where possible.

Construction Basics

For both pants and top, I finished all the seam allowances through the serger to keep them secure through many washings. All hems were stitched with my coverstitch.

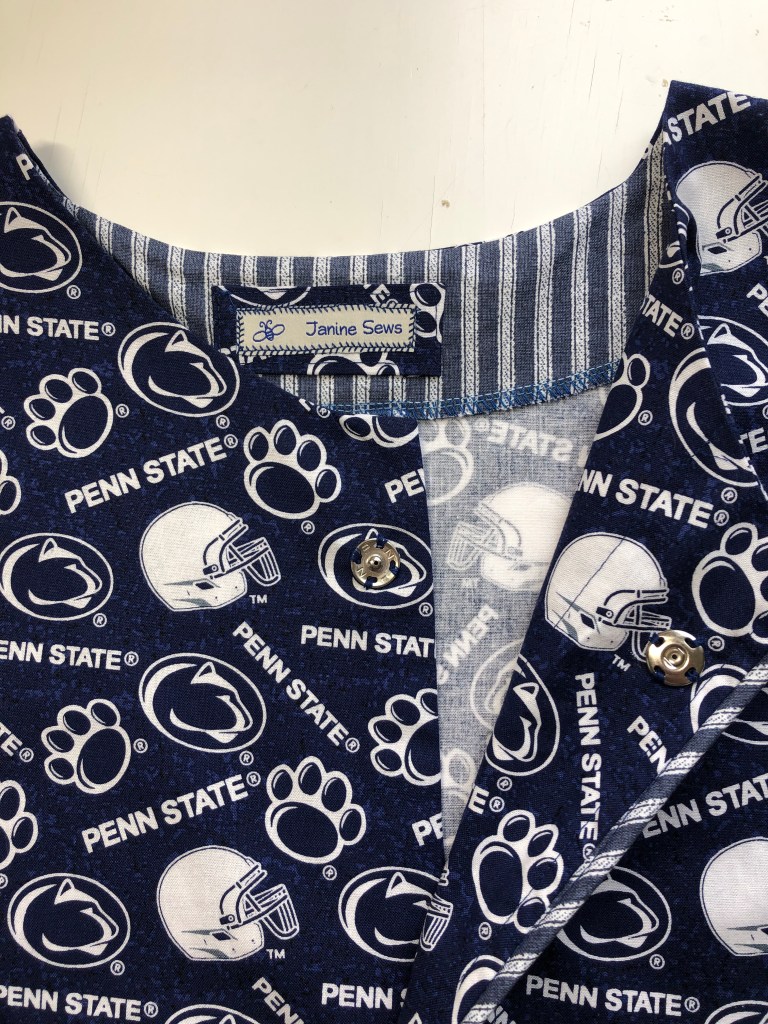
The top pattern piece has fold over front facings. I wanted to add piping so I separated the front piece into a front and a facing. I didn’t trace, I just cut down the fold line and had to remember to add a 1/2″ seam allowance to each side. That allowed me to insert a strip of facing down the front.

Facing piece on left, piping in middle, front piece on right

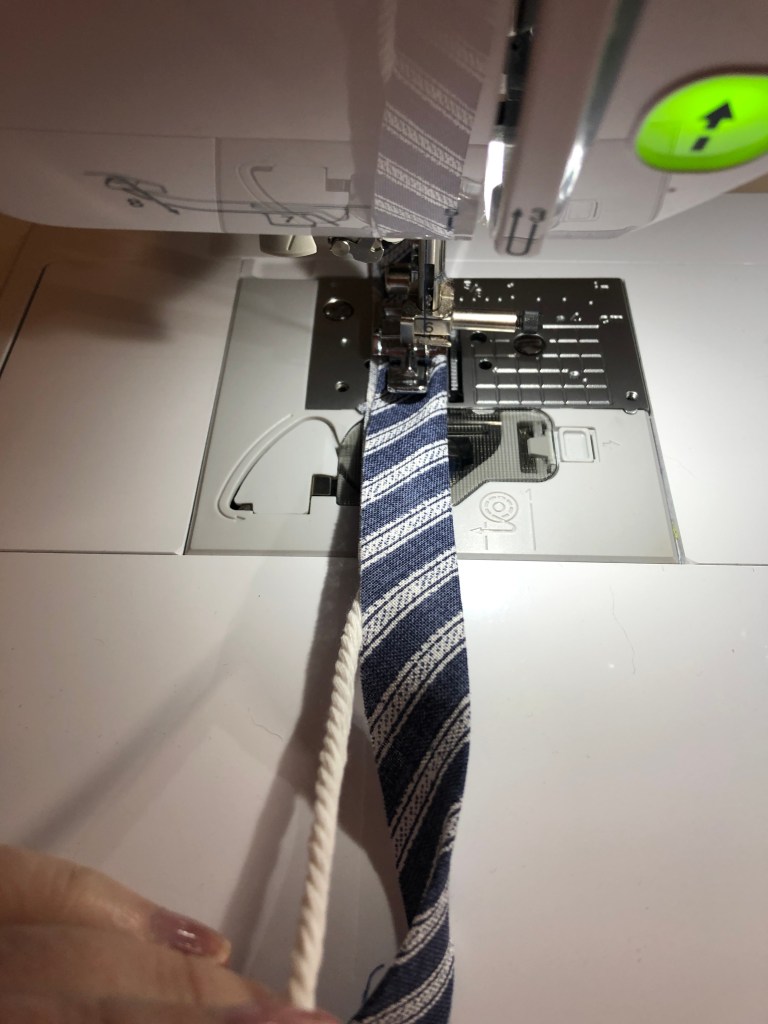
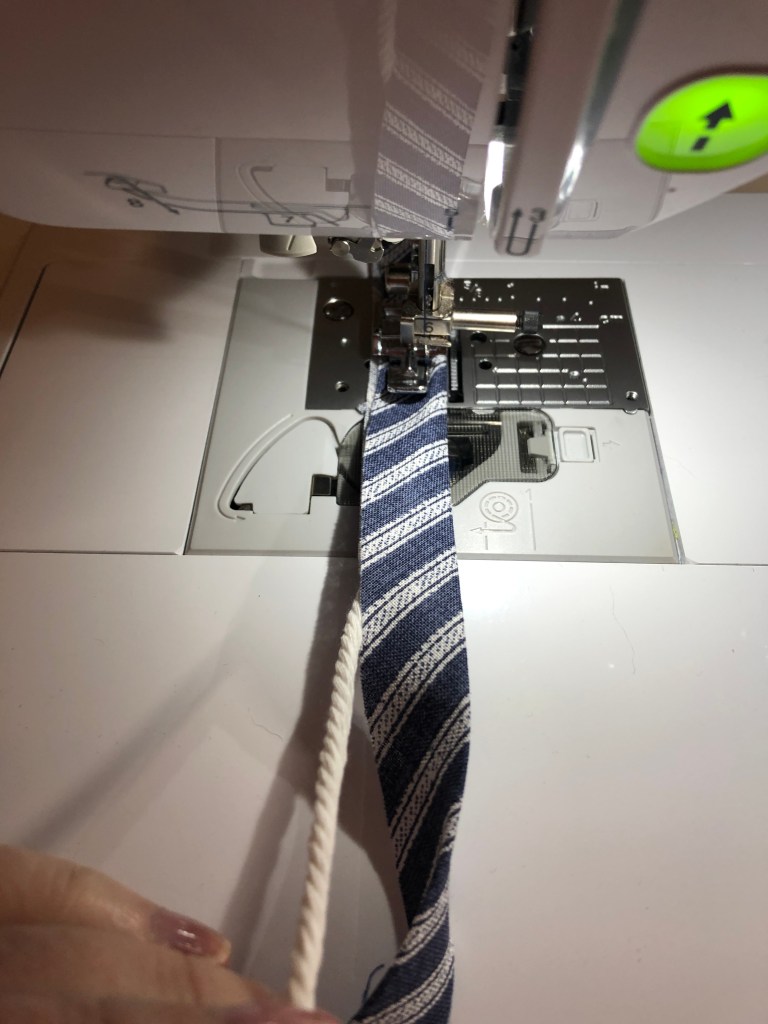
The piping was made by cutting 2 1/2″ wide bias strips of the striped fabric. I then folded the fabric over 1/8″ cording and stitched the piping closed on my regular machine with a zipper foot installed. The piping was inserted between the front and facing on the left side only. (I had to keep reminding myself that this is a man’s top so it closes bassackwards.)

Because I only had 2 yards of the PSU fabric, I was a smidge short for the sleeves. They were cut about 1″ too short and my husband declined to sign off on the capped sleeves design feature. I had plenty of striped fabric so I added 3 1/2″ of striped fabric to the bottom of the sleeve then folded it under and coverstitched along the seam line.

For the front closure, the pattern suggested either buttons or snaps. I asked DH what he would like and he chose snaps, so I stitched on big old snaps. To secure the front band so it didn’t pull, I ran a row of stitching down the front from the neckline to hem, 2 1/4″ in from the edge of the front.

Time to do the pants!

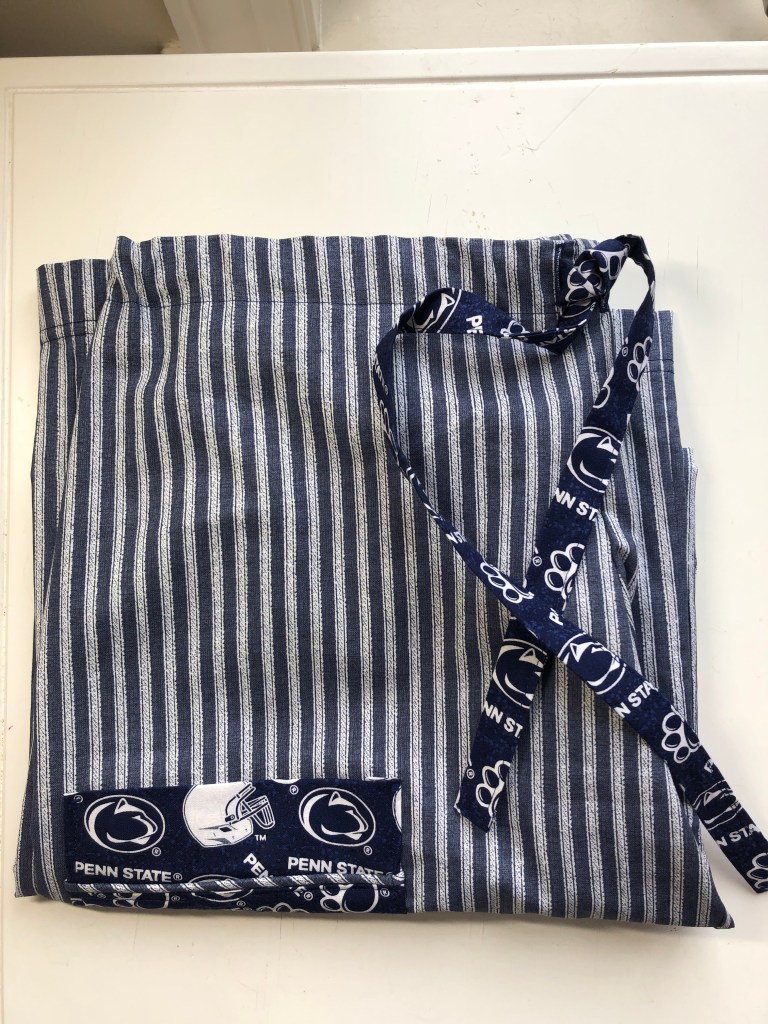
Oh, these pants are a quick make! I sewed the side, inside and crotch seams on the serger. For the waistband, DH had asked for a combination of elastic and ties so I stitched button holes in the front of the waist band to allow for ties.

For the waistband itself, I made two fabric ties from the contrast fabric, each 15″ long with one end finished. I cut an 18″ piece of elastic then stitched a fabric tie to each end of the elastic. The elastic segment of the waistband went at the back, and I ran a row of stitches in the centre back of the waistband to hold the elastic in place. The fabric ties came out through the button holes. This will allow him to either tighten or loosen the waistband as needed. It gives a lot more flexibility than just a piece of elastic.

DH’s primary request was a pocket for his Kindle, on the right leg, above the knee. (Yes, he was that specific.) I used a piece of the contrast fabric and added piping then stitched it on the leg.

Once the pocket was on and hem stitched, these were done!

This was a fun and easy project to sew. I have not sewn anything for him for quite awhile and honestly, it was so easy to fit … I cut a medium and there were no adjustments. Gee, what a difference from sewing clothes for me!

He likes his PJs and is ACTUALLY WEARING THEM!