Sewing · Simplicity

Pattern Review: Simplicity 8843 Anorak

This garment was sewn and reviewed in March 2022. I wrote a review on a sewing website/forum that I no longer visit or use. Rather than lose the reviews, I’m recreating them here on my blog.

The Pattern

Get ready for spring or fall with this great utility jacket. Available in sizes XXS-XXL, this anorak features optional hood with zip-front closure and pocket variations. Express your individuality by making this jacket sportier using organza, or go for a casual look with twills and cotton fabrics.

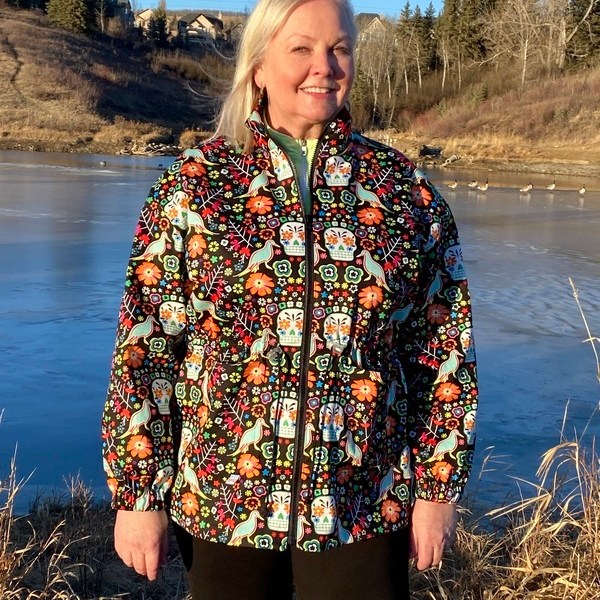
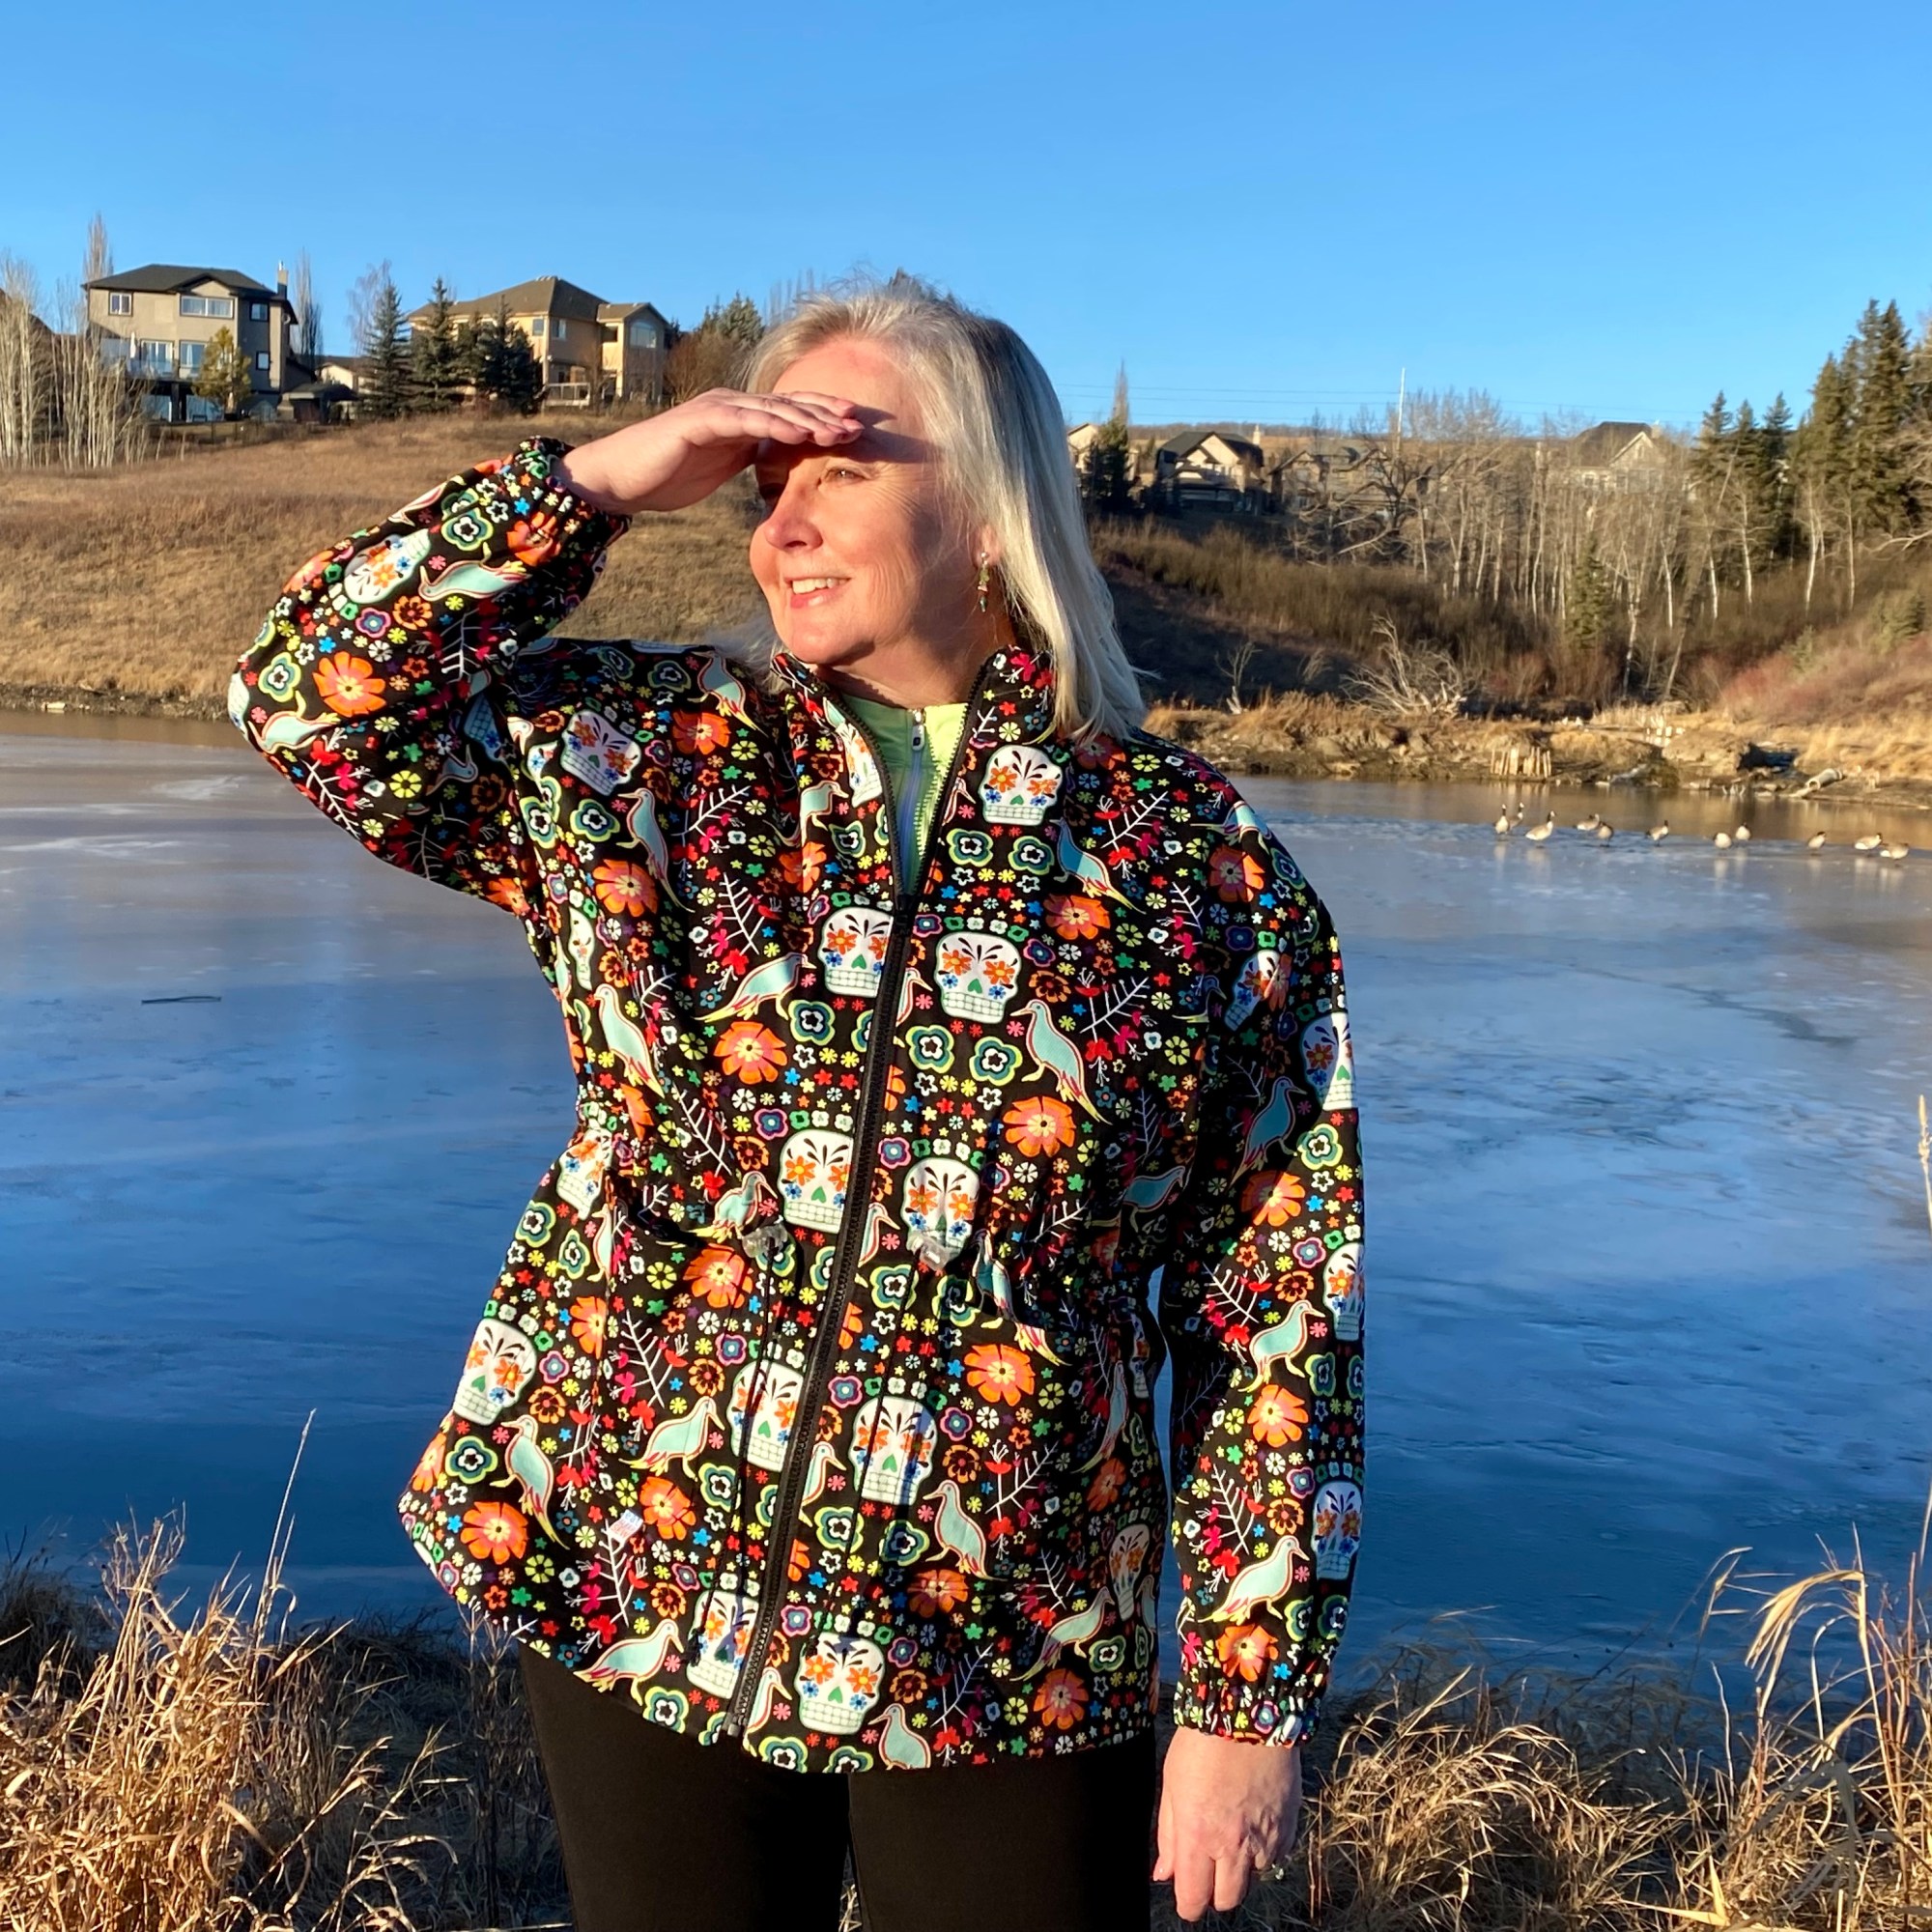
Simplicity 8843 – I made the version without the hood in size Large.


Now that I’m back in a cooler climate, I need jackets. Anoraks are great for this climate and my ‘shape’ in life because they are long enough to wear over tights or leggings, big enough to wear over a sweater, and the waist tie adds some shape (and keeps the cold wind out).

Fabric Used

100% Cotton Twill for the jacket. 100% Nylon ripstop lining.
Both were gifted to me by FabricMart because I’m a Fabricista vlogger/blogger.

Alterations and Changes

I added a lining to make this wearable in early spring in this part of the world where spring may not come until late May. I have not added a lot of linings in my life but this was relatively simple because I just needed to use the front, back, and sleeve pieces for the lining.

For a bit of fun, I fussy cut a piece of the design and stitched that to the inside of the lining. No one else will see it, but it was something that made this jacket bespoke.

Sewing Comments

Again, another relatively easy project that a beginner could sew with a bit of patience. There are challenges with the zipper (made more challenging by adding the lining). And I added work for myself when I used a bold print that would need to be placed properly and matched. I did not mark the pockets well so first sewed them on too high, then when I moved them down they needed to be recut to align with the print.

The cord at the waist is in an external channel that again, needs to have the print aligned. That was actually easier than the pockets!

Conclusion

This turned out to be a really enjoyable sewing project and I’m really happy with the final result!

I would definitely use this pattern again, perhaps with a technical fabric. It’s a nice shape for every day. I wasn’t as successful in matching the fabric design as I had hoped to be but I did add a lining and that was a growth moment 😉

This is a great weight fabric, and the ripstop lining does a good job of cutting the wind which makes this a good choice for spring and fall. And the design is interesting but not so weird that it can’t be worn as outerwear to work.

Thoughts after wearing this jacket for a year

One change I would make if I use this pattern again is to add some length to the sleeves. They are just barely long enough when walking around but pull up when driving. There’s a bit of fabric left in a scrap bag so this may become one of those ‘mending’ projects for the future.

If you’d like to see more, this project is on my YouTube channel.
Sewing an Anorak for Spring

Indie Patterns · Sewing · Vogue

Two Pieces | Vogue 9181 + Jalie Emilie

An Outfit for First Snow of the Season

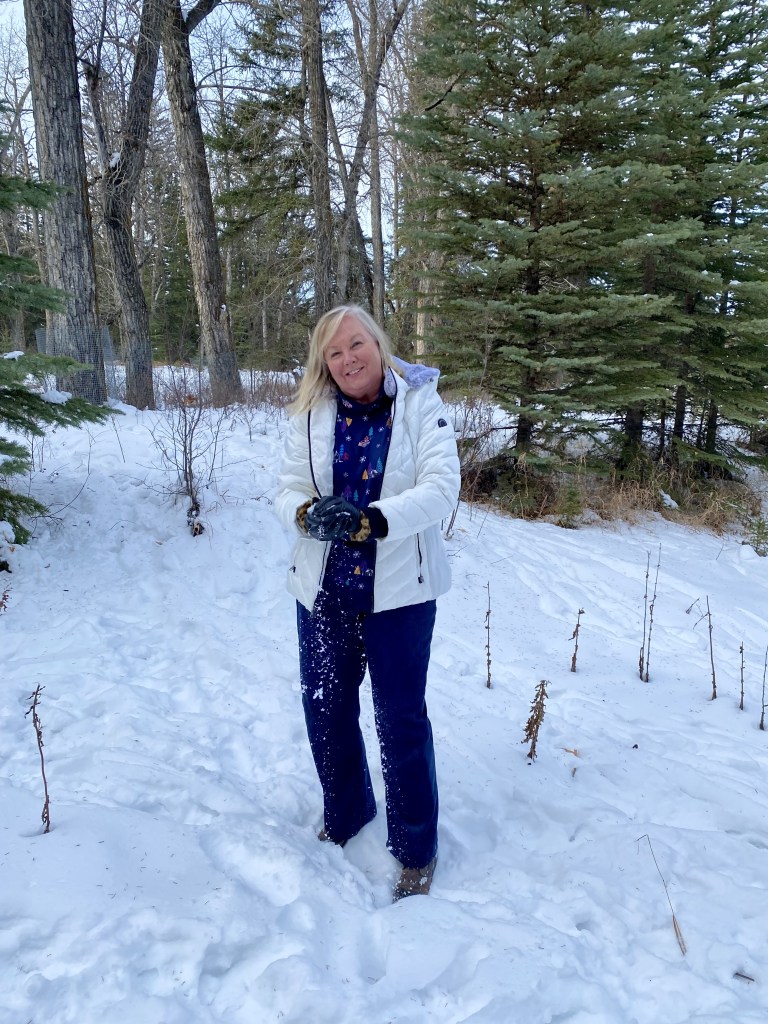
We had a marvellous autumn in western Canada with warm dry days and just a couple of hints of frost. When I was perusing Fabric Mart Fabric’s site in October, I was tempted to focus on pretty florals for blouses or dresses but part of me knew that … (da dah dum … ) winter was coming. Fortunately, Fabric Mart was stocked with a huge selection of cooler weather fabrics that are perfect for winter or holiday sewing.

Over the past several months I’ve been planning my sewing projects so I have pieces that work together so I decided to pick a print fabric for a top, and a solid for pants, using navy as the base.

Pants

For the pants I selected a Poly/Nylon/Spandex Stretch Corduroy in Navy. Corduroy is great for cooler weather, but if you live in a cold climate with blast furnaces you know that heavyweight cord can feel good outdoors but too warm when you come inside. This fine 14-wale corduroy is warm enough to wear outdoors but will be especially comfortable indoors. It also has a bit of drape which makes it nice for trousers. And who doesn’t want some stretch?

I selected Vogue 9181 (Custom-Fit Bootcut Pants) because it is designed for stretch woven fabrics, it has bootcut legs, and it has a front mock zip. For the past several months I’ve been working on the Top Down Center Out fitting method for pants and this pattern, with its shaped waistband, works especially well when learning Top Down Center Out. I first made a half-toile using muslin, then marked up the pattern and cut out the corduroy. The fabric was really easy to cut and sew. It does shed a bit but not nearly as much as cotton corduroy. I used a stretch needle and sewed the seams on my sewing machine, then serged the seam allowances.

I made two mistakes when sewing the pants and both were simply a result of a lack of experience working with corduroy. The first was neglecting to sew a test buttonhole on scrap fabric. That resulted in a good hour of unpicking after I made the same mistake twice! The second error is more embarrassing but I know I’m not the first nor will I be the last to do this. When I cut out the cord I didn’t even think about the nap of the fabric. So my finished pants has the nap going up on the front and down on the back. It makes a difference! I’m hoping that no one will notice and if they do, they’re looking too closely.

These pants are super comfortable. I like the drape with the boot cut shape.

Top

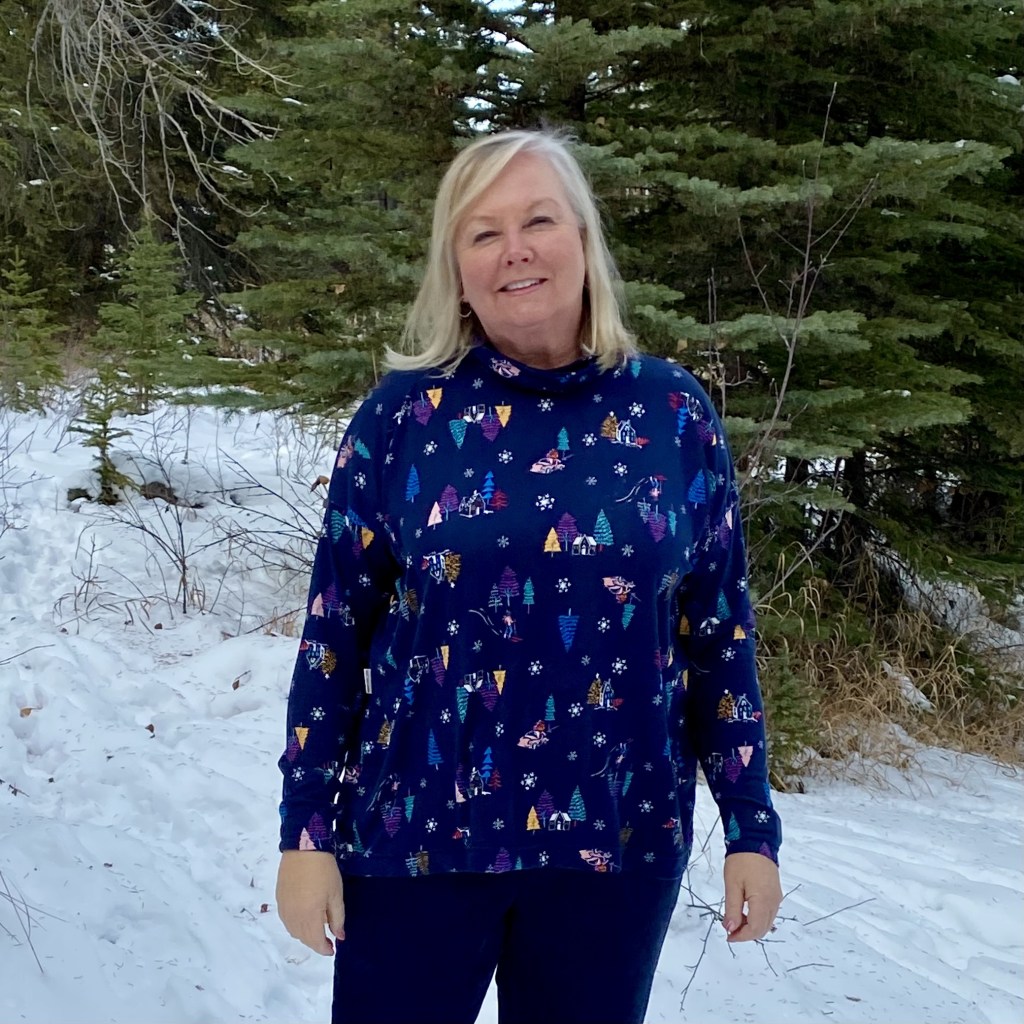
The second part of my outfit is a loose-fitting turtleneck that is perfect for winter weather.

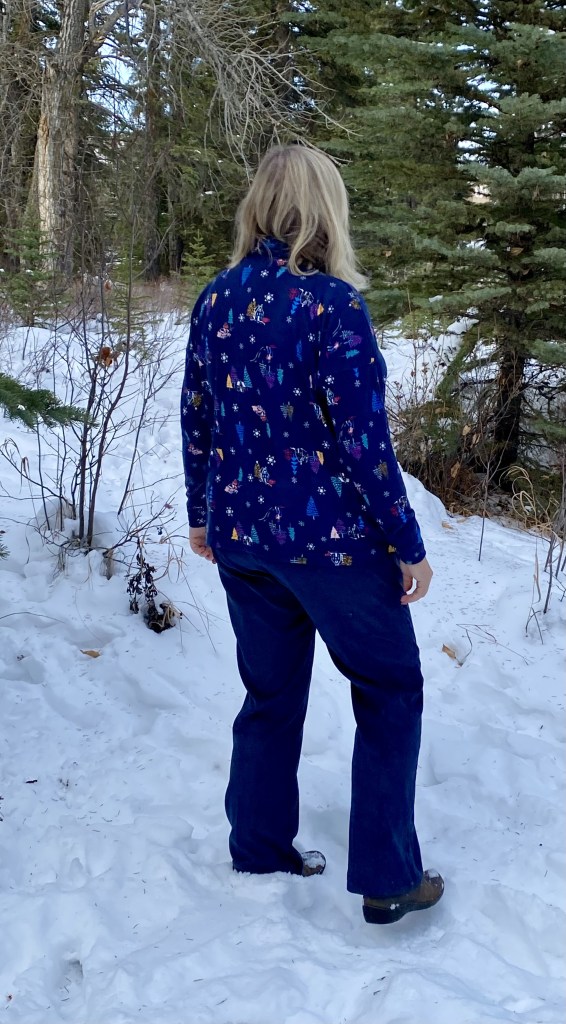
When I was shopping Fabric Mart in the middle of October there were a number of fun holiday print fabrics and I just couldn’t resist this brushed sweater knit with Christmas trees and cabins in non-traditional colours. I think this print will be wearable throughout the winter, not just over the holiday period. This sweater knit is a poly/lycra blend and the stitches are very fine so it feels like a jersey. It has lovely drape and feel cosy but not too warm.

I went back to a favourite pattern, the Jalie Emilie. This free, downloadable pattern is sized for girls aged 2 through bust measurement of about 51″. It’s oversized with dropped shoulders and a turtleneck collar. I’ve used this pattern several times and love it because it’s such a fast make and is a great shape for wearing over tights or pants. And it’s fast! You can sew the whole sweater on the overlocker or serger, or on a sewing machine. The only change I make when sewing this top is to slightly change the shape of the columnar tube collar so it’s more loose fitting around the neck.
As you can see, we’re already in winter mode here in western Canada! I know I’ll get lots of wear out of both of these pieces. Only about seven months of winter to go!

Indie Patterns · Sewing

Thread Theory Designs Finlayson Sweater

Sewing for Men


From Thread Theory: This sweater is a grown up version of the classic hoodie. It will be a wardrobe staple due to its cozy boxy shape and hard wearing cuffed hems but there is no worry of looking like a slob while wearing it!

Early in 2022 I participated in a sewing challenge and my focus was free patterns from Canadian designers/pattern companies. This was a great exercise as it introduced me to new-to-me companies. One of those companies is Thread Theory.

When I decided to make something for my husband, I remembered Thread Theory and purchased the Finlayson patterns for a hoodie. This was not a free pattern however, I thought it was well worth the money because it’s a basic. (*Note – all of the companies I discovered in my challenge are included in my Resources page.)

The pattern is well drafted and easy to use. There’s one set of notches missing – you mark a notch on the bottom edge of the hoodie but there is not a corresponding mark on the bottom band. Not a big deal but worth noting.

This pattern was appealing because of the way the hood is attached – more like a shawl collar than just a hood stuck on in place of a collar or collar stand.

Fabric


Sweatshirt fleece from Fabricland West (Canada). It’s a nice fabric (that means expensive!) that wasn’t difficult to sew. Ideally, I would have used ribbing for the hem and cuffs. Next time …

Alterations

No alterations! Gosh, it’s easy sewing for a guy. Granted, it is a sweatshirt …

I cut a straight L for my husband. Because this is a relatively slim fitting design, I stitched the side seams at 1 cm to give him a bit more breathing room.

Embellishments

The inspiration for the embellishments was his BMW motorcycle – it’s blue, black and chrome as is the BMW logo. And his helmet is red (check out the embroidered rider). For embellishments I focused on things that were: a) masculine, b) sporty and c) not over the top because he’s not an over the top guy. 😆


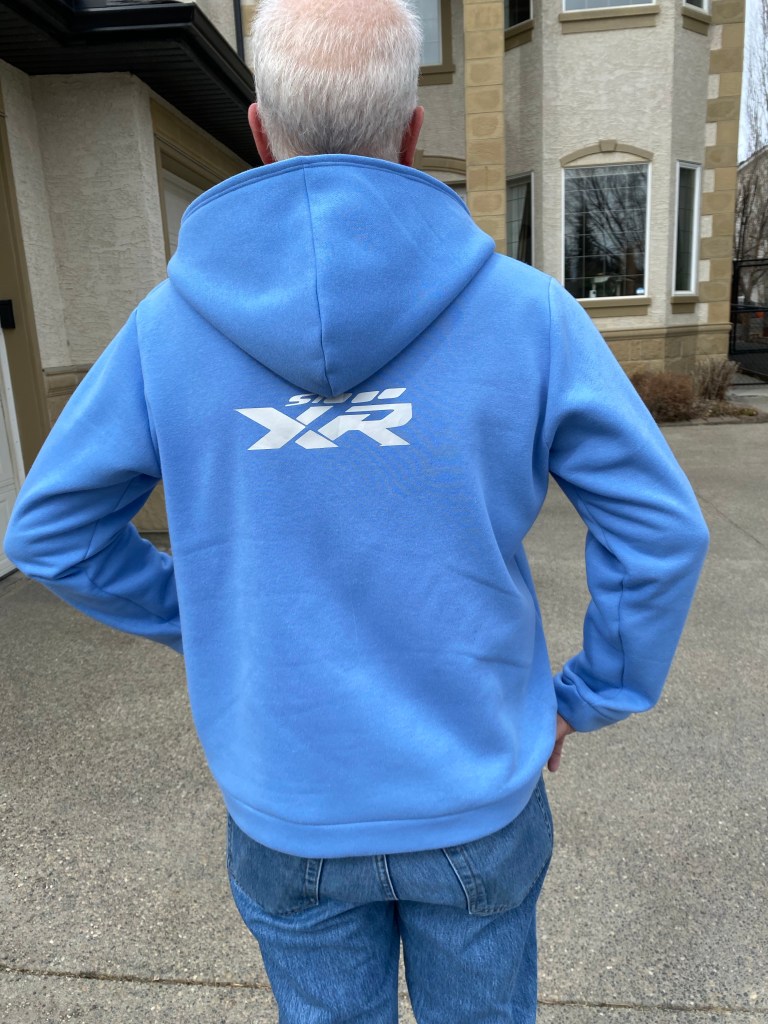
My husband is a motorcyclist and anything BMW will be worn!

LEFT SLEEVE: I wanted a design that was simple and conveyed speed since he likes to ride fast. On the left sleeve I sewed on a stripe that is made up of two layers of grosgrain ribbon (1″ black with 3/8″ ivory layered over). The ribbons were first attached using Steam a Seam and then stitched along the edge.

RIGHT FRONT CHEST: He asked me to incorporate a BMW logo that he had sitting in a drawer. “You can sew it on with your machine.” Yeah, it’s rubber. It was stitched on by hand using topstitching thread.

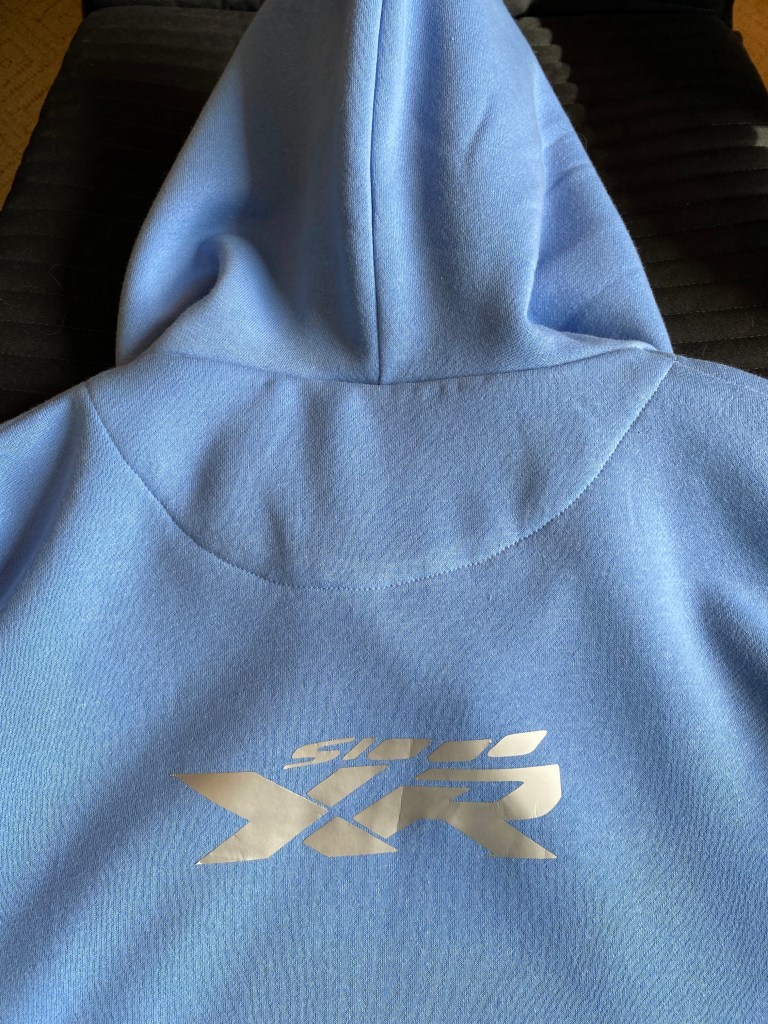
BACK: I used my Brother ScanNCut machine to scan the logo for the model of his motorcycle then cut it from heat transfer vinyl and ironed it on. I haven’t used this machine much so this was absolutely the most challenging part of the whole project and took the most time.

INSIDE BACK FACING: The inside back facing got the most attention.I embroidered a motorcycle rider (with a red helmet), attached some grosgrain ribbon to finish/smooth the back neck seam and sewed on a Kylie & the Machine label.

He likes things that are relatively understated so this has enough accents and embellishments to make it unique but it isn’t so over the top that he won’t wear it out of the house 😁

Indie Patterns · Sewing

Pamela’s Patterns Softly Pleated Dress & StyleArc Coral Cardigan

An outfit for Sew Over 50 Frocktails

I’m a super active participant in the @SewOver50 community on Instagram and also volunteer as the Relief Editor for the group. There are currently about 43,000 followers of the Sew Over 50 account and it’s a wonderful, welcoming community comprised of those who are over age 50 and sew. We don’t discriminate – those under 50 are welcome to follow along!

In September 2022, the two ladies who ARE Sew Over 50 organised a Frocktails event in Edinburgh, Scotland. Like a lot of people, I had trips planned prior to March 2020 and wound up with a bunch of airline credits waiting for an excuse. One of my pandemic lessons was that life can change in an instant. We don’t know what could happen next week or two years from now so grab opportunities when they come your way! So I took those airline credits and bought myself a ticket from Calgary to Edinburgh. Then I started thinking about what kind of frock I would wear to Frocktails!

I set a few requirements for my garment before I settled on a pattern and fabric: a) comfortable, b) pack/travel well, c) versatile and d) suitable for late-September weather.

A quick lunchtime visit to Rick Rack Textiles and I’m ready to sew!

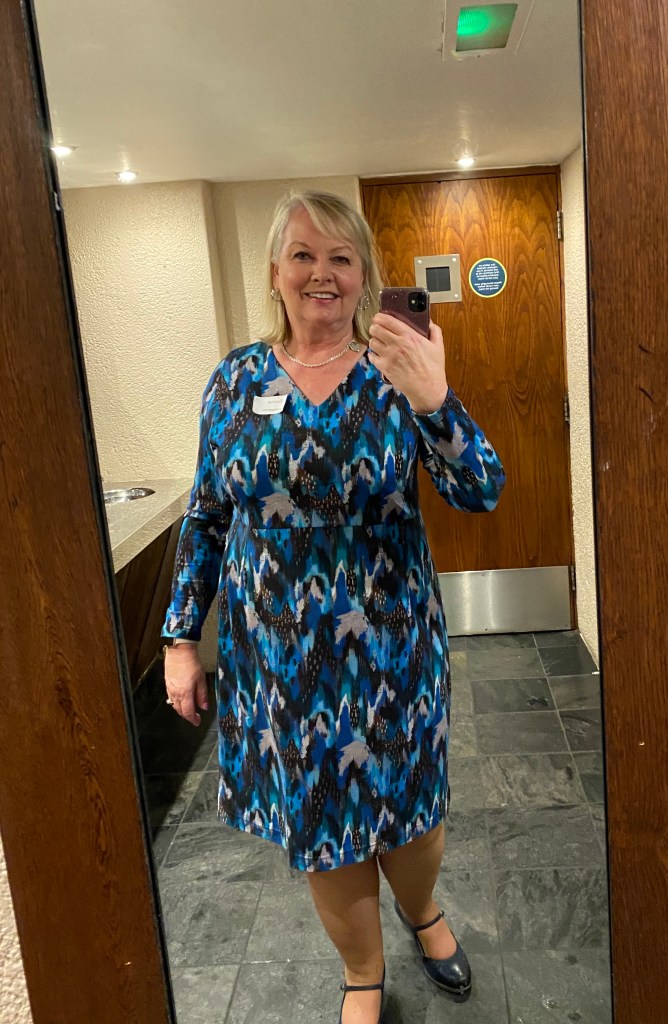
Dress: Pamela’s Patterns Softly Pleated Dress

I’m a fan of Pamela Leggett’s patterns because they are well drafted classics that are designed to fit the more mature figure. For this event I wanted a comfortable dress that could be later worn to work, for dinner or out for events. This pattern fit the bill.

The fabric I purchased is stretch cotton (95% cotton, 5% spandex – about 200 gsm) designed by EttaVee for Riley Blake Designs. In the fabric description it lists that it is suitable for t-shirts, leggings and sleepwear. Does that make for a comfy dress? You betcha! I selected this fabric for the colours and also the design that was decidedly NOT florals. (I tend to gravitate toward florals and have way too many in my wardrobe.)

I selected this pattern because it was designed for knits, it has some shape (it’s not a loose fitting dress) and it is suitable for everything from a day at work to dinner out. Pamela also provides excellent directions on how to adjust her patterns, so I knew that I could finesse the fit.

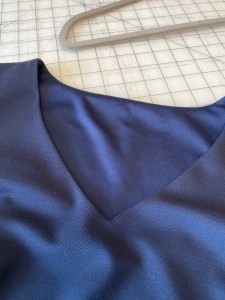
Before I started cutting I made two adjustments to the pattern. First, I changed the neckline from a square or scoop neck to a v-neck because that’s more flattering for my bust. The second change was to line the bodice. This allowed for a beautifully turned v-neck and also helps the bodice to lie nicely. The photo on the left is of the lining in the bodice.

I selected a size based on my upper bust and went from there. Once the dress was basted together, it was clearly too large so I followed Pamela’s detailed instructions to move the waistband higher, shift the front and back pleats to the most flattering point, and taper the skirt. In the end, I wound up with a dress that fits so well. And it was made to be packed in a suitcase!

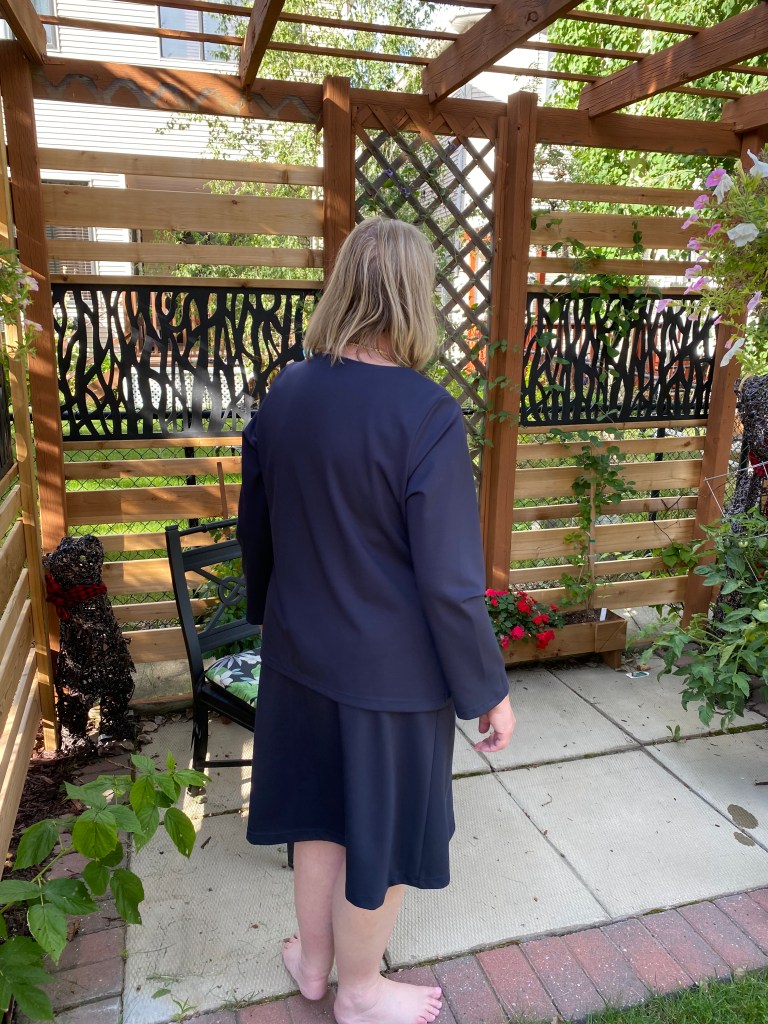
Topper: Style Arc Coral Cardigan

When I was shopping at Rick Rack for the dress fabric I spied a wool blend that matched perfectly and it seemed like the right weight for an autumn cardigan. I hadn’t planned to make a cardigan but the match was just too good and I expected that I would need a cardigan or jacket in late September. This fabric is called “Lana Bolito” and content is 65% viscose and 35% wool. The weight is 340 g/m2

I have several cardigan patterns but was ready for a change, and I also knew that this fabric would work best with a pattern that has some structure.

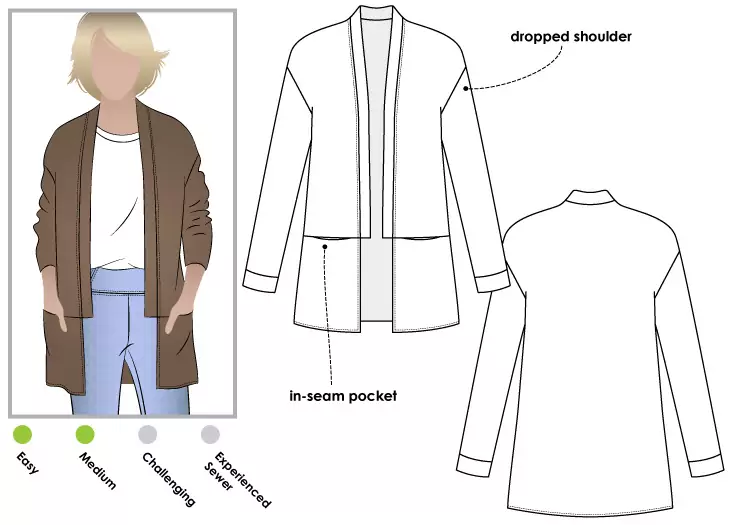
The Style Arc Coral Cardigan is a relatively basic cardie but what makes it different is the front band that ends at about the waist, giving a bit of definition and also showing the structure of the jacket. There is also a seam at the front with inseam pockets, providing a chance for the fabric to shine.

I’ve only sewed Style Arc one other time and know that their instructions are often rather minimal but in this case, it didn’t matter because this is a very simple garment that went together in record time. My skills are also much better than they were last time I sewed Style Arc.

This fabric doesn’t ravel so the seams don’t need to be finished and in fact, I could have gotten away without hemming the jacket or sleeves but I’m not that much of a bohemian.

In the end, I made one small change to the pattern. As you see in the photo on the left, there is a cuff for the sleeve. This fabric was quite bulky and I didn’t like the idea of a cuff so instead, I made a 1.5 inch (3 cm) facing for the sleeve and that gave a nice, crisp line.

I love this cardigan. I think it’s one of my favourite makes this year. When I finished it and took it to my closet, I realised that it coordinates perfectly with several tops in my wardrobe. That means it will be worn and not just hang in the closet! I suspect that I should have washed it several times to pre-shrink and am a bit concerned about how it will react to water so this will be a ‘dry clean only’ cardigan.

The cardigan and dress made it to Edinburgh for Frocktails and they had a wonderful time! As it turned out, Scotland (like Alberta) had a warm autumn so the cardigan wasn’t needed for the event but it wandered up and down the cobblestone streets of Leith.

If you would like to hear more about the Frocktails event, please visit take a look at my YouTube video – Janine Sews Goes to Frocktails. I’ve included many pictures plus video of the fun.

I’m so very glad that I went to Frocktails! I have memories that will last a lifetime, and will be reminded of my lovely sewing friends every time I wear my dress or cardigan.

Sewing · Vogue

Vogue 1568 Ponte Tunic

This project is part of my focus on Wardrobe Basics for Autumn 2022. I have a real dearth of basic garments in solid colours and so set about sewing things that will be reliable pieces for wearing to work or going out. These aren’t going to be trendy pieces but rather garments that can be worn over and over again and made interesting with the addition of scarves, jewellery, or interesting toppers.

You can learn more about these projects on my YouTube channel – Janine Sews – and the link to the video featuring this tunic is here.

The first garment is a tunic using Vogue 1568, a “Today’s Fit” pattern by Sandra Betzina from 2017.

The photos on the pattern envelope don’t do it justice. Think more JJill (like the tunic to the right) and less organza or netting. By the way, I used to wear a lot of JJill when I lived/worked in the U.S.A. I always liked the very clean lines that were more about comfortable elegance and less athleisure or coastal granny,

I looked at this pattern a dozen times before deciding to give it a try. Why the hesitation? It’s lined. Lined knit. I specifically wanted a tunic with either a V-neck or slash opening and after looking at other options, I decided to sew this since the line drawings represented what I wanted. I selected View B which is a pullover tunic with a V-neck and slits in the side.

Fabric

For this pattern I used a lovely mid-weight rayon Ponte de Roma that I purchased from Olga’s Fabric Lane here in Calgary. I bought enough to make a set of coordinates – top, pants and skirt. Those reviews will come at some point in the not-too-distant future.

The lining was purchased from Fabricland West. And it was almost a perfect match to the fashion fabric. The lining is sitting on top of the cut fabric in the top of the photo on the left.

Adjustments

There are no finished garment measurements on the tissue (although the instruction sheets refer to their existence) so I took a look at the few pattern reviews posted on websites and blogs and decided to go with what I normally sew. In the instructions it is stated that the shoulders are narrow which helped me to make the decision on sizing. I did, however do an FBA. Had there been finished garment measurements I would have definitely chosen a smaller size. In retrospect, had I taken the words ‘loose fitting’ seriously in the instructions, I would have had a clue 😅

The Process

Sewing a lined knit garment was quite a challenge! And the sewing steps did not make it any easier. For this garment, you sew the shoulder seams of the fashion fabric, then the shoulder seams of the lining, then the neckline. Then flip it wrong sides together and treat the fashion fabric and knit fabrics as one after basting them together with the machine. Ever tried basting knit to knit? It’s an exercise in patience!

Next steps are to sew the darts, side seams and sleeves. Because you treat the fashion fabric and lining as one, the seams for the bust darts and side seams are visible inside the garment, not hidden in between the lining and fashion fabric. Fortunately, my fabric and lining weren’t overly bulky but I was not enamoured with this treatment. If I’m going to take the time to line a garment, I hope to have a beautifully finished interior.

Once the garment was pretty much completed I realised that it fit well through the shoulders and chest but was too big and boxy from the bust down. As noted on the instructions, the shoulders are narrow so the sleeve cap sits nicely on my relatively narrow shoulders. Unfortunately, I wasn’t happy with the fit around the waist and hips. There was a two-hour long episode of unpicking followed by taking off about 3″ of diameter below the bust.

What Do I Love

  • The neckline finish. Going forward, a lined v-neck will be my first choice for both knits and wovens. (I’ve found a woven pattern that uses a lining instead of a facing and will be posting that review soon!)
  • The lining adds a rich quality to the garment so that it hangs beautifully and makes the top look more handmade and less homemade.
  • The general shape. This mimics what you would find in quality RTW.

Thumbs Up or Thumbs Down?

Thumbs Up – definitely. I’ll use this again with two changes: cut the right size, and have the lining end just below the bust so there won’t be as much fiddling about with basting knit to knit and also to hide the bust darts within the lining.

I wouldn’t recommend this for a beginner because of the whole knit fabric and knit lining thing unless the beginner is willing to just take their time and enjoy the process.

Edit on September 30, 2022: I wore this top plus the pants made of the same fabric on an overnight flight to the U.K. and the fabric looked as good when I landed as it did in the morning. This Ponte would be wonderful for a travel wardrobe. I like it so much that I just bought another piece in plum 💜

Sewing

Keeping Track of Sewing Resources

Does anyone else feel overwhelmed by the sewing resources they’ve collected? Books, magazines, tv shows, blogs, vlogs, webpages … it’s impossible to keep track!

When we moved last summer I ditched (not to the landfill – all were donated!) about a hundred magazines plus a couple of boxes of books and instructional info from sewing events. My reasoning was that most of the things I referred to were online – so why take up real estate with a bookcase full of stuff I never used!

The top shelf is the entirety of my hard-copy sewing library. The bottom shelf is mostly books I use for work.

But I’ve found that I waste a lot of time searching through pages bookmarked on three different computers, or searching for post-its that are inevitably stuffed into a drawer or stuck to a pattern envelope. I was losing valuable time looking for the same information over and over. Compounding the search time was my bad habit of going down rabbit holes – so what would start with an intention to spend a couple of minutes quickly looking at a tutorial would wind up as at least 45-minutes online staring at a screen with my mouth open.

For my own benefit, I decided to record everything in one place – here in my blog. I’ve added a page – My Sewing Resource List – and that’s where I’ll record links to resources that I want to keep track of. Specifically, I’m noting tutorials, guides, informational blogs, and retail stores. This is going to be a living document so it will be updated as I find new resources. If you have resources that you love, please share with me – especially tutorials and learning guides. The retail list includes stores where I spend my money … 🛍

I’m also starting to keep track of free patterns and will be adding to that list. I’ll note if I have used the pattern and my results. If a pattern is a dud, I’ll definitely make a note!

Click on the links on the bar above ⬆to access either of these lists. And let me know if this is helpful to you!