I am consolidating my pattern reviews and will be adding blog posts of pattern reviews that were previously posted on a sewing website that I no longer participate on.
This garment was made in October of 2019. I’m highlighting it today as part of Sew Frugal 23, an Instagram sewing challenge in the month of March, 2023.

Alice and Co. created a free, downloadable Mary Quant mini dress in celebration of the Mary Quant exhibit at the Victoria and Albert Museum in London which ran from April 2019 through February 2020. Here’s a link to the V&A’s website on the exhibition.
In addition to this free pattern, the Minidress, the Georgie dress is also available for free from the V&A website. Search the exhibition website (paragraph above) for that pattern.
Although I was quite young in the swinging 60s, I love the images of Twiggy and friends on Carnaby Street. To me, little shift dresses seem like dresses that can be worn when walking, or dancing, or playing croquet. They are not a shape designed for sitting carefully at tea (although they certainly can be worn for any occasion!)
A link to the free pattern and background information on the V&A Exhibit and Alice and Co’s development of the pattern can be found here: Sew Your Own Mary Quant Minidress
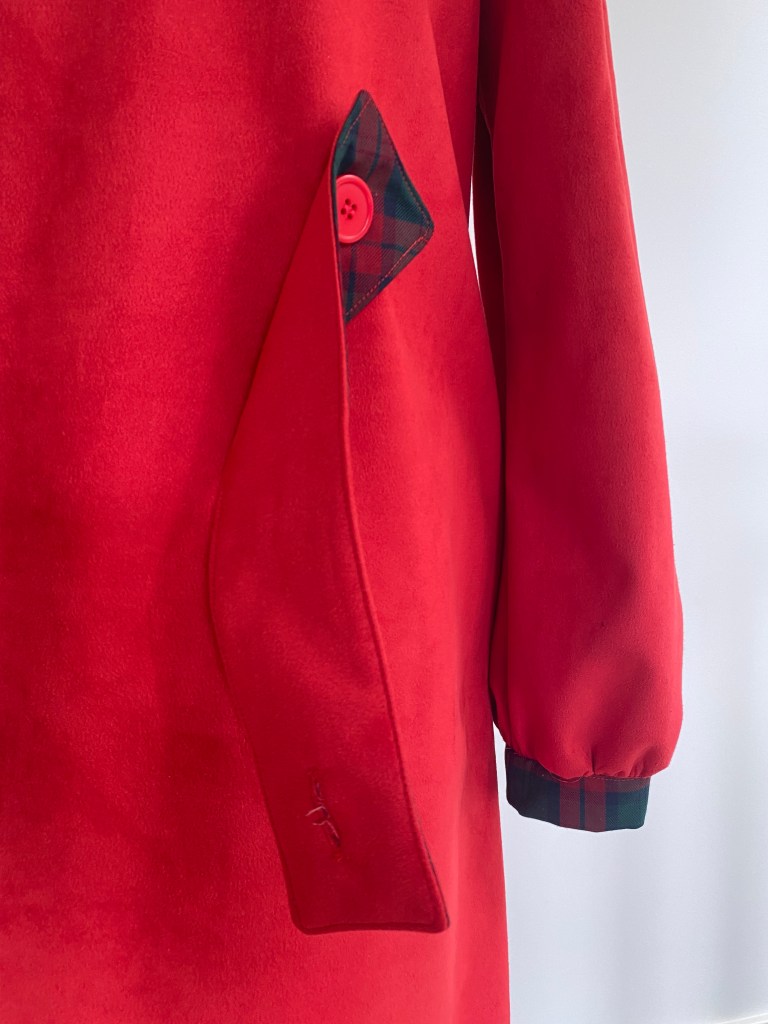
The fabric used for the dress is stretch faux suede that I purchased from Fabric Mart Fabrics. It was featured in one of Julie’s Picks in 2019 and I loved the bright red that doesn’t have a hint of orange so it’s suitable for pink faced people like me.
When I received the fabric it felt more like a sueded scuba. It has quite a bit of bounce to the fabric and certainly does not drape. I thought that lent well to the A-line of the MQ Minidress.
Before I go into too many details, I want to add that the dress is really nicely drafted. It’s absolutely reminiscent of the 1960s but is also a very wearable dress for the 2020s. There are little details that add to the complexity and sophistication of the dress, such as the shaping at the top of the sleeves (photo below in gallery).
Adjustments
I paper fit the pattern and the bust darts aligned well so the only alteration I made was cutting the dress 2″ longer. Once I had basted the dress together I wound up removing over an inch from each side because it was just too big. There’s obviously quite a bit of ease in the pattern.
After stitching on the sleeves, I took about 1 1/2″ off of the width of the sleeves from the shoulder down to the wrist because my fabric wouldn’t drape well on the gathers. That likely wouldn’t be an issue with a lighter weight fabric.
After I had completed the dress I didn’t like where it hit on my legs so I cut 4″ off the length. I must have been feeling quite young that day because it’s now too short! It’s good over opaque tights but I don’t feel that it’s the best length for me.
And the keyhole is quite low cut, as you will see in the one photo of me wearing the dress with a vest/cami underneath. I will add more photos of me in the dress- but for today there is just the one from 2019.
Sewing ‘Challenges’
The primary challenge I encountered on this project was the front keyhole opening. The keyhole is intended to be faced but once I stitched on the facing it was really obvious – my fabric was too thick and springy. Adding to the challenge, this fabric did not take well to unpicking so I wound up with raggedy edges that needed to be trimmed. In the end, I settled on a baby hem around the keyhole opening. I stitched on my machine and held my breath, hoping that the edge didn’t pop out. This was a solution, but definitely not the best solution. This pattern will work much better with fabric that is lighter weight. If you see me wearing this dress, don’t look too closely at the keyhole opening, okay? 🫣
Somewhere along the way, I decided it would be a great idea to make the collar detachable with fashion fabric on one side and plaid on the other. Not having any idea what I was doing, I drafted a collar stand, added a placket, messed around with buttons then ultimate decided that it wasn’t going to lie flat or look finished so I unpicked a lot of stitches and went back to the original pattern. I think the collar would look better with a stand. The way it is, it does look authentically 1960s.
The final piece was the half-belt on the back, and I endeavoured to place it at the small of my back. This is indeed a reversible belt with one side plaid and the other red. I also used the plaid for the cuffs.
Now, over three years after making the dress, I do still like it and I wear it occasionally over opaque tights on cold days. After I had completed the dress and worn it a couple of times, I cut 4″ off the length. That’s was too much and it’s shorter than I would like, and it’s also a bit boxy but again, that is likely the result of the fabric. I may chop off several more inches and wear it over leggings next year, if leggings are still a thing.
If you are wanting to make an easy dress that has that Carnaby Street vibe, this is definitely a good choice. It’s well drafted and quite easy to sew. And free!


