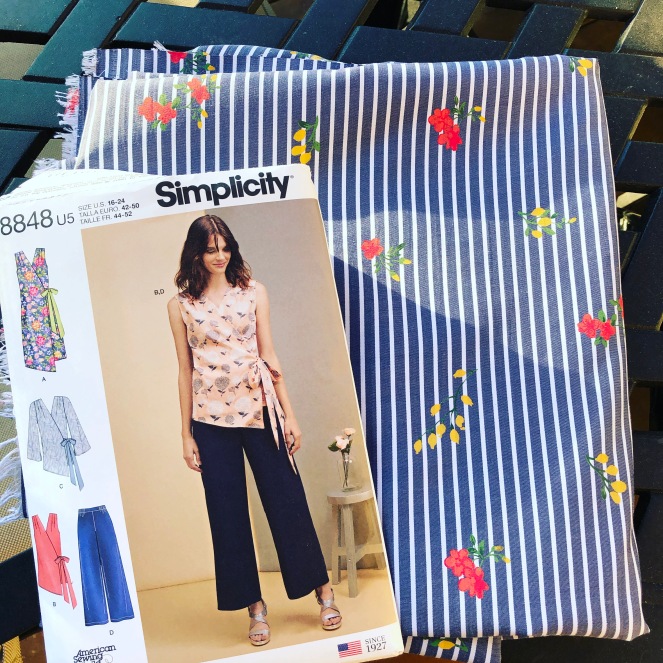
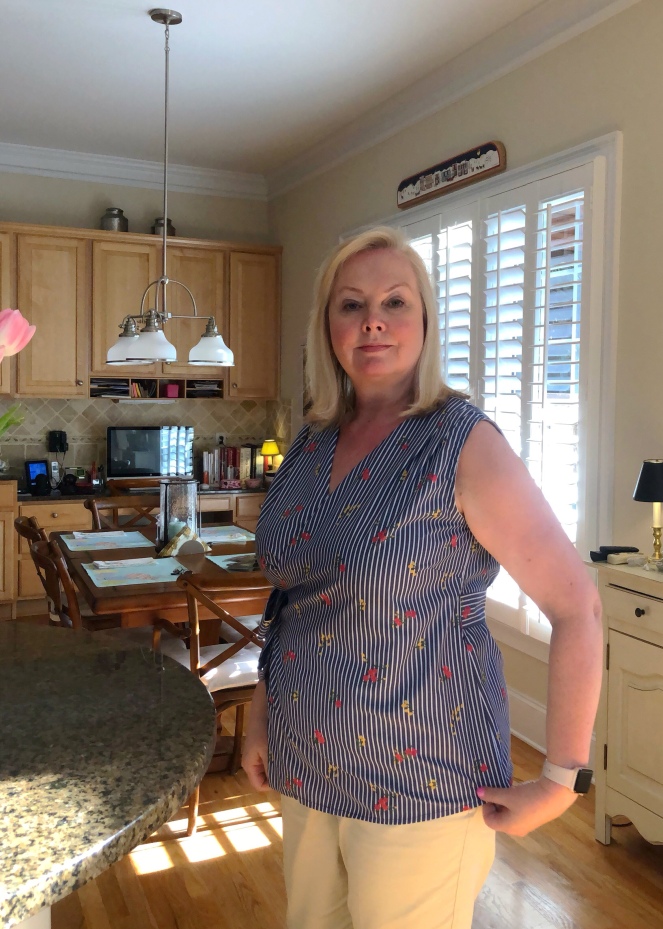
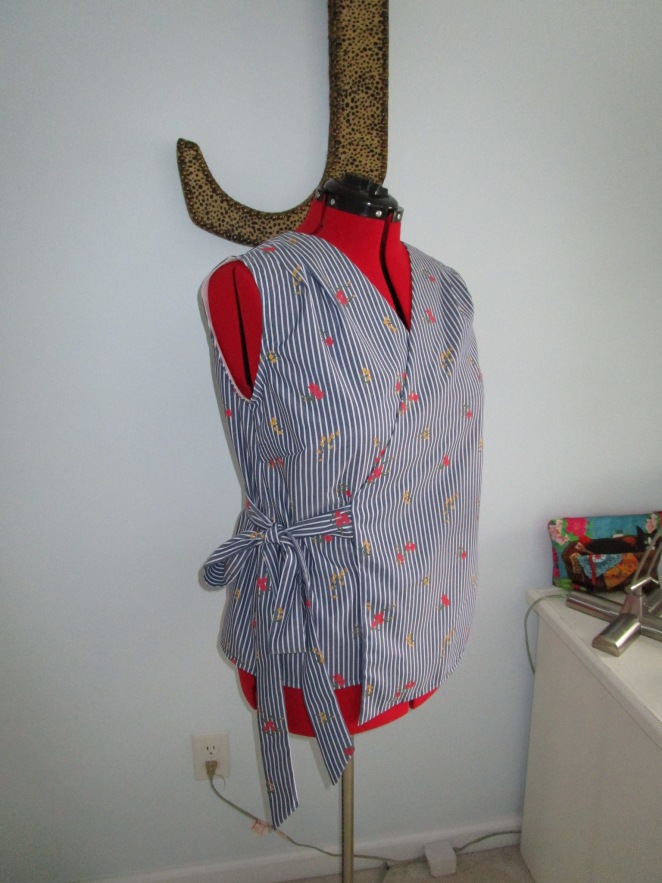
When the Spring Simplicity patterns were released I was immediately drawn to this one for the shape of the top.
Simplicity 8848 is a coordinates pattern featuring a couple of tops, a dress and pants.

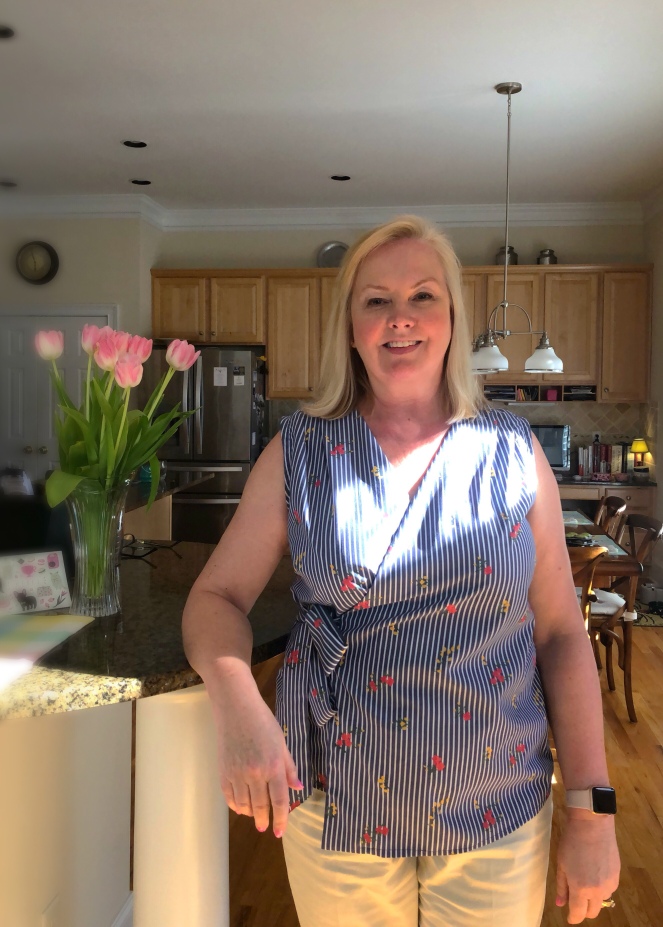
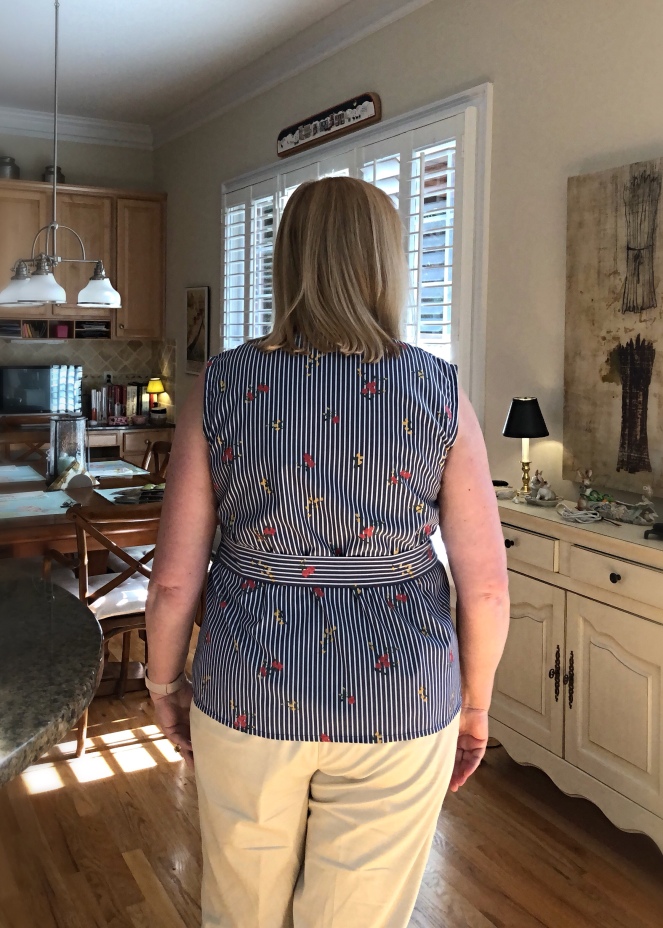
The sleeveless top was appealing for a couple of reasons; the front v-neck is relatively modest, and the ties wrap around the back instead of the front. Ties around the front don’t work great on me – they only exacerbate my lack of a waist.
Fabric
Once again I used a fabric from Hobby Lobby. I know, Atlanta has absolute riches when it comes to fabric stores, but this fabric was perfect for this top. I liked the stripes and interest of the floral, and it’s 100% polyester, so no worries about wrinkles on hot summer days. When you sit most of the day, this is a big deal.
Sewing Notes
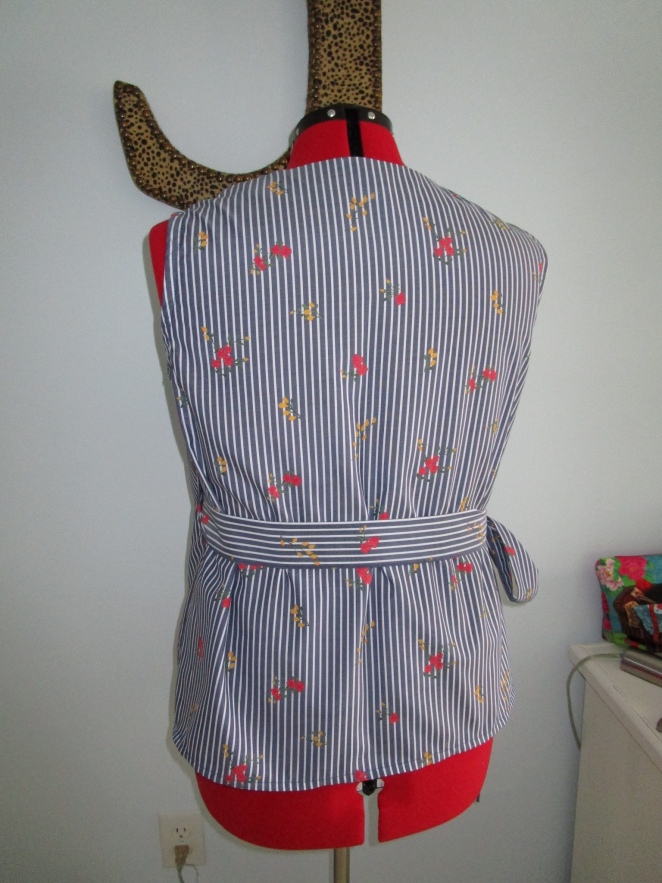
I made a real toile! Since there’s little shape except for the ties, I was a bit concerned that it would just exacerbate my middle-aged spread.
For the toile, I cut a 16 and did a pivot and slide to add 5/8″ to each of the sides at the bust, waist and hips. That worked fine, but there were plenty of pull lines from the bust.
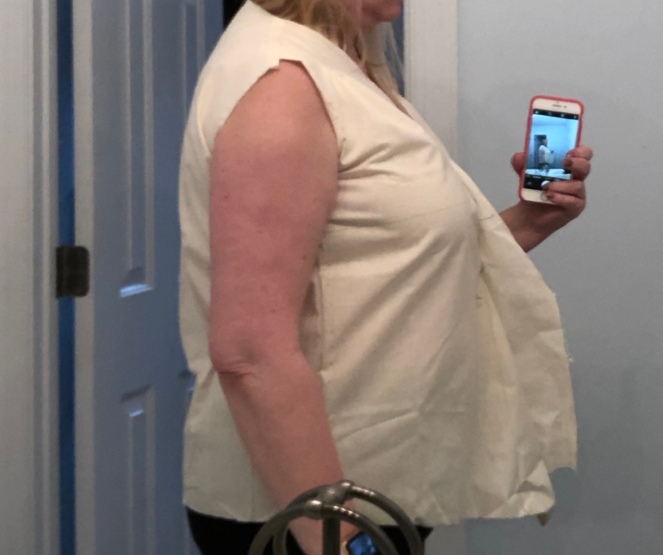
So … I made a second toile – and on this one, I actually added a bust dart. (Feeling pretty accomplished at this moment!)
Once I was happy with the toile I cut my fashion fabric.
Sewing up the fabric was relatively easy, including making one quick change to the top on the fly. The waist ties were placed much too low on my body. If you look at the pattern envelope you’ll see that they sit below her natural waist. Like most women over 50, my waist has moved north, so I had to move the ties up about 2″.
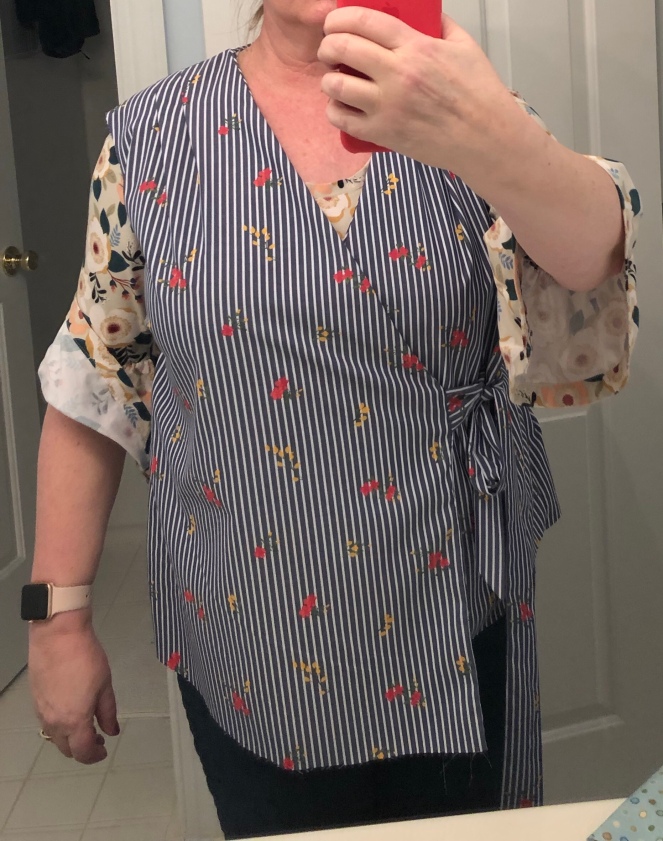 The armscyes were a bit too fitted for my taste, so I took off 1/2″ all around, then stitched on the store bought bias tape as the pattern recommended. This is really not my preferred way to finish the armscye, Next time I’ll create facings.
After the top was finished and I tied it up it was clear that the one tie was at least 12″ too long. I could trip over the ties!
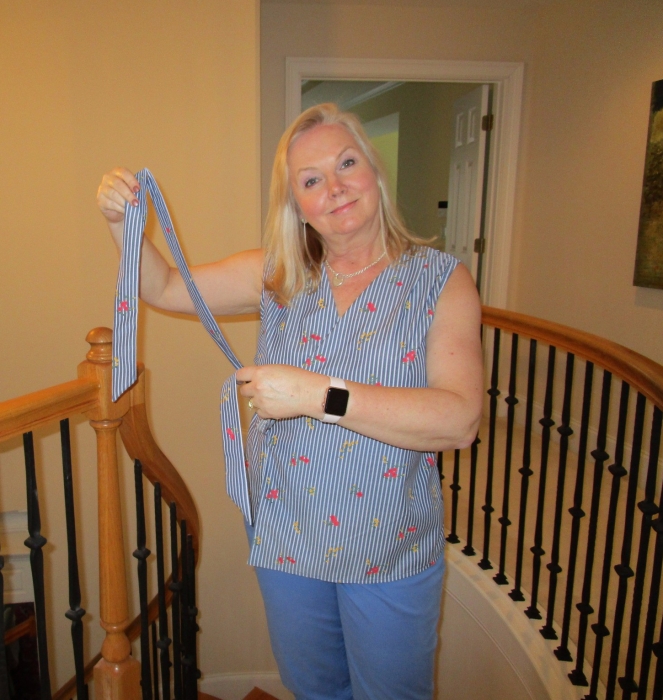
After the top hung for about 8 weeks I finally cut off the tie and stitched it by hand. Now it’s wearable, just in time for warm weather.
The wrap stays closed without any pins or fashion tape, so that makes this a win in my books. I think I’ll make another for summer. Pink seersucker, maybe?


Really like this top. It fits wonderfully. And I love the fabric. Hobby Lobby does have some nice fabric.
LikeLiked by 1 person
Thanks, Lisa! Now we just need some warm weather 🙂
LikeLike
Very nice style and lovely fabric.
LikeLiked by 1 person
Thank you, Jeanette!
LikeLike
Cute! You wear it well! I love that other than the fitting its a fast easy sew! I only use bias tape to finish off armscye on children’s clothing. I definately would prefer facings too!
LikeLike
You look really nice in your new top, the fabric really suits you. Well done in making the adaptions for a personal fit, this is something I need to get to grips with. My next garment will definitely include an initial toile fitting as I have wasted so much good fabric making garments that do not fit very well, or do not suit me. I need to find someone who teaches fit here in the UK as most classes only teach how to make a garment, and I can do that really well after attending many different classes, but no one teaches fitting!
LikeLike
Hello Jenene
This top looks great! You’ve given me encouragement to try my hand at it. I have a ridiculously hard time getting tops to fit. Would you please tell me what you mean by “ I did a pivot and slide to add 5/8″ to each of the sides at the bust, waist and hips“?
Thanks a million and I’m looking forward to perusing you blog to see other lovelies you’ve created.
Lisa A
LikeLike
Hi Lisa!
I’m so pleased that you’re considering this pattern!
A pivot and slide is a relatively simple way to increase the bust (and/or waist/hip) without increasing the size of the shoulders and upper chest. It’s quite simple but does mean an additional step before cutting the fabric. I learned by reading Nancy Zieman’s filling book and watching her video. Here’s a link to the video:
Let me know if this isn’t clear and I’m happy to post some pictures. And thanks for your kind words!
Janine
LikeLike
Thanks so much for this!
LikeLike