Nancy Zieman’s Pivot and Slide method got me thinking that I could fit a button-down blouse.
Pattern
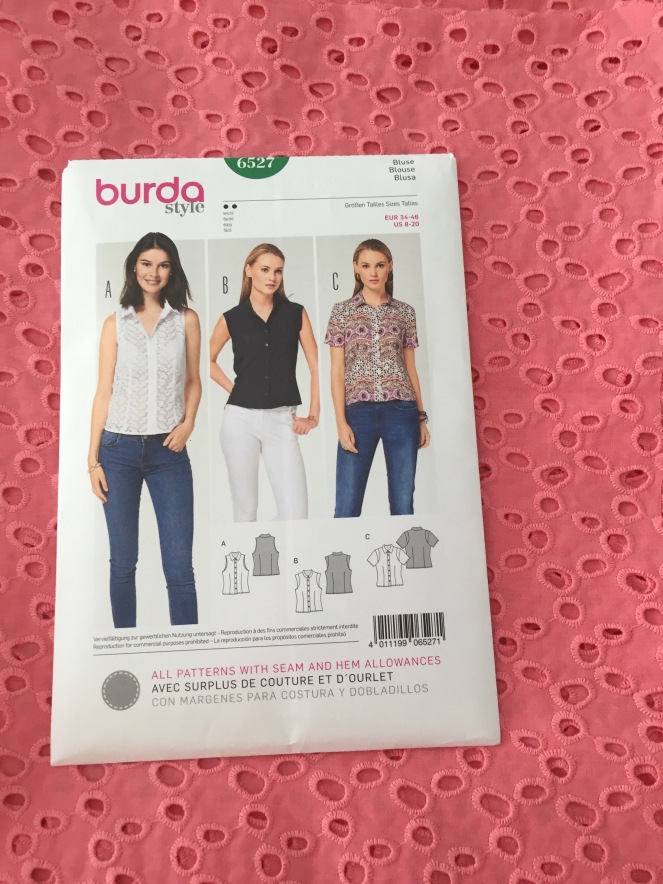
The description of Burda 6527 is, “Darts at the waist fit these airy summer blouses to your figure. Choose between a shirt collar or a stand collar, the sleeveless version or with sleeve bands and short sleeves.” I decided to make Version B, which has a stand collar and little sleeve caps.
Fabric
Cotton Eyelet from Julie’s Picks Club at Fabricmartfabrics.com.
I don’t know what possessed me to buy it. It can’t be worn without something under it, and the colour is impossible to match. It’s not fuchsia, it’s not coral, it’s not orange.
Adjustments
Last month I purchased Nancy Zieman’s “Pattern Fitting with Confidence” book. While I’m becoming more adept at doing FBAs, Nancy’s methods seem easier to calculate. The idea of not having to hack up my patterns is also appealing because as I keep telling myself, “I’m going to be a smaller size in [insert number] months.”
Using Nancy’s methods I determined that I should cut a size 16. But a 16 means that I need to add insertion pieces and that means tape, so I went with the 18 instead for this first effort. So I used the 18 measurements and compared against my measurements to come up with the adjustments to be made.
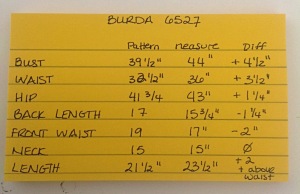 Burda Patterns provide a ton of extremely useful measurements on the pattern pieces. The Front Waist, Back Waist and Neck were all included (plus many more). Burda gets a bit star in my book for this information.
Adjustments were made in this order:
- Shortened (slide) 1 1/2″ above the waist
- Lengthened (slide) 3 1/2″ below the waist
- Increased (pivot) bust by 3 1/2″
- Increased (pivot) waist by 2 1/2″
- Increased hip (pivot) by 1 1/4″
- Moved (slide) front and back darts accordingly
I didn’t increase the bust by quite as much as the difference on my calculation card. When I looked at the ease on the pattern sheets, there was already almost 4″ of ease built in for the bust and waist.
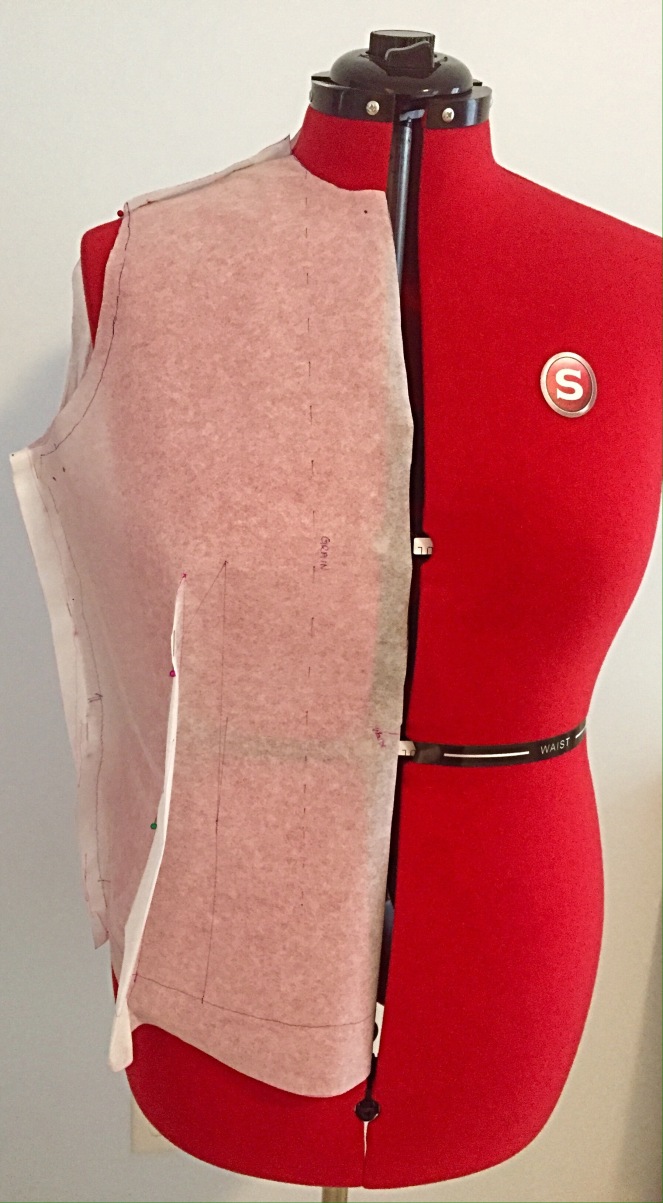
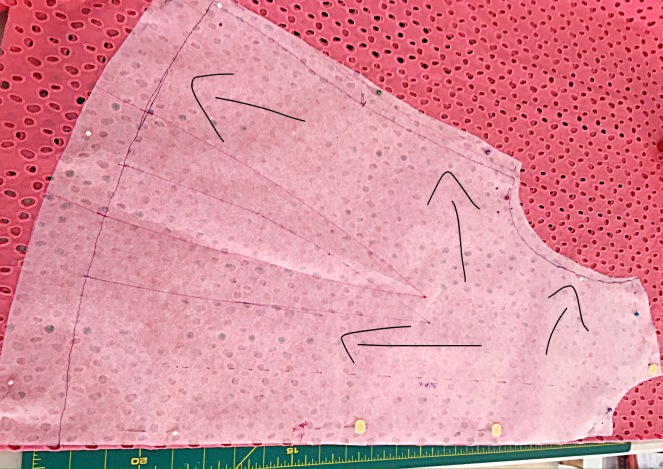
I traced the patterns and made the changes on Swedish Tracing Paper. Once I made the changes, I pinned all of the pieces together and checked the fit. This type of paper is very nice for fitting because it has some drape, and it’s durable. While doing the pattern fitting I moved the darts both front and back.
Process
 After making the changes to the pattern I cut the fabric. Because this eyelet is so
 see-through airy, I knew that I had to add interlining for the pieces that are interfaced (collar stand and front placket). There would be no way I could find a matching fabric, fortunately the selvedge of this fabric was not embroidered, and that plain section was about 2 1/2″ wide – enough to cut one collar stand and two strips for the front plackets.


Since I hadn’t made a muslin, I wanted to confirm the fit so first basted the darts, shoulders and side seams and tried on the blouse. The fit was very good, except I didn’t like the back darts because they weren’t giving enough shape, so I made that minor adjustment and set about sewing.
The pattern directions are good, but in some places they’re a bit vague. If you have experience sewing blouses with plackets and collars, you’ll be fine. I was really happy with how the front plackets and collar stand lined up, especially since it was hard to mark this fabric.
I used French seams on the sides and shoulders. The darts were trimmed and machine overcasted.
 The sleeves … they don’t make me happy. At first I topstitched the outer edge of the little wings that they call sleeves and they stuck straight up and out. They remind me of the smock I made in Grade 7 Home Ec. So I took out the top stitching and that helped some. But I’m still not entirely sold on them. This look is not good with an untoned arm. Tell me what you think! I am thinking of taking them off completely and just adding a facing. At the bottom of the sleeve there is a small bias piece used to finish the bottom of the armscye. The instructions were a bit weird, so I wound up folding the bias piece and pressing, then opening up and stitching along the fold line, in the same position as the stitching on the sleeves. Then I folded in the bias piece and finished it.


I wasn’t feeling particularly rushed with this project so hand stitched the inner edge of both front plackets and the collar. This type of work is so much easier now that I know about waxed thread.
Finding the buttons was a bit of a challenge. I wanted something monochromatic, and surprisingly found just the right set at Hobby Lobby. Honestly, I’m having really good luck with that store. I know some people don’t like shopping there because they offer their own brand of products, but on a weekday that’s my only choice.
Time Required
Close to 2 full hours on the pattern and adjustments, plus cutting the fabric
About 6 hours sewing, including the hand stitching
More time that I expected, but that’s okay. It’s not a race 🙂
The Result
I’m generally happy with the result. I will use this pattern again for a button-down blouse, but will skip the little batwings. Maybe I’ll wear it with a black tank and black pants …
Update:
The top was not going to be worn with those little batwings, so I tried a few different things and finally settled on gathering the edges a bit. I sewed a row of basting stitches, then gathered until the sleeves rounded toward the arm. Then I sewed a row of zig zag stitches over the basting. Much more wearable now!


Wow! I have a Jalie button-down pattern that frankly scares me a little. Your technique is pretty stellar!
LikeLiked by 1 person
Oh, thank you! Plackets aren’t hard, they just need loads of patience, good markings, and sewing without wine ;). You can do it! Would love to see your blouse.
LikeLike
Thanks for your post. I’m absolutely stuck on the cap sleeve and can’t work out how to put this on as instructed? I’m thinking the instructions are wrong. Help.!
LikeLike
I’m glad it has been helpful, but let’s see if we can figure out what’s going on with your sleeve. The cap doesn’t go all the way around the armscye as a regular sleeve would. Is that where the instructions aren’t working?
LikeLike
I wish I could post a picture as it would be easier to explain. At No 9 on the pattern you are instructed to machine the straighter edge of the cap sleeve and clip on the corners. At this point the fabric is right sides together and the rounded edge of the cap is not machined at all. I assume that you then apply this unmachined edge of the cap which is a difficult fit, as its a longer edge (being rounded) means it almost goes round the whole arm hole? Just doesn’t seem right?
What I’m now thinking is that the rounded edge should be machined first turned the right way and with right sides together attached to the outside of the shirt armhole? As in picture 10. This would mean that the small pieces of facing will now fit around the bottom part of the arm hole?
I would appreciate any direction on this Life of Janine! Your top looks lovely by the way, in answer to your feedback on the cap sleeve with toned arms, I think if they were bigger caps it would be a problem but these are so subtle they work!
LikeLike
Cherry, tomorrow morning when the light is better I’ll update the blog post with pictures of my finished armscye so you can see how I finished the armscye. I recall that it wasn’t as simple as the pattern instructions stated. I had to do some folding and stitching to make everything look neat.
LikeLike
Cherry, I’ve looked at the instructions again and I did NOT follow them. In step 9 where they indicate to stitch together the inside edge of the sleeve band pieces, I stitched together the OUTSIDE edge of the sleeve band pieces. Then I followed all other instructions. And yes, the small piece of facing fits right at the bottom. I wound up doing a fair bit of hand stitching to ensure that there weren’t loose threads and edges where the binding is attached.
I hope this helps! Ping me back if you need more pictures or guidance.
LikeLike
Hi Janine,I’ve finished the top and inset the cap sleeve as you did. I think the angle of the cap is not right, will live with it but in my opinion it looks more like a wing than a cap as they don’t curve around the arm hole but shoot slightly up and out. Gives a lot of emphasis to the cap. It’s a shame as the rest of the pattern works but this part is not satisfactory and I don’t have the skills to fix it. Thank you for your input, much appreciated. Cherryx
LikeLiked by 1 person
Hi Janine, Many thanks for getting back. What you’ve said is helpful – in fact last night as a test I had some spare fabric and recut two pieces and did the opposite to the instructions still unsure I watched this video on line https://www.youtube.com/watch?v=r751I1CRIeU and on here the cap is machined on the straight edge exactly as the pattern advices. But doing it this way does mean theres a lot of easing of fabric as its not a natural fit with the arm hole shape? Does it mean you can do it either way?
LikeLike