As usual, Pattern Review announced the Sewing Bee contest challenge and I was compelled to enter. This year, Round 1 was pyjamas for an adult. My husband made a couple of sad comments (😕 I need new pyjamas. Can your entry be for someone other than you? 😿) So I made PJs for him. The challenge was to make not just pyjamas but to make them unique for the wearer.
Pattern
I used a pattern I have used twice before to make him PJ bottoms – Favorite Things Pattern Designs Sleep Well (V034). When I started sewing again in 2015, I took a ‘return to sewing’ class at Discover Sewing in Atlanta and our project was these PJ bottoms so I felt very confident sewing the pants and the top looked simple.
“Bespoke” PJs
I wanted to make these something that DH will wear (no cat fabric), so that meant finding a print that would be fun and be wearable. He’s a proud alumnus of the Pennsylvania State University and I had a bunch of PSU logo’d fabric around so the decision was made. The top requires 2 1/4 yards of 45″ fabric but I had just 2 yards of the Nittany Lion fabric and nothing suitable for bottoms (2 2/3 yards of 45″). Off to Hobby Lobby for a lunchtime shop. (The Sewing Bee has a short window – just 7-days – so if you live away from a major city there likely isn’t enough time to order fabric without paying for express shipping.) I had hoped to find a nice checkerboard or plaid to match but only find stripes.
To advance to the next round of this competition you really have to make your garment stand out. You might be able to get away with a perfectly sewn garment and excellent pictures for the first round but each year there are more entrants so that means you have to do something to catch the eye of the judges, and in this case, add elements that made the PJs unique for the wearer. I had the print and striped fabric so decided to mix things up and use bits of both fabric on both the top and pants, and add piping where possible.
Construction Basics
For both pants and top, I finished all the seam allowances through the serger to keep them secure through many washings. All hems were stitched with my coverstitch.
The top pattern piece has fold over front facings. I wanted to add piping so I separated the front piece into a front and a facing. I didn’t trace, I just cut down the fold line and had to remember to add a 1/2″ seam allowance to each side. That allowed me to insert a strip of facing down the front.
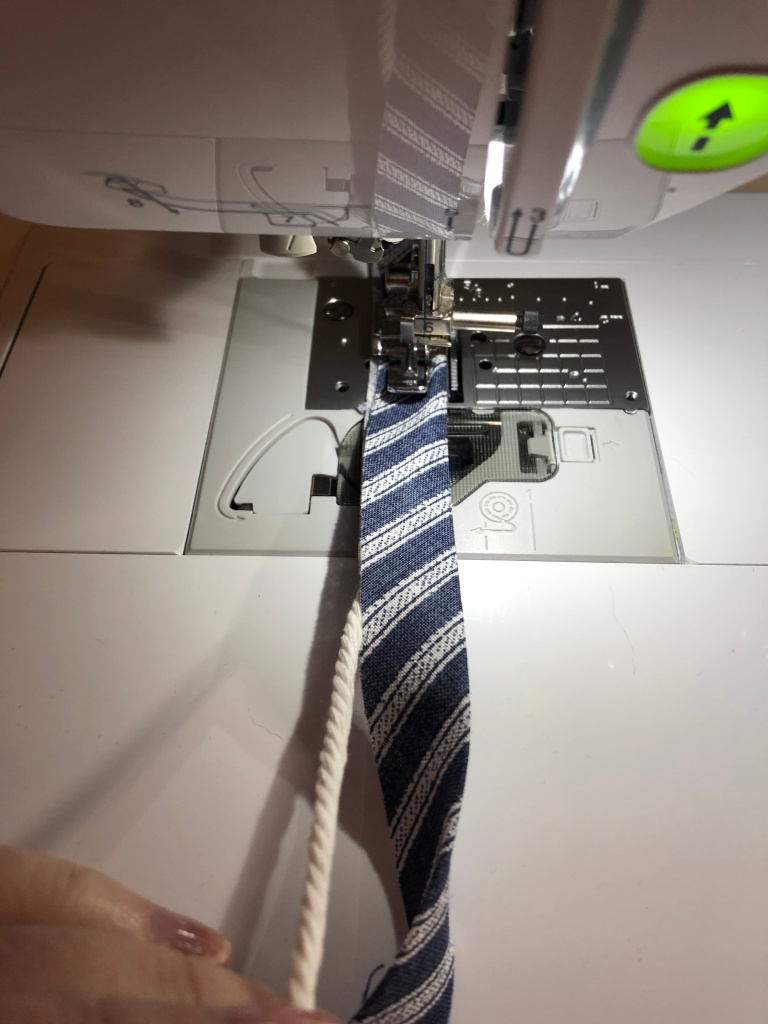
The piping was made by cutting 2 1/2″ wide bias strips of the striped fabric. I then folded the fabric over 1/8″ cording and stitched the piping closed on my regular machine with a zipper foot installed. The piping was inserted between the front and facing on the left side only. (I had to keep reminding myself that this is a man’s top so it closes bassackwards.)
Because I only had 2 yards of the PSU fabric, I was a smidge short for the sleeves. They were cut about 1″ too short and my husband declined to sign off on the capped sleeves design feature. I had plenty of striped fabric so I added 3 1/2″ of striped fabric to the bottom of the sleeve then folded it under and coverstitched along the seam line.
For the front closure, the pattern suggested either buttons or snaps. I asked DH what he would like and he chose snaps, so I stitched on big old snaps. To secure the front band so it didn’t pull, I ran a row of stitching down the front from the neckline to hem, 2 1/4″ in from the edge of the front.
Time to do the pants!
Oh, these pants are a quick make! I sewed the side, inside and crotch seams on the serger. For the waistband, DH had asked for a combination of elastic and ties so I stitched button holes in the front of the waist band to allow for ties.
For the waistband itself, I made two fabric ties from the contrast fabric, each 15″ long with one end finished. I cut an 18″ piece of elastic then stitched a fabric tie to each end of the elastic. The elastic segment of the waistband went at the back, and I ran a row of stitches in the centre back of the waistband to hold the elastic in place. The fabric ties came out through the button holes. This will allow him to either tighten or loosen the waistband as needed. It gives a lot more flexibility than just a piece of elastic.
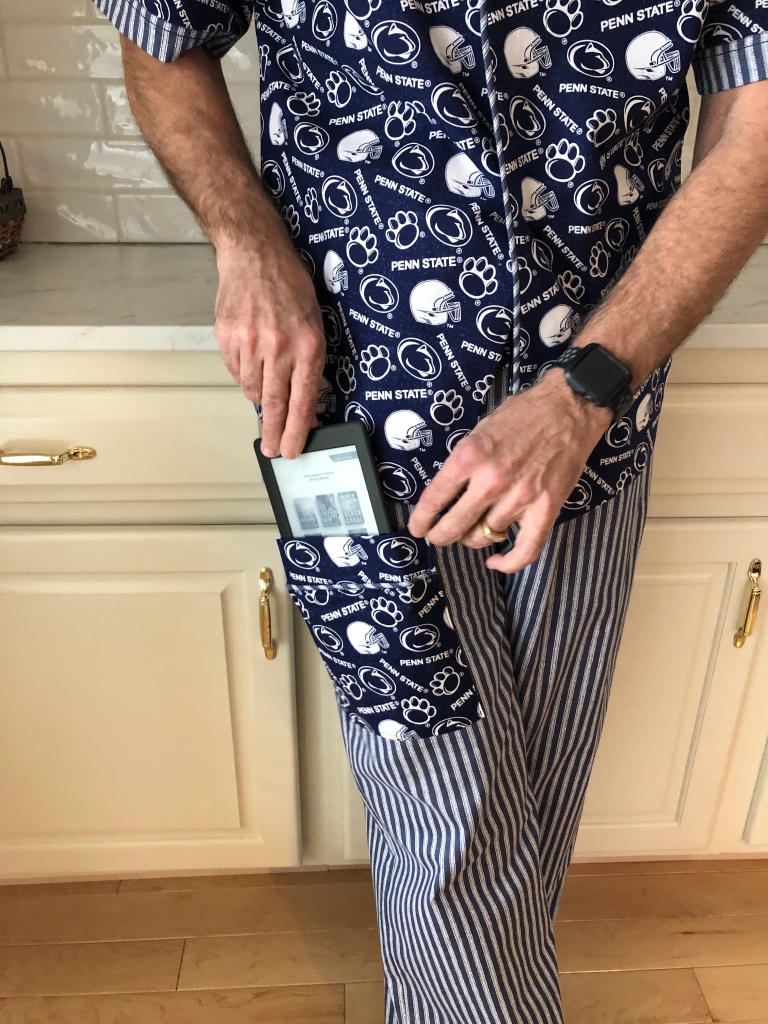
DH’s primary request was a pocket for his Kindle, on the right leg, above the knee. (Yes, he was that specific.) I used a piece of the contrast fabric and added piping then stitched it on the leg.
Once the pocket was on and hem stitched, these were done!
This was a fun and easy project to sew. I have not sewn anything for him for quite awhile and honestly, it was so easy to fit … I cut a medium and there were no adjustments. Gee, what a difference from sewing clothes for me!
He likes his PJs and is ACTUALLY WEARING THEM!


The PJs look awesome! Hope you get to advance in the sewing bee.
LikeLiked by 1 person
Thank you, Catherine! If I don’t advance it’s okay. He’s actually wearing the PJs so that’s a major accomplishment! 😁
LikeLike
What a fun challenge!
LikeLiked by 1 person
Yes, it was definitely something different!
LikeLike
Love these especially being born/raised PA folks. Great job! Penn State – we are! 😉
LikeLiked by 1 person
Maybe they will be lucky 🍀? 😂
LikeLike